This brief Windows 10 tutorial shows you how to quickly change your account name when using a Windows 10 computer.
These little Windows tasks can come in handy for new users. Those who are just starting out with Windows may find our easy to read tutorials a blessing.
Now, there are many reasons one may want to change his/her account name in Windows. Other users just want learn how to do simple stuff like that in Windows.
Whatever your reasons, we’re here to help you do simple and advanced tasks in Windows.
Few days ago, we showed you how to change your computer name. That tutorial was specifically written to help new users.
This post is also geared towards new users. Those who don’t already know how to do these things or where to look.
Before you change your account name, here are some things you may want understand first.
Changing your account name in Windows usually only change it on the welcome screen and display windows.
The original name will still be used to assign permissions, policy settings and others. Changing your name using the method below changes it on the welcome screen only so you can identify your account.
For example, when you turn on your Windows computer, it prompts you to select a account or username, then type the assigned password.
That name on the logon screen is the one you’ll be able to change permanently. The original account name will still be used used to identify your home directory and assign file permissions.
To get started, we need to open the Windows control panel.. There are multiple ways to get to the control panel.
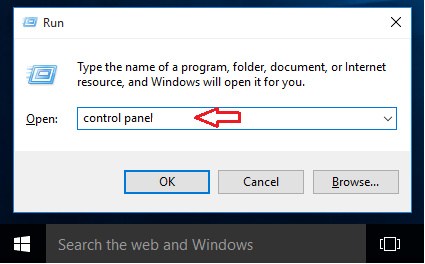
One way is to press the Windows key + R, then type control panel in the run command box and click OK.

Or you can Right-click the Start button and select Control Panel from the options listed.
In the control panel, select User Account (or Change account type)

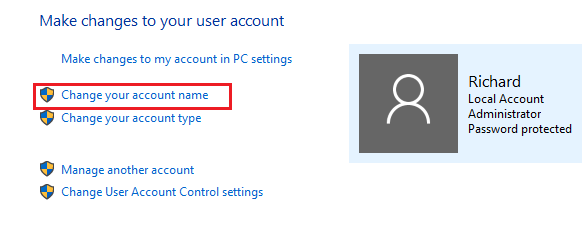
On that page, click Change your account name.

On the next page, type the name you want click the Change name button and you’re done.
That’s how you change your account name in Windows 10.
Enjoy!