This blog post is straightly for newbies and those who are just starting out with WordPress. In this brief post, I am going to show you how to migrate or switch your WordPress blog host provider.
In most cases your first host provider is not the one you build a long term relationship with. Most users registered their blogs not knowing much about the host they’re registering with.
When things begin to go downhill and their blog becomes unstable, they then start looking for better web hosts to host their content for the long haul. Below are the necessary steps to migrate to a new host.
What data to copy over to the new host?
The first thing to understand is what to copy to your new host. WordPress relies on two primary data: Web Content and Database Content.
When moving to a new host, you’ll want to copy the entire root folder which is the web content data. On most hosts online, the root folder is known as public_html or htdocs.
This folder contains posts, images, themes, plugins and others. Since most web host offer FTP access, you should use an FTP client to download the data to your local computer.
Check this post on how to use FileZilla Client to manage your blog.
Select the entire root folder and download it to your local machine. You’ll need to upload the entire folder to you new web host later.
Download WordPress Database
The next primary data you’ll want to copy over is WordPress database. WordPress will not function without it database. After downloading the entire web content, go and download its Database content.
To do that, you’ll need to access the backend of your host via Cpanel or other tools. If you’re using Cpanel, logon to it. It’s usually at
http://yourblog.com/cpanel
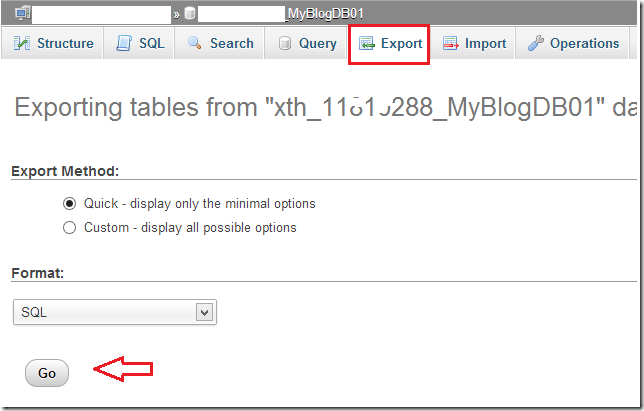
Once logged in, go to phpMyAdmin and connect to the database. Next click ‘Export’ to export the database content. Choose the Quick option and prompted.
When you click Go, it should prompt you to save the database content. save it and you’re half way through your migration.
Now that you have both your blog and database content, it’s time to upload them to your new host.
Using the same FTP client, connect to your new host via FTP and copy (or replace the root folder) with the content you downloaded earlier. Depending on the size of your content, it could take hours or more.
Once the web content is uploaded, connect to your new host via Cpanal or other tools and select phpMyAdmin. Once connected to phpMyAdmin, click Import to import the database you exported earlier.
Once your web content and database content have been uploaded, you must then connect to your domain host and switch the A record (old IP address) to point to your new IP address at the new host. If everything goes as describe above, you new site should be up and running in few hours.Hope this helps.
Enjoy!
