This blog post is part of your WordPress series which shows you how to install and manage a WordPress blog or websites.
To read previous blog posts in this series, please click here, here and here.
This short tutorial is going to show you how to quickly Google Analytics tracking code to your WordPress blogs or websites so you can track events on your sites. Using this code, you’ll be able to view how many visitors or hits you get on your sites as well as pages viewed and clicked on. It’s a great tool to install and the best thing about it is, it’s free!
So, without wasting anymore of your time, lets’ get going.
Objectives:
- Add Google Analytics Tracking Code To Your WordPress Blog
- Enjoy!
To get started, the first thing you’ll need to do is register for a free account on this site. Or visit www.google.com/analytics
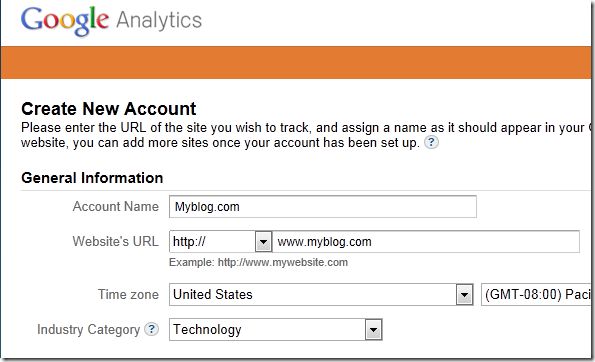
After registering and confirming your email address, you’ll be taken to Analytics to create a new profile. Fill out your site’s information and agree to the agreement.
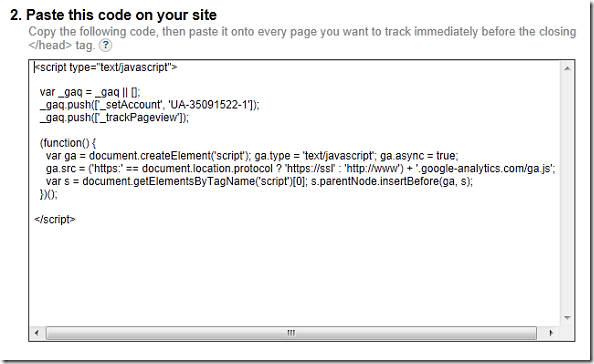
Next, you’ll be given a piece of code to add to your site. Copy the entire code in the box shown, then open your favorite file editor. If you don’t have an editor installed, please read this post to learn how to install one in Ubuntu. Using Komodo Edits as well as its build-in FTP client, you can manage your blog files easily.
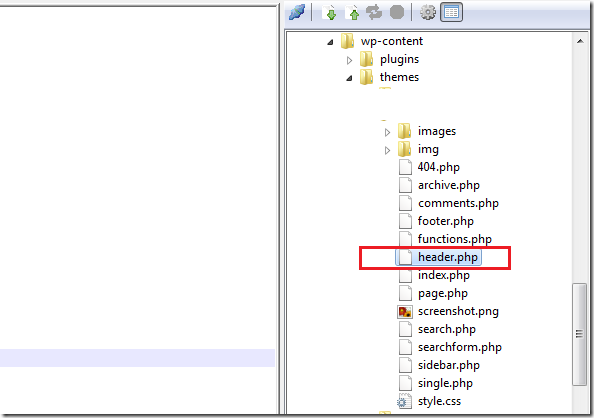
When Komodo Edit opens, launch the FTP client and browse to /var/www/myblog.com/wp-content/themes/Your_Themes/ then look for and double-click ‘header.php’ to open.
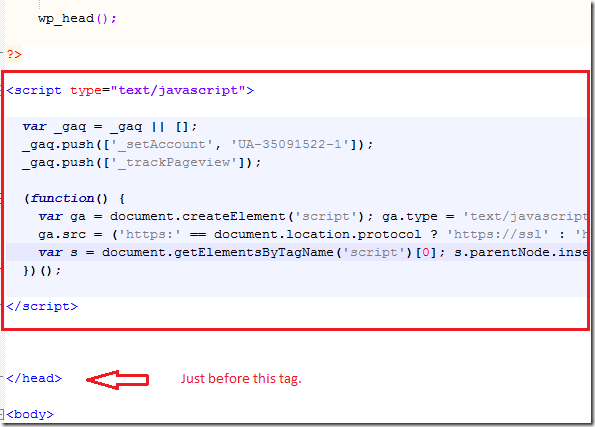
After opening header.php files, paste the code just before the </head> tag line in the file and save it.
After few hours or a day go back to Analytics and login and you’ll see some stats about your site.
Again, it’s always nice to have an file editor installed, that why I showed you how to install Komodo Edits in Ubuntu. Reference it to learn how to install it.
If you can’t edit the file because of permissions issues, change the permission on the file before editing.
Enjoy!


