This brief tutorial shows you how to run WordPress with W3 Total Cache on Nginx webserver. When you combine these three, you may be able to improve your website performance dramatically, considering your host is great.
Without a reliable and great host, you may not enjoy the benefits these three services or technologies provide. W3 Total Cache is a WordPress plugin designed to improve user experience and speed up web pages. Nginx web server is a lightweight, fast and secure web server which also can be used to speed up your websites.
To get started, go and install W3 Total Cache plugin for WordPress. To learn how to install W3 Total Cache, click this link.
Next, browse to your WordPress plugin page and active W3 Total Cache. After activating it, you can then go and begin configuring each component. For better performance, install it on a dedicated host with APC caching module installed.
W3 Total Cache also works great on shared hosting. If your environment is a shared host, then configure a settings for shared hosting environment.
- Configuring W3 Total Cache
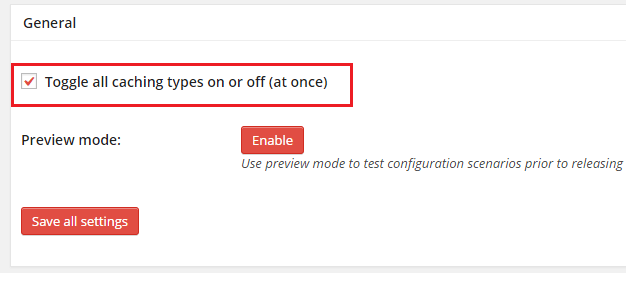
When you activate W3 Total Cache, go to your WordPress admin portal and select Performance from the left menu. Then tick the box shown below to enable all caching types at once.
This enables all the different caching types. Below are all the caching types and recommended configuration settings.
- Page Cache: Enabled
Page Cache Method:
Shared Hosts: Disk Enhanced
Dedicated Hosts: Alternative PHP Cache (APC)
- Minify: Enabled
Minify mode: Auto
Minify cache method:
Shared Hosts: Disk Enhanced
Dedicated Hosts: Alternative PHP Cache (APC)
HTML minifier: Default
JS minifier: Default
CSS minifier: Default
- Database Cache: Enabled
Database Cache Method:
Shared Hosts: Disk Enhanced
Dedicated Hosts: Alternative PHP Cache (APC)
- Object Cache: Enabled
Object Cache Method:
Shared Hosts: Disk Enhanced
Dedicated Hosts: Alternative PHP Cache (APC)
- Browser Cache: Enabled
At this point you should verify if your site layout is still intact since Minify is enabled. If your site layout is completely messed-up, then you may have to go and disable minify caching. Just go to the Minify page and uncheck the box to disable it.
The next thing you have to do is start configuring each section individually. On the left menu, there are links for each section. First click on the Page Cache to open that section. Then configure these settings.
- Page Cache: General
Cache front page
Cache feeds: site, categories, tags, comments
Cache SSL (https) requests
Cache URIs with query string variables
Cache 404 (not found) pages
Cache requests only for www.liberiangeek.net site address
Don’t cache pages for logged in users
Don’t cache pages for following user roles: Administrator
- Page Cache: Preload
Automatically prime the page cache
Update interval: 907
Pages per interval: 15
Sitemap URL: your site’s sitemap
Preload the post cache upon publish events.
Page Cache: Purge Policy
rss2 (default)
Purge Limit: 10
Late initialization: Enabled (accept the defaults settings)
- Minify: Enabled
Rewrite URL structure
Disable minify for logged in users
Minify error notification:Disabled
HTML & XML
HTML minify settings:
JS minify settings: Enabled
CSS minify settings:
@import handling: Process
- Database Cache: Enabled
Maximum lifetime of cache objects: 360
Garbage collection interval: 3600
Object Cache: Enabled
Default lifetime of cache objects: 360
Garbage collection interval: 3600
- Browser Cache: Enabled
Set cache control header
Do not process 404 errors for static objects with WordPress
CSS & JS
Expires header lifetime: 31536000
Cache Control policy: cache with max-age (“public, max-age=EXPIRES_SECONDS”)
Enable HTTP (gzip) compression
Prevent caching of objects after settings change
Disable cookies for static files
Do the same for HTML & XML / Media & Other Files under Browser Cache
For both User Agent Groups and Referrer Groups, check both boxes to enable and save your settings.
When you click save, W3 Total Cache may prompt you to add the configurations to the nginx.conf file in the root directory, then it and add the saved settings.
Now that your settings is saved and the nginx.conf file in the root directory and edited, go and apply these settings to Nginx. To do that, open your nginx’s default site configuration file usually in /etc/nginx/conf.d/default
The add the line below into the server block and save it.
include /var/www/html/nginx.conf;
To protect the nginx.conf file, add these lines in the server block as well.
location = /nginx.conf { deny all; }
Save your settings and you’re done.
Enjoy!

