This brief tutorial shows you how to install OsCommerce on Ubuntu 14.10 servers. OsCommerce is a great PHP application for anyone who wants to host and manage an online store. It’s free and is opensource, which means you can use it, modify it and make profit from it but whatever you do with it, you must also use the same licensing terms as the license of the original software.
OsCommerce comes with great sets of tools which can be used to manage a complete web store online. Instead of installing paid commercial software to manage your online store, OsCommerce can be used to cut down your store cost.. which can be very expensive with commercial software.
For more advanced support, you may have to pay small fees, although you could also learn everything there is to manage your store for free.
With many other PHP based application, OsCommerce depends on the LAMP stack. The LAMP stack is just a short reference for Linux, Apache2, MySQL and PHP. Before you can install OsCommerce, you must first install the LAMP stack on Ubuntu. We’ll show you how to do that as well.
When you’re ready to install OsCommerce, continue below to get started.
- Installing the LAMP stack on Ubuntu
The first thing is getting the LAMP stack installed. To do that, follow the guide here or click on the link below to learn how to install the LAMP stack on Ubuntu. We’ve written an easy guide for you.
https://www.liberiangeek.net/2014/10/install-apache2-php-mysql-support-lamp-ubuntu-14-10/
- Configuring OsCommerce Database and User
OsCommerce depends on databases to host its content. Images, text, links references are stored in database. Since MySQL database is already installed, let’s go and configure a database for OsCommerce to use.
Run the commands below to logon to the database as administrator
mysql -u root -p
Next, run the commands below to create a database named oscommerce.
CREATE DATABASE oscommerce;
Then run the commands below to create a new database user called oscommerceuser for OsCommerce to use as well as it password. This user account will be used to connect to OsCommerce databases.
CREATE USER oscommerceuser@localhost IDENTIFIED BY 'type_password_here';
Finally, run the commands below to grant the user all access to the new OsCommerce database.
GRANT ALL PRIVILEGES ON oscommerce.* TO oscommerceuser@localhost;
Flush and exit, and you’re done.
FLUSH PRIVILEGES;
- Downloading OsCommerce
Next, run the commands below to download the latest version of OsCommerce as of this date.
cd /tmp/ && wget http://www.oscommerce.com/files/oscommerce-2.3.4.zip
Then run the commands below to extract the download content.
unzip oscommerce*.zip
Next, run the commands below to copy OsCommerce content to the default root directory for Apache2. You can choose to customize Apache2 root directory, but for this post, we’re going to use the default location which is at /var/www/html
sudo cp -rf oscommerce*/* /var/www/html/
Before you can begin configuring OsCommerce, you must change the permissions on two files. Below are the commands used to do that.
 sudo chmod 777 /var/www/html/catalog/includes/configure.php

sudo chmod 777 /var/www/html/catalog/admin/includes/configure.php
Next, give Apache2 ownership of the root directory.
sudo chown www-data:www-data -R /var/www/html/
After that, run the commands below to restart Apache2
sudo service apache2 start
After restarting Apache2, open your favorite web browser and browse to the server via its hostname or IP address followed by /catalog (ex. mydomain.com/catalog)
You’ll then see OsCommerce setup wizard.. If you don’t see it, go back to check all the steps above.
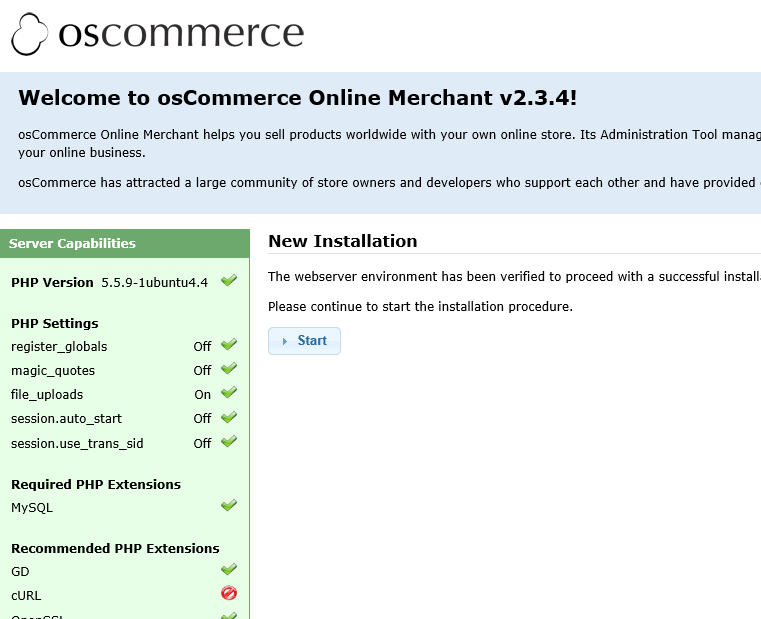
Continue with the setup to the database connection page

When you’re done, you should be able to

Finish the installation and enjoy your store.
After installing, remove the installation directory to protect your site. To do that run the commands below.
sudo rm -rf /var/www/html/caatalog/install
Change the permissions on these files are well.
 sudo chmod 644 /var/www/html/catalog/includes/configure.php

sudo chmod 644 /var/www/html/catalog/admin/includes/configure.php