Migrating your WordPress blog to HTTPS is simple. Since Google started rewarding HTTPS pages with higher ranking, many webmasters are beginning to migrate their blogs to all HTTPS traffic.
To enable HTTPS or HTTP over SSL for your blog, there are few things to understand.
First, you must register for a SSL certificate from a Certificate Authority. There are many classes of certificates available to you. For most bloggers who are just running a simple website online, the single domain (Domain Validation) certificate should work just fine.
For more about classes of SSL certificates available, please go to this page.
Now that you know a thing or two about SSL certificates, lets go and see how to install a SSL certificate on your Nginx web server on Ubuntu 14.04.
What we’re going to be installing is a self-signed SSL certificate. The only difference between the self-signed certificate and the publicly trusted SSL certificate is that the self-signed certificate isn’t trusted by a Certificate Authority also known as CA.
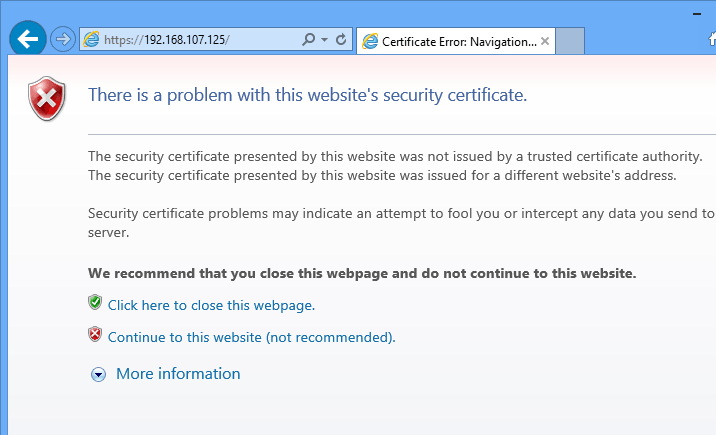
They both use the same algorithm and encryption, but because there’s no CA to vouch for the self-signed certificate, clients computer who view the self-signed certificate usually alert about the certificate being used… that’s it’s not trusted because it’s not signed by a CA.
When you’re ready to install a SSL certificate on Nginx on Ubuntu 14.04, continue below to learn how.
- Generating The Server Certificate Key
Before anything else, let’s generate our server encryption key. The way SSL encryption creation process work is a server encryption key is generated.. Then a certificate signing request or CSR file is generated with information about the server certificate and sent to a Certificate Authority.
The CA then generate and encrypt the request with its globally trusted to key to complete the process. The newly created certificate can then be used and installed on the web servers to encrypt web traffic.
So, create a folder to store the certificate in.
sudo mkdir -p /etc/nginx/ssl
Then change into that folder and and generate the server private key
cd /etc/nginx/ssl
Generate the key
sudo openssl genrsa -des3 -out server.key 2048
- Generating a Certificate Signing Request
Now the server key is generated. The next step is to generate a certificate signing request (CSR) from the server private key. Run the commands below to generate a CSR of the server private key.
sudo openssl req -new -key server.key -out server.csr
When you run the command above, you’ll be prompted to confirm some information about the resource you’re protecting. The CA will then have to verify the information and issue a certificate.
Follow the sample guide below.
- Common Name: The fully-qualified domain name, or URL, you’re securing.
If you are requesting a Wildcard certificate, add an asterisk (*) to the left of the common name where you want the wildcard, for example *.coolexample.com. - Organization: The legally-registered name for your business. If you are enrolling as an individual, enter the certificate requestor’s name.
- Organization Unit: If applicable, enter the DBA (doing business as) name. If you’re securing a single blog, then type the blog owner’s name here.
- City or Locality: Name of the city where your organization is registered/located.
- State or Province: Name of the state or province where your organization is located.
- Country: The two-letter International Organization for Standardization (ISO) format country code for where your organization is legally registered.
Now you should the server key as well as the CRS file.
- Generating a SSL Certificate from the CSR file.
Now that the CSR file is generated, in a real world you would send it to a CA to generate a SSL certificate. The CA will verify the information provided in the CSR file and issue you a certificate.
Since we’re not seeking CA approval, we’ll sign it ourselves. This is what’s known as self-signed certificate.
To sign the certificate, run the commands below.
sudo openssl x509 -req -days 365 -in server.csr -signkey server.key -out server.crt
The commands above signs the server private key and generate a certificate that will be valid for 365 days. You can then install the certificate on your web server.
After you installed the certificate file, every time you restart the web server, you’ll be prompted to enter the password you entered earlier for the certificate.
This can be annoying. To remove the password prompts, do this. Before generating the server SSL certificate above, run the commands below first before generating the certificate.
sudo cp server.key server.key.orig

sudo openssl rsa -in server.key.orig -out server.key
- Applying the Certificate on Nginx
Now go to your Nginx configuration file and apply the certificate. Remember the certificate files are stored in /etc/nginx/ssl/
sudo vi /etc/nginx/sites-available/default
[....]

server {

listen 443 default_server;

root /usr/share/nginx/html;

index index.html index.htm;

# Make site accessible from http://localhost/

server_name 192.168.107.125;

ssl on;

ssl_certificate /etc/nginx/ssl/server.crt;

ssl_certificate_key /etc/nginx/ssl/server.key;

ssl_protocols SSLv3 TLSv1 TLSv1.1 TLSv1.2;

ssl_ciphers "HIGH:!aNULL:!MD5 or HIGH:!aNULL:!MD5:!3DES";

ssl_prefer_server_ciphers on;

location / {

# First attempt to serve request as file, then

# as directory, then fall back to displaying a 404.

try_files $uri $uri/ =404;

# Uncomment to enable naxsi on this location

# include /etc/nginx/naxsi.rules

}

[....]
Restart Nginx web server and test. You should see the SSL certificate warning page. Continue to get to Nginx default page.
Enjoy!
