Since Google announced that HTTPS pages would get a small boost on its search engine result pages, webmasters around the net are beginning to install and understand HTTPS or HTTP or SSL..
For those who don’t know, it’s just a way to encrypt information between the client computer and the server the client is communicating with using encryption certificate. When it comes to SSL, a trusted Certificate Authority or CA verifies and trust the server’s certificate. The client computer would then trust the server’s certificate because a trusted CA has verified the server details.
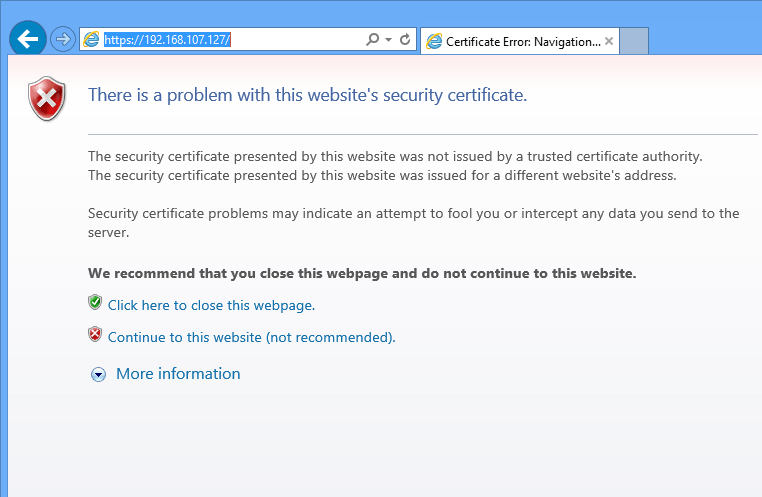
This his how trust are established online. When you create a self-signed certificate on your web servers, the client computer will not be able to trust the certificate because no trusted CA has vouched for it. This is why you see the red page alerting that the certificate the server using isn’t trusted and that you shouldn’t continue to the page.
You can override the alert and continue, but do this only if you know that the server is using a self-signed certificate and there no danger on the page.
Now that you know the difference between self-signed and publicly trusted certificates, this brief tutorial is going to show you how to install a self-signed SSL certificate for Apache2 on CentOS 7.
Remember, self-signed certificates are only good for testing and shouldn’t be used online where users would need to verify trust. Only use self-signed certificates in test environments.
When you’re ready to install SSL for Apache2 on CentOS 7, continue below to learn how to.
This tutorial assumed that you already have Apache2 installed on CentOS 7. If not run the commands below to install it.
sudo yum install httpd
After installing Apache2, run the commands below to install the SSL module for Apache2. This is the module Apache2 uses to communicate over SSL.
sudo yum install mod_ssl
Next, run the commands below to restart Apache2
sudo systemctl restart httpd.service
Next, run the commands below to create a SSL key directory. This is where you’ll store the server generated SSL keys.
sudo mkdir /etc/httpd/ssl
Change into the new directory and begin creating the key.
cd /etc/httpd/ssl
Then run the commands below to generate a SSL certificate for the server. You’ll be prompted to enter a passphrase, type and confirm it to continue. You’ll go further if you don’t enter a passphrase.
sudo openssl genrsa -des3 -out server.key 2048
Next, run the commands below to create a certificate signing request or CSR key.
sudo openssl req -new -key server.key -out server.csr
When you run the above commands, you’ll be prompted to enter some basic information about the resources you’re trying to protect as well as the owner of the resources.
Follow the sample guide below.
- Common Name: The fully-qualified domain name, or URL, you’re securing.
If you are requesting a Wildcard certificate, add an asterisk (*) to the left of the common name where you want the wildcard, for example *.coolexample.com. - Organization: The legally-registered name for your business. If you are enrolling as an individual, enter the certificate requestor’s name.
- Organization Unit: If applicable, enter the DBA (doing business as) name. If you’re securing a single blog, then type the blog owner’s name here.
- City or Locality: Name of the city where your organization is registered/located.
- State or Province: Name of the state or province where your organization is located.
- Country: The two-letter International Organization for Standardization (ISO) format country code for where your organization is legally registered.
After that, run the commands below to remove the certificate passphrase so you don’t get prompted each time you restart Apache2.
sudo cp server.key server.key.orig

sudo openssl rsa -in server.key.orig -out server.key
Finally, run the commands below to generate the final server certificate that will be valid for 365 days. This certificate sign request is used to sign the server’s key.
sudo openssl x509 -req -days 365 -in server.csr -signkey server.key -out server.crt
The certificate is ready to be used.
Now go and open the SSL file and make the following changes
vi /etc/httpd/conf.d/ssl.conf
Then in the <VirtualHost _default_:443> block, make the below changes. For the server name, change it to the server IP or hostname. Then point the correct SSL .crt and .key for the server for SSLCetificateFile and SSLCeritificateKeyFile and save the file.
[....]

<VirtualHost _default_:443>

ServerName 192.168.107.127:443

SSLEngine on

SSLCertificateFile /etc/httpd/ssl/server.crt

SSLCertificateKeyFile /etc/httpd/ssl/server.key

[....]
Restart Apache2 and try accessing the server using HTTPS.
Remember to open the firewall to HTTPS traffic. To do that, run the commands below.
sudo firewall-cmd --permanent --zone=public --add-service=https

sudo firewall-cmd --reload
Enjoy!
