Few days ago I showed you how we installed Memcached in CentOS7 to help improve our website performance. We have consistently been trying to find ways to speed up our site load time by implementing various techniques like caching, and only installing necessary WordPress plugins.
Our most recent move was switching from WordPress Super Cache plugin to WP-FFPC which is a great plugin to help speed up any WordPress site. Since WordPress Super Cache didn’t have official support for Nginx web server, it was just a matter of time before we switch. We wanted a caching plugin that fully support Nginx and none does that better than WP-FFPC.
WP-FFPC works with any web server. When combined with Nginx and Memcached, you can dramatically speed up your WordPress blogs and that’s what we’ve implemented.
Our blog loading time has decreased by 2 seconds. We were averaging about 5 seconds on most of our pages, now most of our pages load under 3 seconds. That’s impressive.
If you have a WordPress blog and want to implement the same setup on Ubuntu server, you’ll want to first install Memcached. This blog post is going to show you how to install Memcached in Ubuntu 14.04 LTS.
Memcached is a high-performance distributed memory object caching that caches objects for faster website performance. Instead of disk caching, Memcached stores objects in memory which is faster thank disk.
To install Memcached in Ubuntu, continue with the steps below.
sudo apt-get install php5 php5-dev php5-memcached
Next, run the commands below to install Memcached
sudo apt-get install memcached
That’s it! In Ubuntu 14.04, memcache and memcached are both installed when you run the commands above. These are two separate memcache modules. One is Memcached and the other is Memcache.
Memcached is widely use and seems more stable so you should be using the one with the d at the end.
The commands above will also install Apache2, the most popular web server online today. To start Memcached, run the commands below.
sudo service memcached start
To verify if Memcached is install and functioning, run the commands below to view its stats.
echo "stats settings" | nc localhost 11211
Live run-time stats can be viewed by running the commands below.
watch "echo stats | nc 127.0.0.1 11211"
This is how you install Memcached and its PHP extensions in Ubuntu.
To verify memcached installation via PHP, create a PHP test page with the code below.
sudo vi /var/www/html/info.php
Then type the code below in it and save.
<?php

phpinfo();

?>
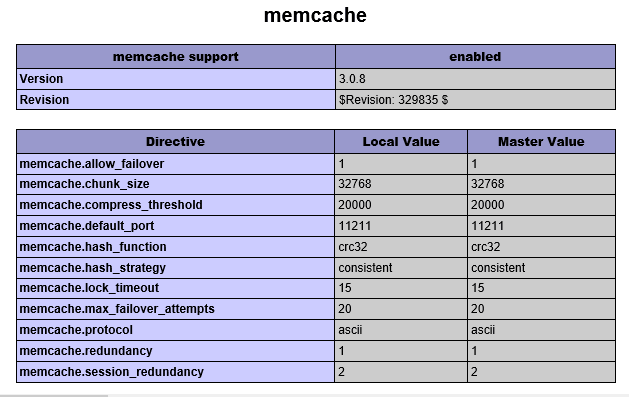
Open your browser and browse to that page and you should see something like the image below.
Memcached default configuration file in Ubuntu 14.04 is at /usr/share/memcached/memcached.conf.default
If you wish to make changes to Memcached configuration, do it in this file. You can increase/decrease the memory, connection port, log file location many more settings in this file to control how Memcached operates.
Enjoy!