Most desktop computers come with optical drives. These drives are used to run programs compiled on a CD or DVD disc, watch movies from a DVD disc and other useful means.
On the other hand, most laptops, especially netbooks and those thin laptops don’t come with optical drives. You can’t insert a CD or DVD and run programs from them.
So, if you have CD/DVD content, and you want to access it on your laptops without CD or DVD drive, then you may want try this. This method allows you to use desktop computer’s optical drive to access content on a CD/DVD disc.
This tutorial assumes that you have both a laptop and a desktop in your home and they are connected in some ways to your WiFi or a Internet modem. If this is the case, then follow the steps below.
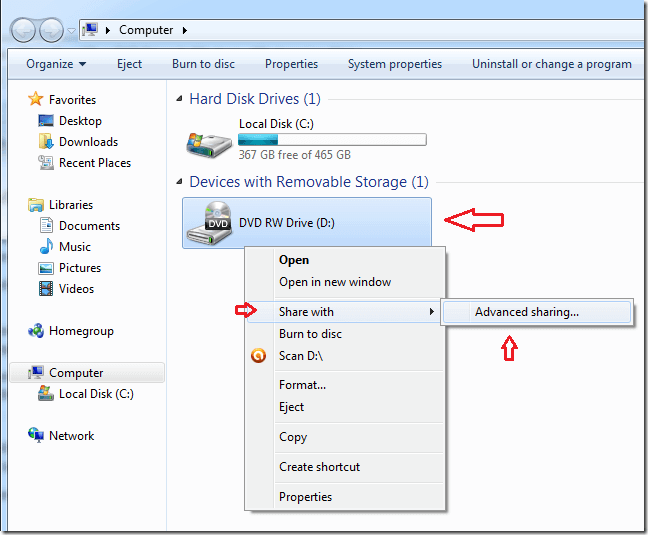
Insert your CD/DVD disc into your desktop’s optical drive. Then open Windows Explorer or File Explorer in Windows 8 and 8.1. Next, select the Computer container on the left to show your mounted drives.
Then right-click on the optical drive and select Share with –> Advanced sharing.
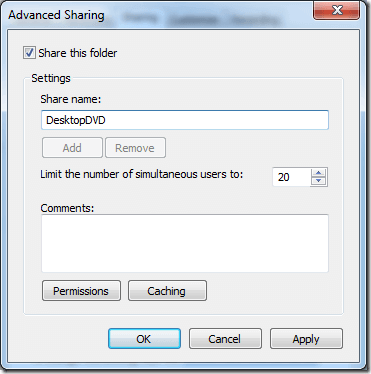
Next, click ‘Advanced sharing’ button and check the box to share this folder. Then provide a share name for the drive. You’ll use this shared name to access the content of the optical drive.
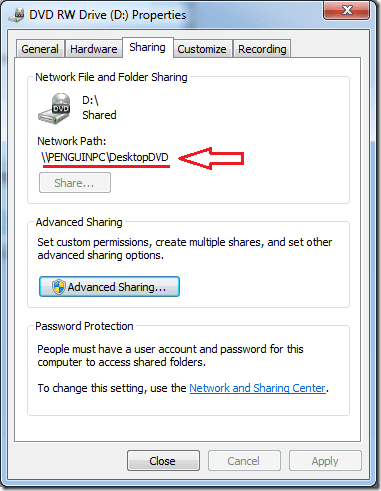
After click Ok or Apply, you’ll then see the path (location) to the shared drive. Take notes of it because this is how your will access the drive’s content from your laptop.
From any computer, type in the path from File Explorer or Windows Explorer and you’ll access the content provided file sharing is enabled on the Windows computer.
If file sharing isn’t enabled, read the post below to enable it and then try again.
That’s it! Enjoy!


