With Windows 8, you can share files and documents with users on your local computer and local network. Local users can sign using their local accounts and access the shared resources. Local network users must connect to your computer over the network to access those same shared resources.
This brief tutorial is going to show you how to share files and documents in Windows 8 and access them from Ubuntu 13.04 Raring Ringtail over the local network. By default, file and printer sharing are disabled on Windows 8 computers. You must turn it on before remote systems will be able to access shared resources
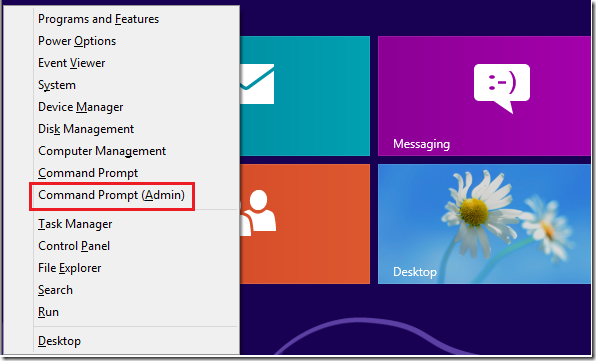
To enable File and Printer sharing on Windows 8 computers, press the Windows Key + X keys to show Windows 8 Tools Menu. When it opens, select Command Prompt (Admin).
Next, run the commands below to enable File and Printer sharing on Windows 8 machines.
netsh advfirewall firewall set rule group="File and Printer Sharing" new enable=Yes

Now that File sharing is enabled, let’s find out what workgroup the Windows 8 machine belongs to? If you want to make file sharing easy between Windows and Ubuntu machines, you must add them both to the same workgroup.
To find out what workgroup your Windows machine belongs, run the commands below
net config workstation


After running the above commands, you should see the workstation domain or workgroup your computer belongs.
Filesharing is now enabled on your Windows machine and you also know what workgroup it belongs. Next, let’s logon to our Ubuntu 13.04 machine run press Ctrl – Alt –T on the keyboard to open the terminal or console. When it opens, run the commands below to install Samba.
Samba is the software tool that allows Windows and Linux / Ubuntu machines to enable filesharing.
sudo apt-get install system-config-samba


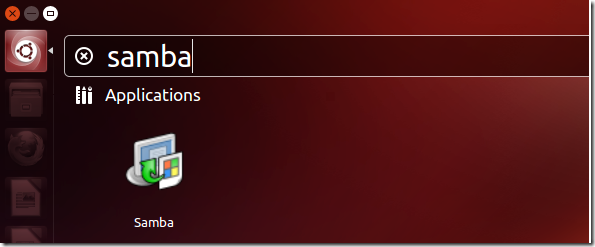
After installing it, open Samba from Dash


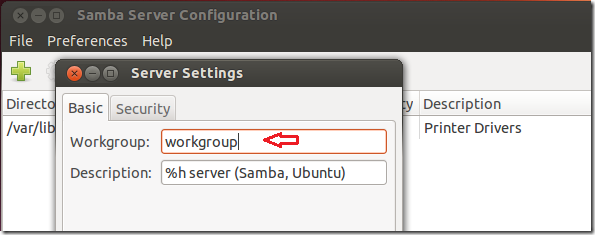
When it opens, select ‘Preferences –> Server Settings’ then add the workgroup that your Windows machine belongs to and click OK.


After that, go back to the terminal and run the commands below to add your account to Samba database.
sudo smbpasswd -a username


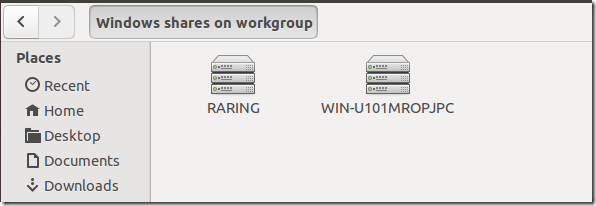
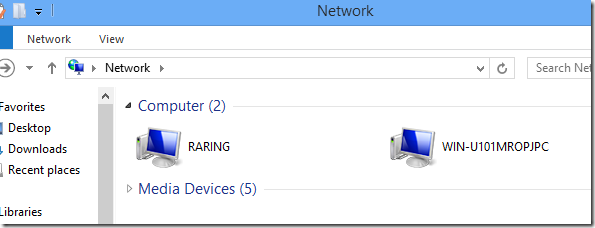
That’s it! You should now be able to see both the Windows and Ubuntu machine from your Ubuntu machine.


Then same from your Windows machine.


Although file sharing is enabled, to view files and documents from either machines, you must share them. Our next tutorial will show you how to share files and documents from Ubuntu or Windows 8 machine.

Enjoy!
