Few days ago we started this series about online blogging and this is the second of many to come. The reason we’re writing this is because we’ve received many requests from our readers asking us to write simple-to-understand tutorials about blogging online and how to setup a personal website or blog.
To read our previous article on setting up your personal blog online, read this post.
In our previous post, we told you to go and register a domain name for your blog. We recommended domain.com as a good domain registrar that will help you register your domain. If you already have a registered domain name, then more power unto you. With that, it’s now time to register for a webhost.
Web hosts are companies that host your content (text, images, videos, etc.) online. Your users use your domain name to get to your content and webhosts store that content for you. Most companies, including domain.com offer domain registration as well as hosting. So you could just register a domain name and webserver from the same company.
At this point, if you’ve already registered for domain and hosting, then you’re ready. If not, you should go and register for both services before continuing below. For those are ready, let’s get going.
Accessing Your Web Host Account And Installing WordPress
For the record, we’re going to be using WordPress as our content management system (CMS). Why? Because WordPress is the most popular CMS out there and has lots of support behind it. Now that you have access to your webhost account, it’s not time to logon and install WordPress.
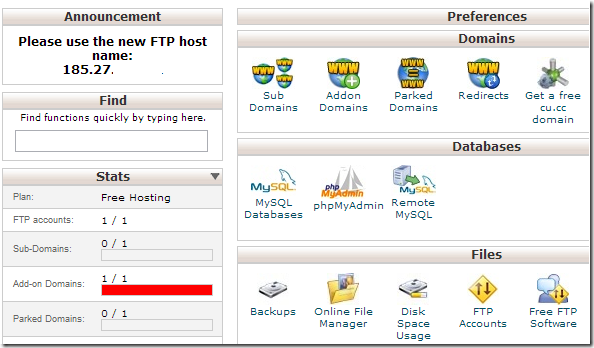
To to that, sign in to your account. If you sign in successfully, you’ll see something like what’s in the image below or similar. It’s your web host panel. It helps you manage your host account from the backend. From here you can create websites, databases, backup and restore content and many more.
If what you have is different from the image above, don’t worry they all are similar in function. From here you should be able to create / manage databases, create / manage web content and more. Most often, you’ll want to use remote tools like FTP client to upload content, phpMyAdmin to manage databases and others.
Creating WordPress Database & User, Uploading WordPress Content To the Site
Now that you’re signed in, it now time to create WordPress database. There maybe a tool in the control panel that helps you install WordPress, configure the database automatically. But I want to show you how they all are created so you understand how they all come to be.
First let’s create our WordPress database. To do that, click on MySQL Databases. Then type a database name and click Create.
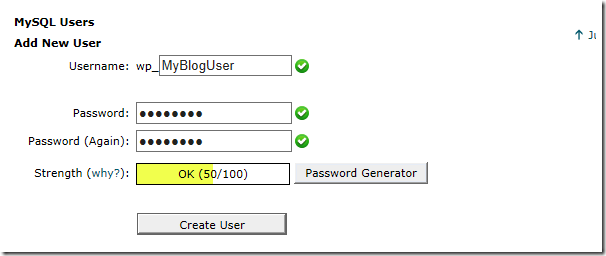
Next, create MySQL database user and password at the bottom of the page.
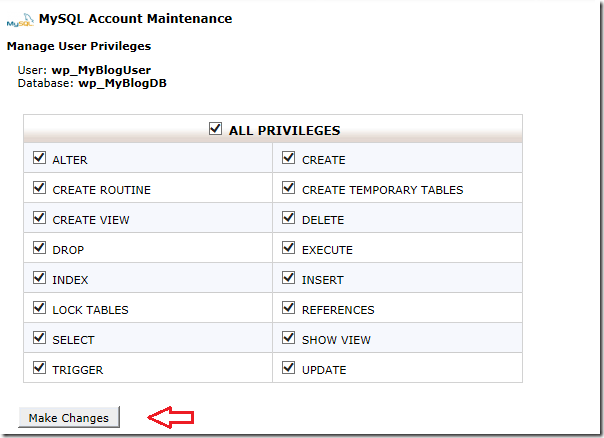
Finally, add the user to the database you just created.
And grant all permissions. Yours may look different than the image below, but give all the permissions displayed to you.
At this point, you should now have a new WordPress database and database user created for the site.
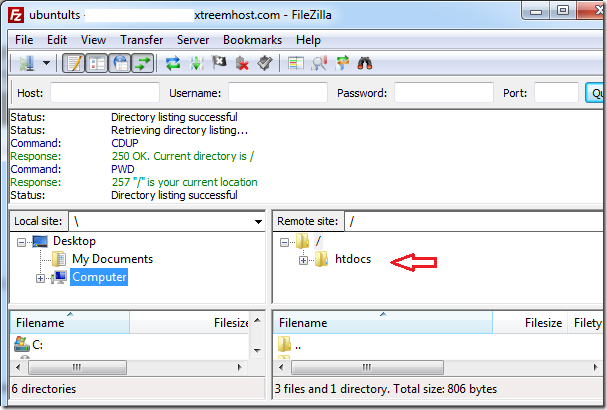
Next, go back to Cpanel home page and look for FTP Account on the homepage, then create an FTP account. If one is already created, take notes of the username, password and host IP or domain name. When you have that information, go and download a FTP client like FileZilla . Then with your FTP information, connect to your host.
You should see something like the folder below or similar. It may sometime be called public_html. This is where WordPress content should be added.
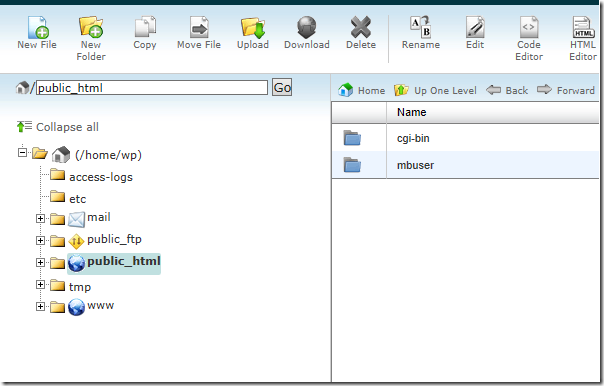
You can also access this folder from Cpanel’s File Manage. When viewing the root folder from File Manager online, it will look the image below.
Put all your WordPress content in this folder using FTP client.
Next time, I’ll show you how to download WordPress file and upload it to your webserver. Then show you how to configure WordPress to connect to the database you created earlier.
Enjoy!
