Want to synchronize the correct time and timezone in CentOS and Ubuntu servers using NTP? This brief tutorial is going to show you how. When you’re running a server, you’ll want to make sure it’s setup with the correct date and time as well as the proper timezone information. That’s because you may be running critical applications that depend on the server’s internal clock for date and time information.
For example, if your server’s internal clock is not synchronized with online NTP servers and the date and time on the server is way off, that can impact some of your applications, including apache with caching enabled. Web clients may not cache your content correctly because of the time deference between the clients and the web server.
To make sure that your server’s internal clock is accurate, follow these steps below.
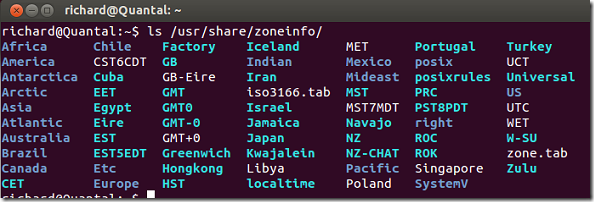
First, let view all the timezones your system has by running the commands below. Remember to run these commands as root. In Ubuntu always precede the commands with sudo.
ls /usr/share/zoneinfo/


Take notes of the available timezones on your system. Next, you’ll want to replace the current timezone file in /etc/ directory with the correct one. To do that, remove the current timezone file by running the commands below.
mv /etc/localtime /etc/localtime.bak


Next, run the commans below to link the local timezone file with the correct one in the /usr/share/zoneinfo directory.
ln -s /usr/share/zoneinfo/CST6CDT /etc/localtime


Next, install these packages if you haven’t already done so in Ubuntu or CentOS.
sudo apt-get install ntp ntpdate

Here’s the same commands in CentOS.
yum install ntp ntpdate

Once ntp is installed, run the commands below to synchronize your server’s internal clock. There are multiple ntp servers to choose from so if the one below isn’t what you want, then choose a different server.
ntpdate 0.us.pool.ntp.org

Finally, run the commands below to apply the changes to the hardware so it sticks after reboot.
hwclock --systohc

Enjoy!


