Now that you’ve learned how to install and setup WordPress in Ubuntu 12.04, it’s now time to begin publishing your blog posts. Our WordPress series started with setting up WordPress and configuring permalinks.
To read our previous posts in this series, click here and here.
This brief tutorial is going to show you how to publish your first blog post using WordPress. Publishing in WordPress can be done using WordPress’ built-in editor or other desktop client software. One popular publishing client is Microsoft Live Write. There are many, but MS Live Writer is the most popular.
Today’s tutorial will not include MS Live Writer, that will be done next time. This post will focus on using WordPress’ built-in editor as well as desktop clients that work in Linux, including Ubuntu.
Publishing from WordPress’ Built-in Editor
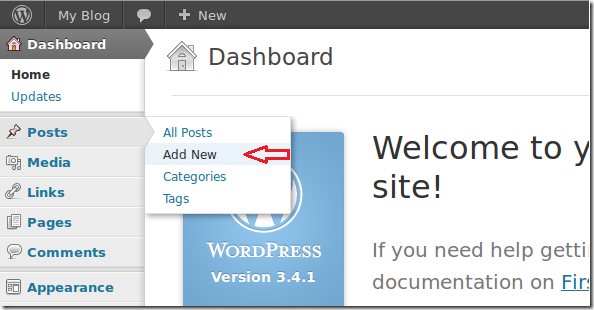
To publish posts from WordPress’ built-in editor, login to WordPress and go to Posts –> Add New.
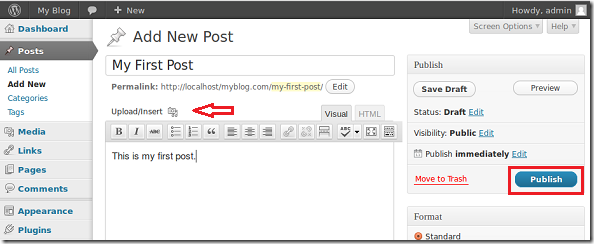
When the editor opens, use it to write up your first post and click publish to show it to the world.
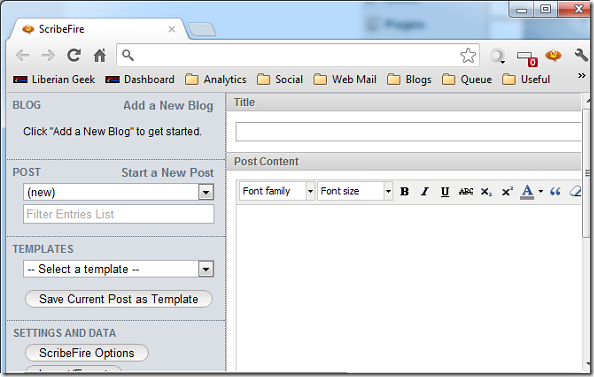
Or if you want to use external clients, try this web browser plugin call ScribeFire. It supports Firefox, Chrome and Internet Explorer and Opera. Install it in your favorite web browser and use it to publish your posts.
Enjoy!


