In today’s fast-paced world, time is key and when it comes to sharing files over the internet, you can get irritated because you have to wait. But what if I tell you that you can reduce the size of your files without compromising their integrity? Yes! You can do it using the “Zipping” method.
The “Zipping” method refers to creating the compressed files in the “.zip” format. In Windows, you can utilize multiple methods to create a “.zip” file with reduced size to save disk space and bandwidth while sharing.
Today’s guide explores the methods to “Zip” or “Unzip” files using the Windows Command Line.
Content Overview
By following this guide, you will learn:
Let’s dive into the details of the above.
Zip and Unzip Files Via the Command Prompt
For zipping and unzipping files via the Command Prompt, follow these approaches:
- The “tar” Command
- The “7zip” Utility
Zip and Unzip Files Using the “tar” Command on Windows
The “tar” is originally a *nix command-line utility, but now in the latest versions of Windows, it is officially supported. The use of the “tar” command to zip or unzip files in Windows Command Line is as follows:
Zip Files Using the “tar” Command as follows:
tar -c -f ZipFileName.zip File-To-ZipHere,
- The “tar” invokes the “tar” command.
- The “-c” flag stands for “Create” which means creating the archive.
- The “-f” flag specifies the name of the output archive.
Below is the execution of the command, but first you must navigate to the specified directory and list files using the following commands:
cd <Path to the Specified Directory>
dir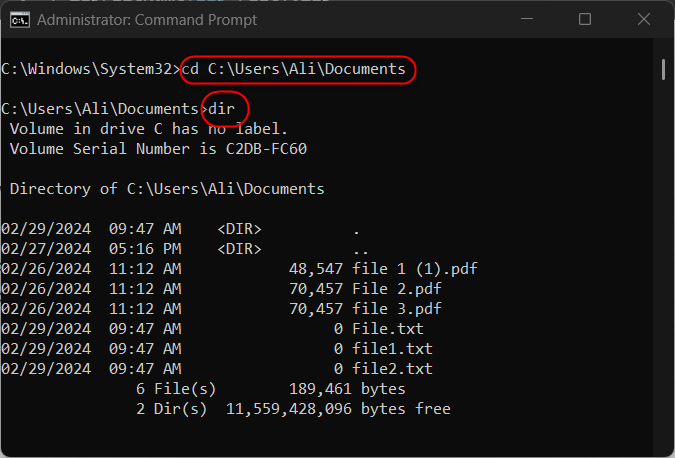
Now use the following command to create a “.zip” file for the “file.txt”:
tar -c -f files.zip file.txt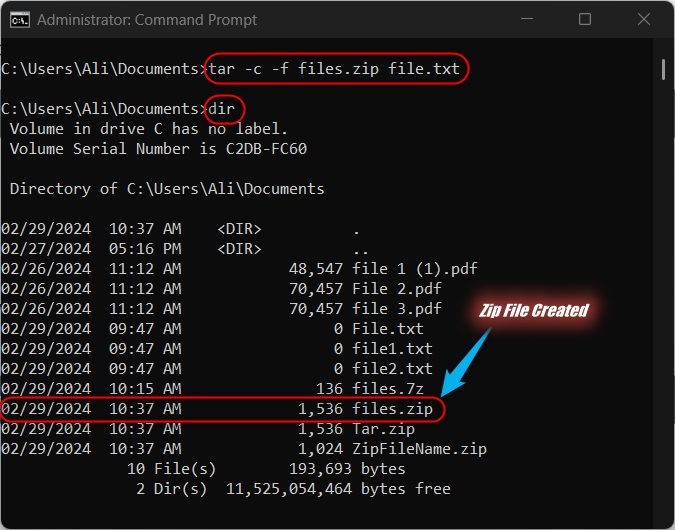
Unzip Files Using the “tar” Command
To unzip the files using the “tar” command on Windows, run the following command and replace files.zip with the name or the path to the zipped file you want to extract:
tar -xf files.zip
dir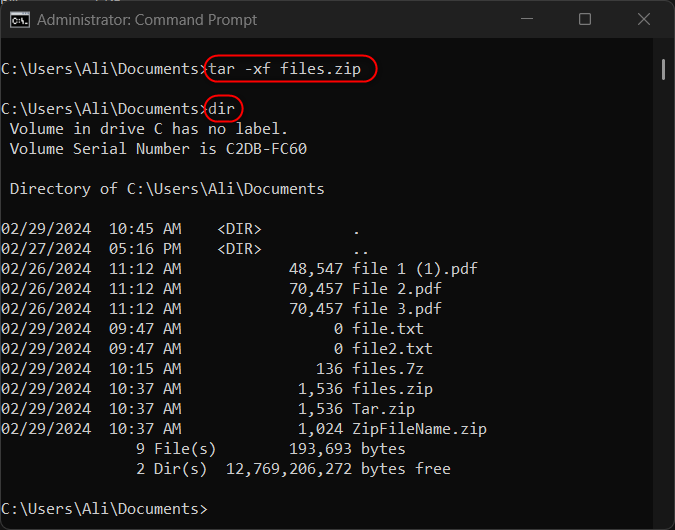
Zip and Unzip Files Using the “7zip” Utility on Windows
The “7zip” is a popular and open-source cross-platform file management utility that lets you create and extract zip files. To use it on Windows, execute the following command in Windows PowerShell to install Chocolatey – A PowerShell utility to install and manage Windows apps:
Set-ExecutionPolicy Bypass -Scope Process -Force; [System.Net.ServicePointManager]::SecurityProtocol = [System.Net.ServicePointManager]::SecurityProtocol -bor 3072; iex ((New-Object System.Net.WebClient).DownloadString('https://community.chocolatey.org/install.ps1'))After installing the “Chocolatey” use the below-mentioned command to install “7zip”:
choco install 7zip.install -y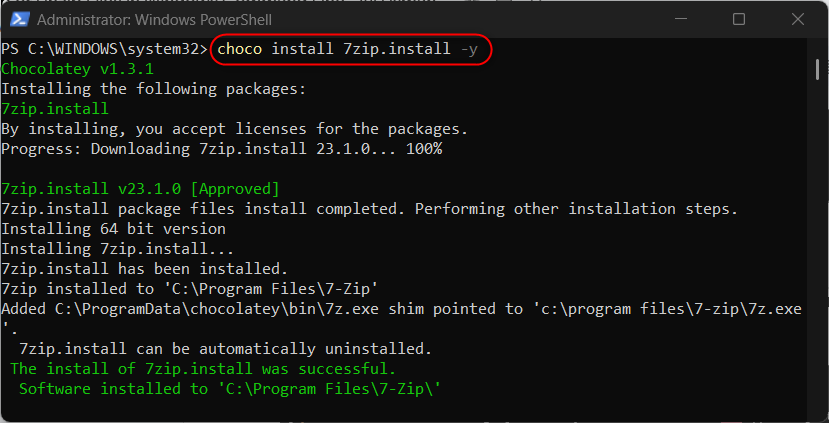
Now to create a zip file of all the text files in the navigated directory using the “7zip”, execute this command:
7z a -t7z files.7z *.txt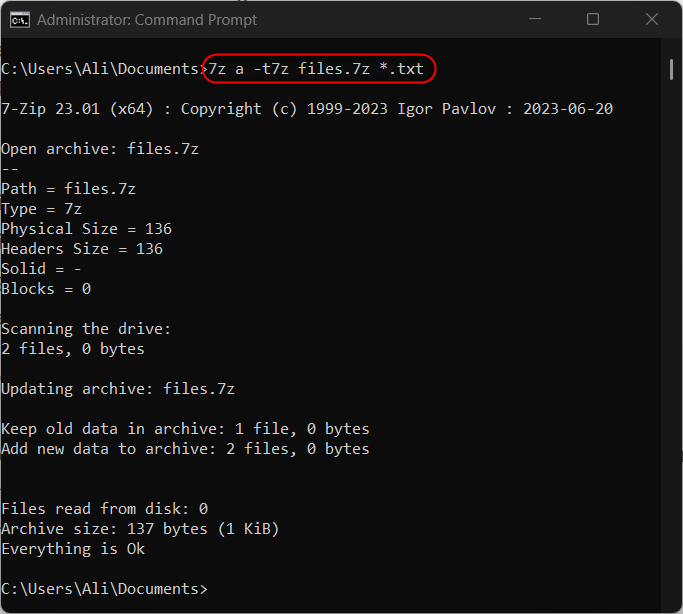
Note: You can remove the * from the above command and insert a file name as well.
For unzipping the files using the “7zip”, you need to execute the below command and replace “files.7z” with the file’s name you want to unzip:
7z e files.7z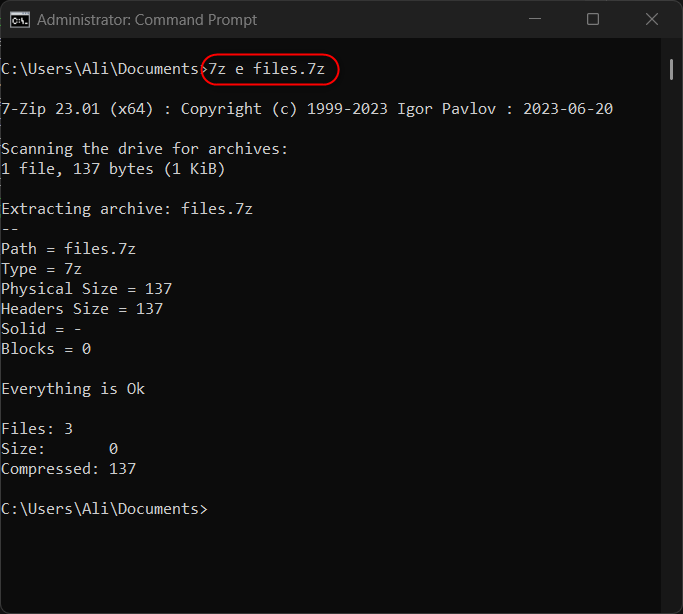
Note: You can use the “7zip” and “tar” in Windows PowerShell in the same way as the Command Prompt.
Zip and Unzip Files Via the Windows PowerShell
We have already discussed zipping and unzipping the files using the Command Prompt (the same can be used in Windows PowerShell). However, in Windows PowerShell, you can use the “Compress-Archive” cmdlet to zip and “Expand-Archive” to unzip the files.
The “Compress-Archive” is used to create the zip files, as illustrated in the below command:
$compress = @{
>>   Path = "C:\Users\Ali\Documents"
>> CompressionLevel = "Fastest" >> DestinationPath = "C:\Archives\Draft.zip" >> } >> Compress-Archive @compress PS C:\WINDOWS\system32> 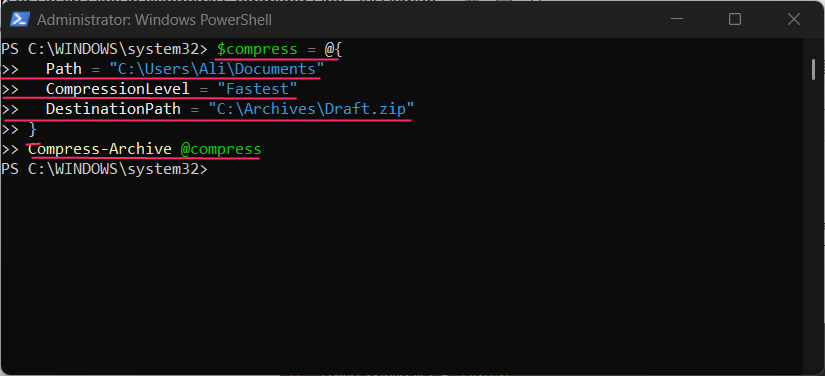
Now check the contents of the directory in which the zipped file is stored:
dir C:\Archives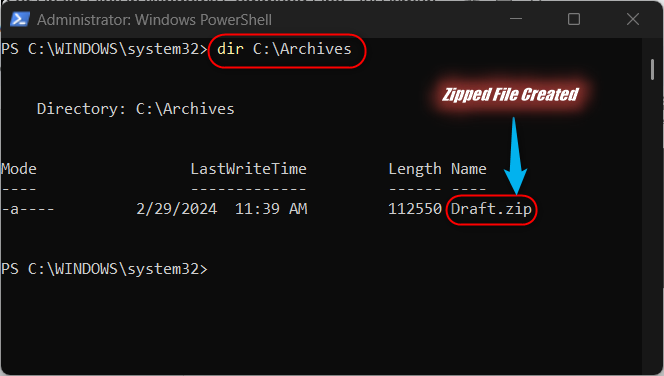
To unzip the files using the “Expand-Archive” cmdlet, run the following command:
Expand-Archive -Path C:\Archives\Draft.zip -DestinationPath C:\Users\Ali\Documents
That’s all for this post to zip and unzip files in Windows Command Line.
Final Words
To zip and unzip files in Windows Command Line, use the “tar” or “7zip” utilities in either Command Prompt or Windows PowerShell. Additionally, you can use the “Compress-Archive” cmdlet to create a zipped file and “Expand-Archive” to unzip it. This guide has discussed the methods to zip and unzip files using the Windows PowerShell and Command Prompt.