Are you dealing with a slow system performance, especially while booting? If yes, there could be many reasons behind it; the most common are hard drive errors, file system inconsistencies, or corrupt files. To scan and fix your hard drive issues such as errors, bugs, and corrupt files, Microsoft has integrated the “chkdsk” utility into Windows OS.
The “chkdsk” checks and attempts to repair the logical errors on disk volumes, including file system inconsistencies, lost allocation units, and bad sectors. You can run it via the command line, Windows recovery environment, and File Explorer.
Quick Outline
This guide explains the “chkdsk” in Windows and sheds light on the following content:
- How to Use the chkdsk From the File Explorer
- How to Use the chkdsk Using the CMD/Windows PowerShell
- How to Use the chkdsk From the Windows Recovery Environment
Let’s begin!
How to Use the chkdsk From the File Explorer
You can perform the basic “chkdsk” functionality on any of your disks via the file explorer. To check a disk for errors, follow these steps:
Step 1: Right-click on a Disk and then select “Properties” or press the “Alt + Enter” keys after selecting it.
Step 2: Select the “Tools” and then use the “Check” button to trigger the “chkdsk”. Next, use the “Scan drive” option:
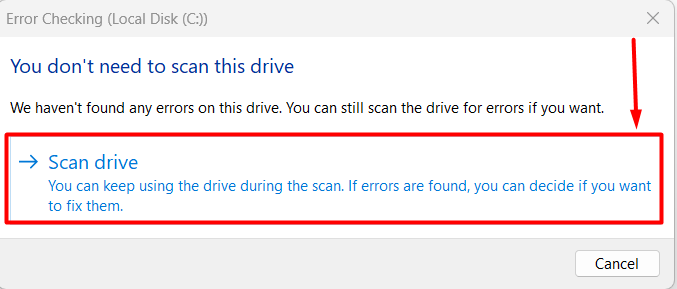
It now checks the specified disk for errors in the following stages:
- Stage 1: Examining the basic file system structure… (File record verification & Bad file record checking)
- Stage 2: Exploring the file name linkage…(Index validation& Reparse point and Object ID verification)
- Stage 3: Analyzing the security descriptors… (Security descriptor authentication & Data attribute verification).
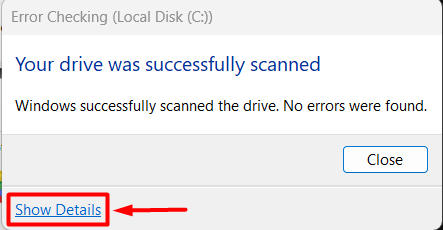
To view the details about the above Stages, use the “Show Details” to open the “Event Viewer”:
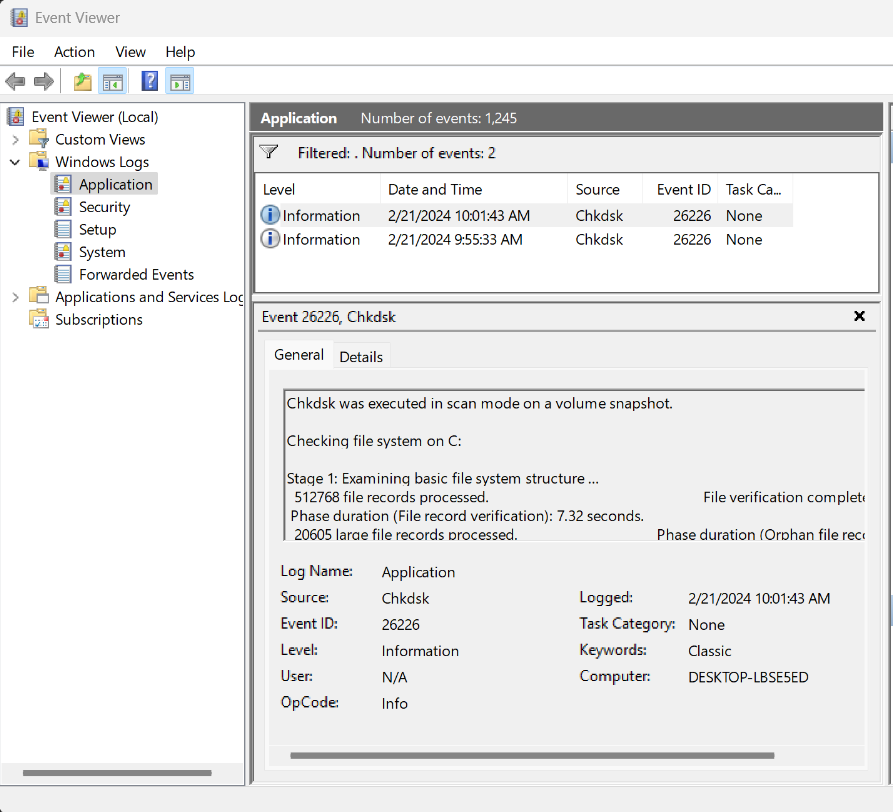
From the “Event Viewer”, you can analyze the detailed information about the “chkdsk” scan:
How to Use the chkdsk Using the CMD/Windows PowerShell
The “chkdsk” command when run(as Administrator) from the Command Prompt/ Windows PowerShell allows you to perform the following:
Run the chkdsk | Read-Only Mode
The “chkdsk” when used with no options/flags, initiates the “chkdsk” utility in “Read-Only” mode and does not fix anything, as seen below:
chkdsk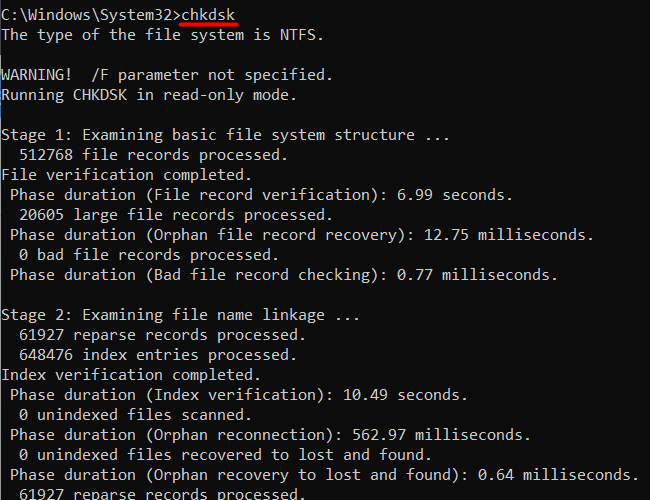
Run the chkdsk | Fix the Hard Drive Errors
The “chkdsk /f” scans and tries to repair the errors found while scanning process. It won’t run if the specified disk is in use. However, you can trigger it on the next system boot (before logging into your user account), as seen below:
chkdsk /f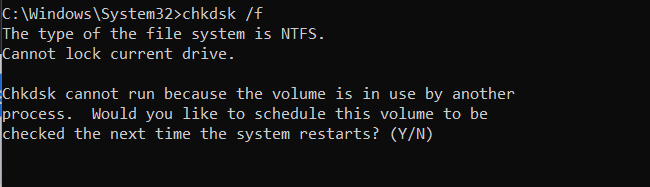
Run the chkdsk | Fix the Bad Sectors on Your Hard Drive
The “chkdsk /r” allows you to scan and fix the bad sectors on your system’s hard drive. The bad sectors are the locations within the hard drive that contain the unreadable information and when damage occurs, that information is lost. To use the “chkdsk” command (Drive F in this case) and fix the bad sectors in your hard drive, execute:
chkdsk F: /r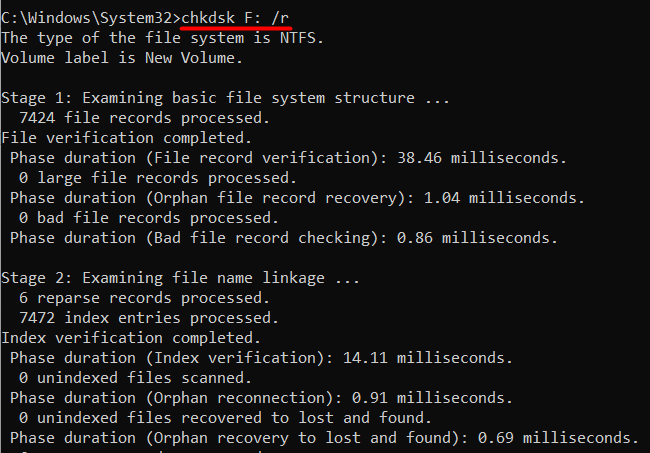
The “chkdsk /r” includes the following additional stages in its scan:
- Stage 4: Examining for bad clusters in user file data… (User file recovery).
- Stage 5: Looking for bad, free clusters… (Free space recovery).
Run the chkdsk | Dismount and Fix the Hard Drive
If you are seeing the error “Cannot lock the current drive” while using the “chkdsk” command, dismount the drive and then retry (requires restart). It forces all the applications to close and then implies the “/f” option to fix the errors. To use it, execute:
chkdsk /xRun the chkdsk | Perform an Online Scan
The “Online Scan” in “chkdsk” allows you to fix the disk errors without unmounting it. Although it is less intensive but still effective. To use the “Online Scan in chkdsk”, run:
chkdsk /scan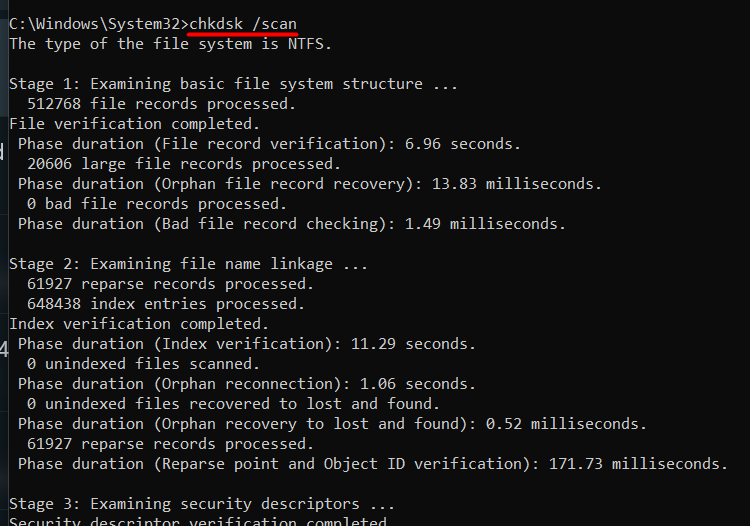
Run the chkdsk | Perform an Offline Scan
The “Offline Scan” is similar to the “/r” flag of the “chkdsk” command but it requires unmounting the specified disk. To use the “chkdsk” offline scan and fix errors on your hard drive, run the below command:
chkdsk /offlinescanandfix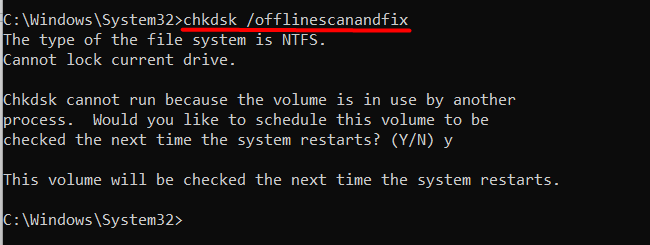
From the above output, you can see that it has scheduled the scan for the next time the system restarts. It could take a lot of time, but you can cancel it using the following command:
chkdsk /dRun the chkdsk | Perform a Resource Intensive Scan
The “chkdsk” command also lets you perform a resource-intensive scan to complete the process as quickly as possible. Since it consumes more resources, we’d recommend closing all other programs. It uses the “/perf” option and requires the “/scan” flag as well:
chkdsk /scan /perf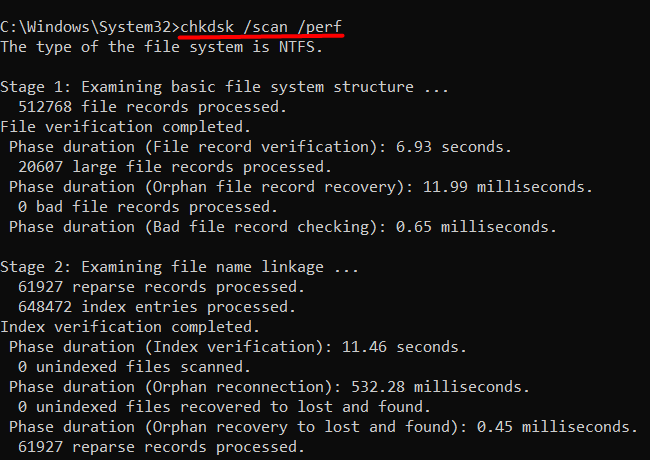
Note: The “chkdsk /scan /perf” works only for the NTFS.
To view and understand other options/flags of the “chkdsk”, use the following command:
chkdsk /?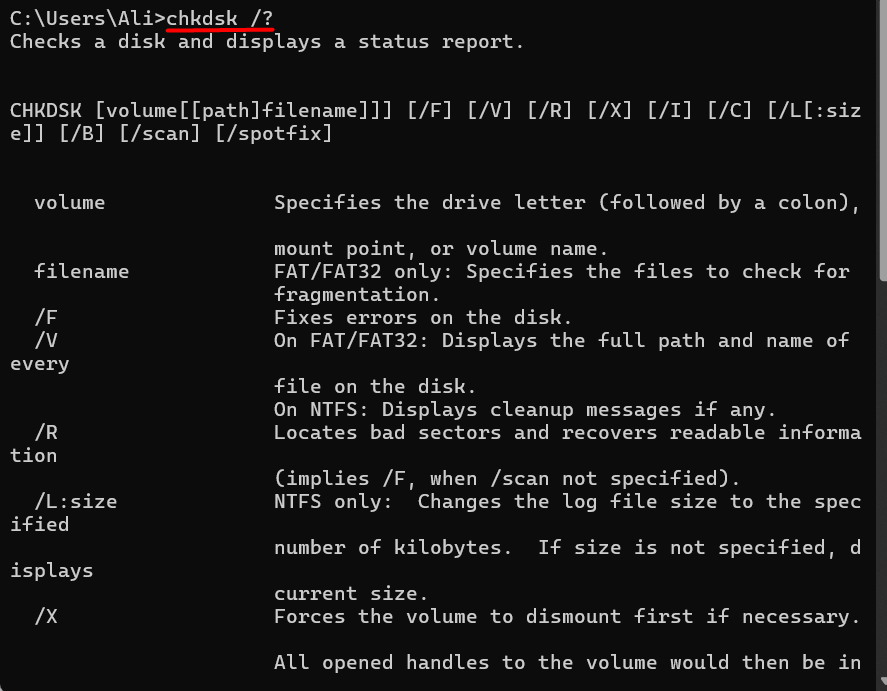
How to Use the chkdsk From the Windows Recovery Environment
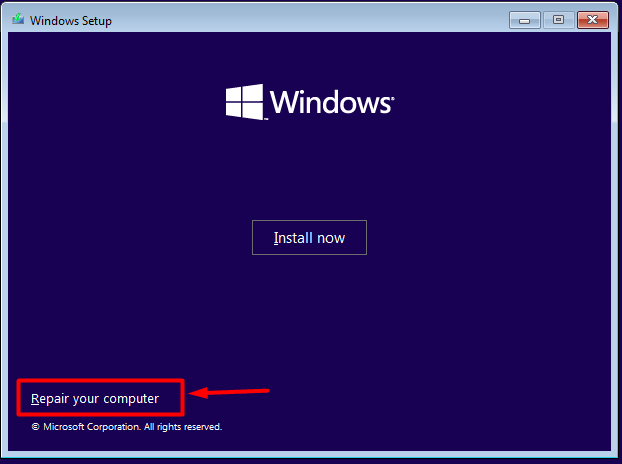
If you are unable to boot your system, try using the “chkdsk” command from the “Windows Recovery Environment” or “WinRE”. The “WinRE” is a specialized environment that allows Windows OS users to fix boot-related issues. Since a corrupt file system can prevent the system from booting, it is necessary to fix it before booting.
To fix the hard disk errors using the WinRE, insert your Windows installation media, and select the option called “Repair your computer”:
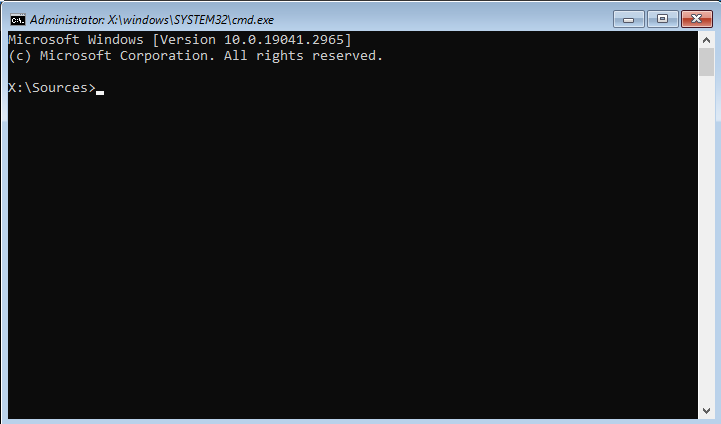
From here, navigate to “Troubleshoot” and then select the “Command Prompt”. Now you can use the “chkdsk” command (explained in the above section) and fix your hard drive issues:
Final Words
The “chkdsk” command lets you fix the hard drive errors. It acts as a doctor for your hard drive that thoroughly scans for the problems and with your permission, attempts to fix them. You can use it via File Explorer, the Command Line, and the Windows Recovery Environment (WinRE). This guide has discussed the use of the “chkdsk” command in Windows.