Microsoft has added several utilities and applications to fine-tune the user experience in Windows. However, these utilities can sometimes misbehave or not work at all and in this case, you must disable or remove them. One of the problematic utilities from Microsoft is Windows Defender, which is now renamed “Microsoft Defender Antivirus”.
The Microsoft Defender Antivirus scans your system for infected files and attempts to remove them, but while doing so, it consumes more system resources and can cause slower performance. However, you can disable/turn off the Microsoft Defender Antivirus either briefly by turning off the Real-Time Protection. If you permanently want to disable Microsoft Defender Antivirus, you must use the Group Policy or Registry Editor.
This guide will show the methods to disable Microsoft Defender Antivirus.
How to Disable/Turn Off Windows Defender or the Microsoft Defender Antivirus
To Disable Windows Defender or Microsoft Defender Antivirus, use either of the following methods:
- Briefly Disable Windows Defender/Microsoft Defender Antivirus
- The Group Policy
- Install Third-Party Antivirus App.
The above methods are illustrated as follows.
Method 1: Briefly Disable Windows Defender or the Microsoft Defender Antivirus
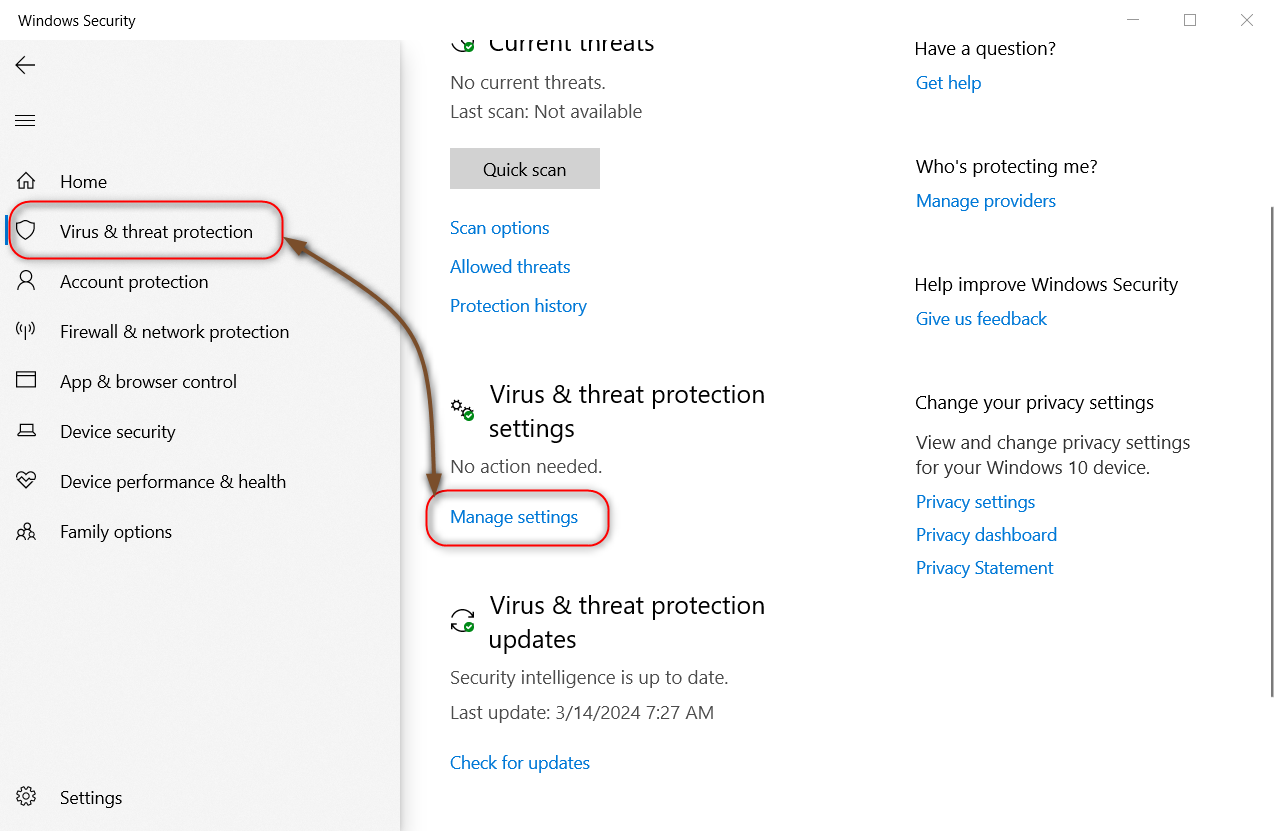
To briefly disable Windows Defender or the Microsoft Defender Antivirus, you must turn off the “Real-time protection” from the Virus & threat protection settings. To do that, open the Windows Security app from the Start Menu, navigate to Virus & Threat Protection, and then to the Manage Settings option:
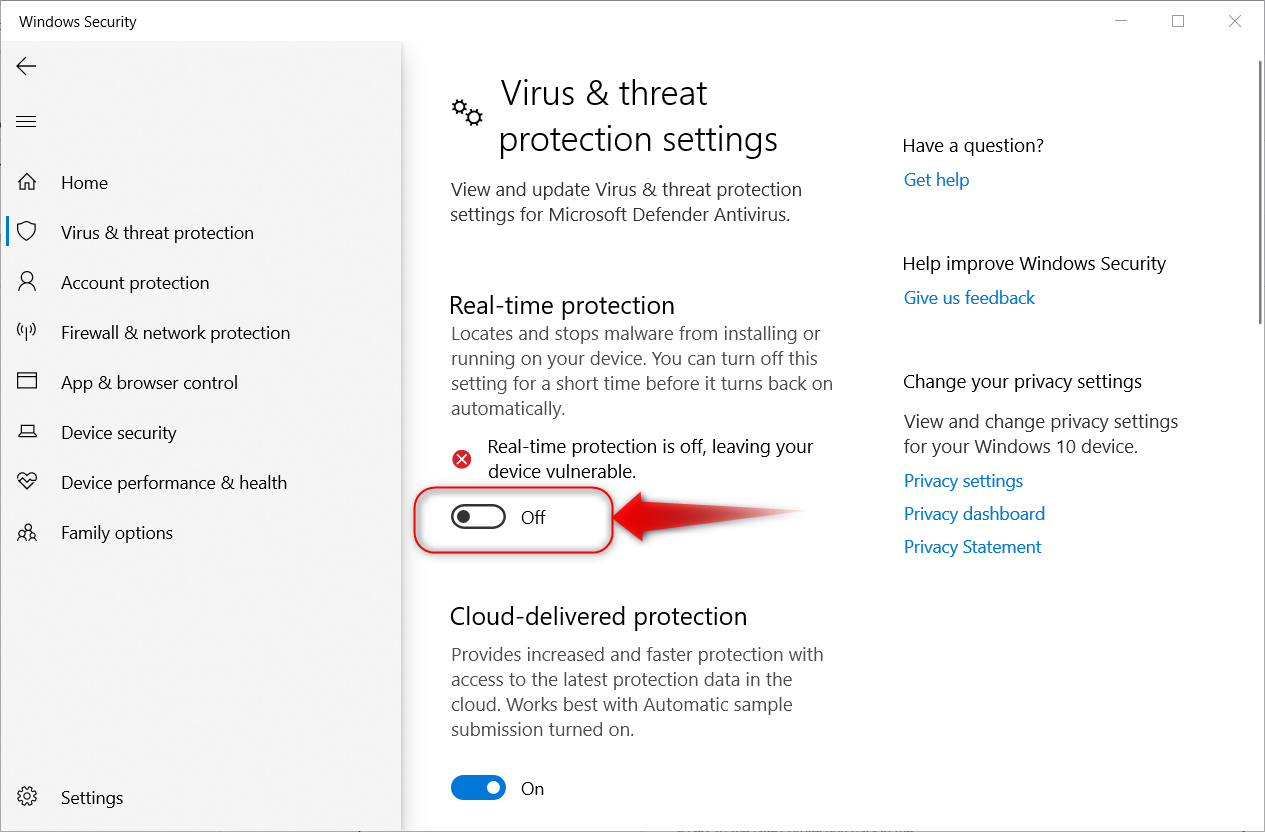
Next, turn off/disable the Real-time protection. Doing this briefly prevents Windows Defender Antivirus from scanning your system files. You can use this to install software that is potentially marked unsafe by it, but proceed with caution as the software you are about to install may contain malware or viruses:
Note: You need administrative privileges to briefly disable Windows Defender Antivirus.
Method 2: Permanently Disable Windows Defender Via the Group Policy
If you are using the Home version of Windows, you will not find the Group Policy editor, so you must use the Registry Editor to disable Windows Defender/Microsoft Defender Antivirus permanently. However, if you are using any version other than Home, you can permanently disable the Windows Defender/Microsoft Defender Antivirus by following these steps:
Step 1: Turn Off Windows Defender/Microsoft Defender Antivirus Tamper Protection.
Step 2: Navigate to “Computer Configuration > Administrative Templates > Windows Components > Microsoft Defender Antivirus” and open “Turn off Microsoft Defender Antivirus” and set it to “Enabled”.
Step 3: Reboot Your System.
The above steps are illustrated as follows:
Step 1: Turn Off Windows Defender or the Microsoft Defender Antivirus Tamper Protection
The Tamper Protection prevents other software from changing the Windows Defender or the Microsoft Defender Antivirus. To permanently disable Windows Defender/Microsoft Defender Antivirus, you must disable the Tamper Protection from Windows Security ? Virus & threat protection by toggling the Tamper Protection to Off:

Step 2: Open the Group Policy Editor and Disable Windows Defender or the Microsoft Defender Antivirus
After turning off the Tamper Protection, open the Group Policy Editor via the Start Menu; from here, navigate to “Computer Configuration > Administrative Templates > Windows Components > Microsoft Defender Antivirus” and open “Turn off Microsoft Defender Antivirus” and set it to “Enabled”:

Step 3: Reboot Your System for the changes to trigger.
Method 3: Permanently Disable Windows Defender by Installing a Third-Party Antivirus Software
If you are willing to employ a third-party antivirus software, you can permanently disable Windows Defender/Microsoft Defender Antivirus. To do that, just install a third-party Antivirus, and the default Windows Antivirus will be disabled automatically.
If it doesn’t change your default antivirus software, follow these steps to permanently disable Windows Defender/Microsoft Defender Antivirus, follow these steps:
Step 1: Install Any Reputable Antivirus Software.
Step 2: Launch the Windows Security App and go to the option called Virus & Threat Protection.
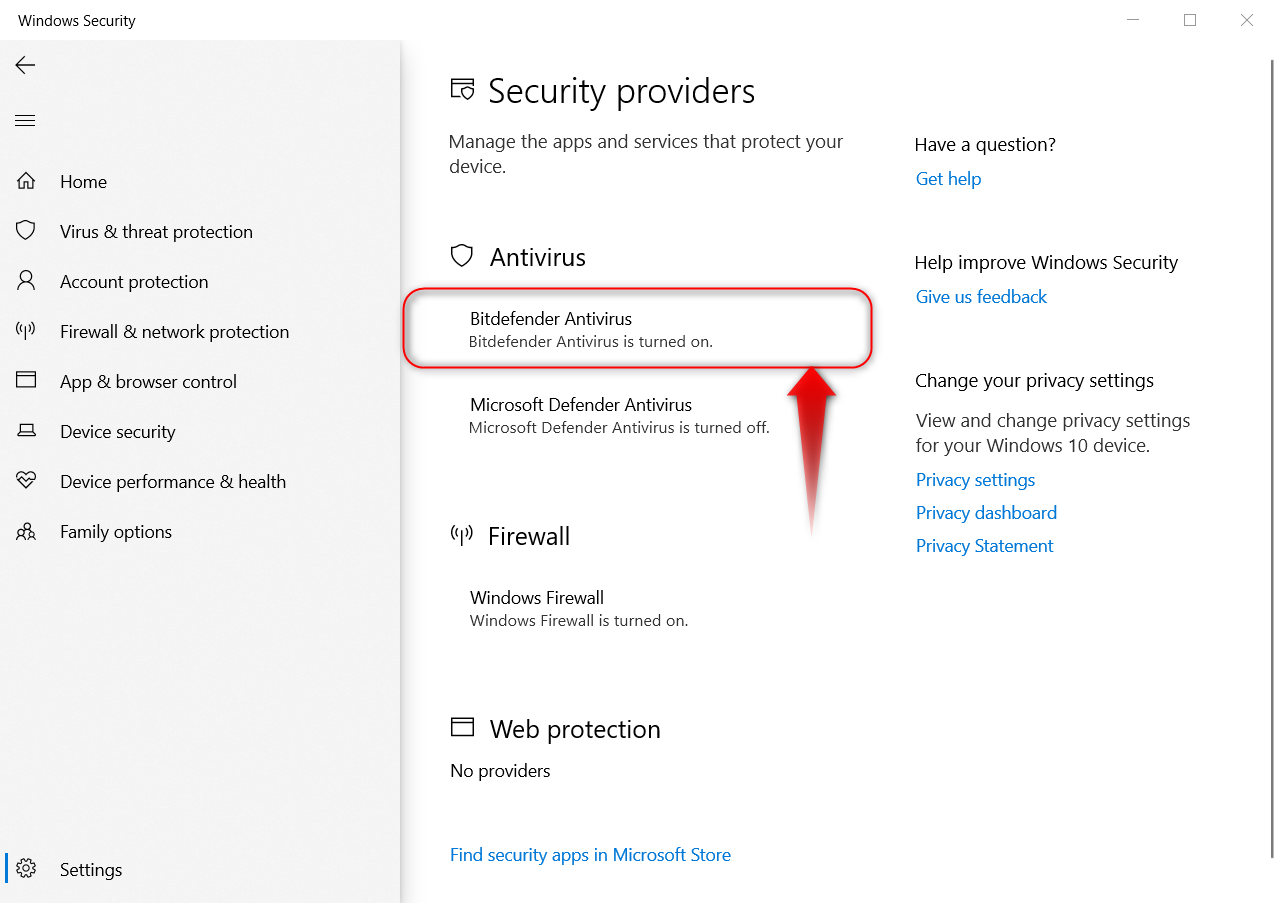
Step 3: Click on the Manage Provider option under the Who’s protecting me? Panel and choose the default antivirus software. After selecting the default antivirus software, every other antivirus software is automatically disabled:
FAQ’s
How to Briefly Disable Windows Defender or the Microsoft Defender Antivirus?
You can briefly disable/turn off the Microsoft Defender or Microsoft Defender Antivirus by turning off the Real-time protection. If you do this, it will not monitor your system files. It only lasts until the system reboots or is re-enabled by you.
How to Permanently Turn Off/Disable Windows Defender or the Microsoft Defender Antivirus?
To permanently disable Windows Defender or the Microsoft Defender Antivirus, Open the Windows group policy editor, navigate to “Computer Configuration ? Administrative Templates ? Windows Components ? Microsoft Defender Antivirus” and open “Turn off Microsoft Defender Antivirus” and put it to “Enabled”. Or simply, install a reputable antivirus software.
How to Permanently Turn Off the Windows Defender or the Microsoft Defender Antivirus in Windows Home Version?
In Windows Home versions, the group policy editor is missing and you must install a third-party antivirus software to disable it. Or you can briefly disable it by turning off the Real-time protection.
Final Words
To disable/turn off the Windows Defender/Microsoft Defender Antivirus, turn off/disable the Real-time protection from the settings called “Virus & Threat Protection”.
To permanently disable Windows Defender/Microsoft Defender Antivirus, use the group policy editor or install a third-party software. It will remain disabled until you uninstall the third-party antivirus software or switch to it. This guide has discussed the methods to disable/turn off the Windows Defender or Microsoft Defender Antivirus.