We all crave security in the digital world, and Windows being the most widely used operating system calls for additional security measures. Additional security measures are required because most cyber criminals consider Windows OS their primary target. One of the security features required to install the latest OS from Microsoft, Windows 11 is the Secure Boot.
Think of the Secure Boot as the gatekeeper for your system that verifies the legitimacy of the software components necessary to start the OS. Secure Boot helps prevent unauthorized software from loading during this process by using digital signatures to verify the authenticity of critical startup files. If any files are modified or malicious, it blocks the system from booting while protecting your data.
You cannot legally install or upgrade to Windows 11 without enabling the Secure Boot on your system. If Secure Boot is not enabled, your system is at risk, and malware can infect and hijack it without you even knowing. These malware are often referred to as Boot kits and any Antivirus software cannot detect them as yet. So, you must enable Secure Boot to keep your system safe by following this detailed guide.
How to Enable/Turn on Secure Boot for Windows 11
The steps to enable/turn on the Secure Boot in Windows 10 for installing or upgrading to Windows 11 are as follows:
Step 1: Check if Secure Boot is Enabled
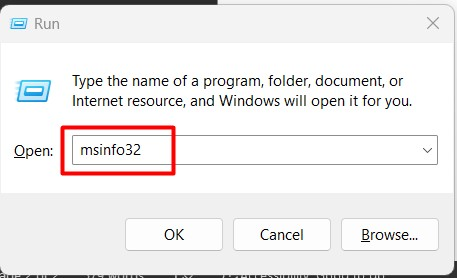
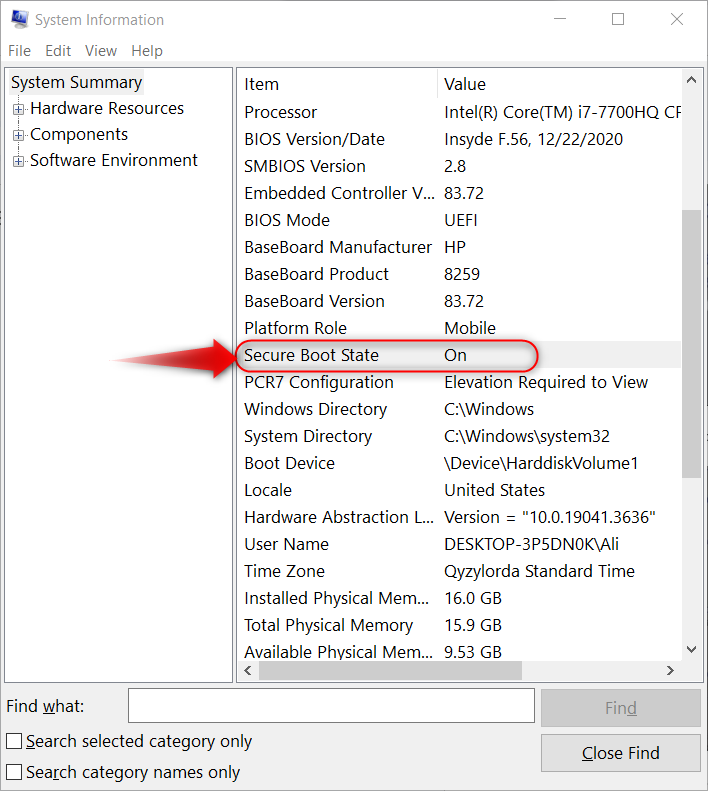
To check if the Secure Boot is enabled or not, open the System Information by entering msinfo32 in the Windows Run:
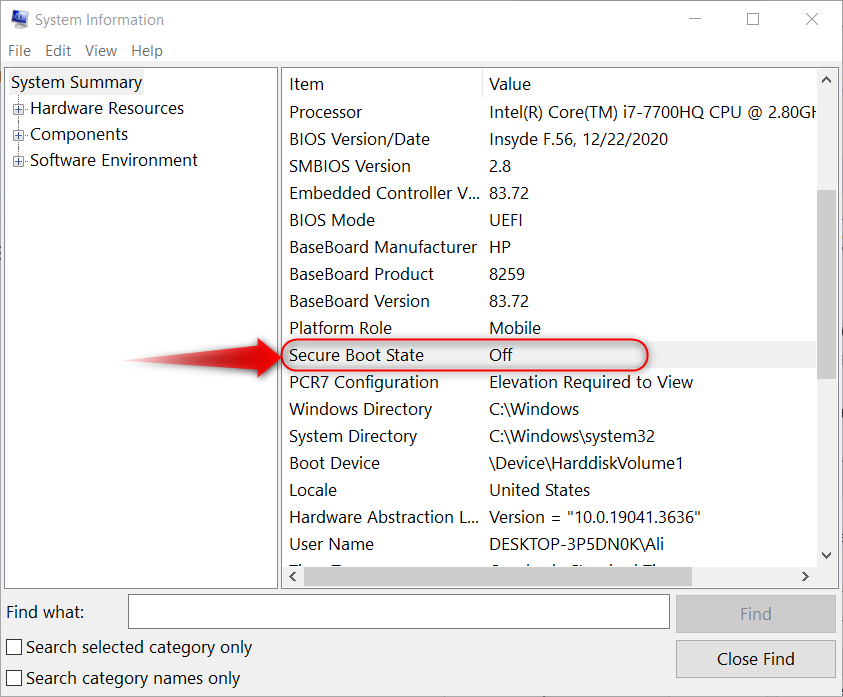
In the System Information app, check the status against the Secure Boot State, if it is Off then it means the Secure Boot is not enabled:
Step 2: Open the BIOS Menu
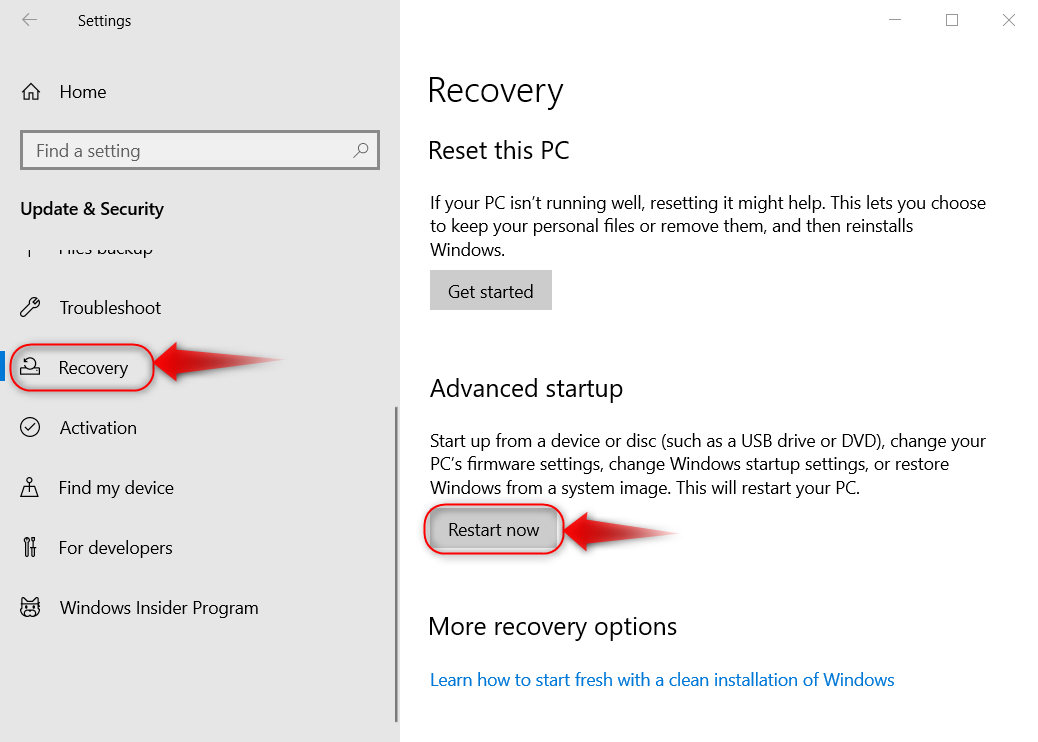
You can only enable or disable the Secure Boot via the BIOS Menu. To access the BIOS Menu, press the Windows + i keys to open the Windows Settings app, navigate to Update & Security ? Recovery, and use the Restart now button under the Advanced startup option:
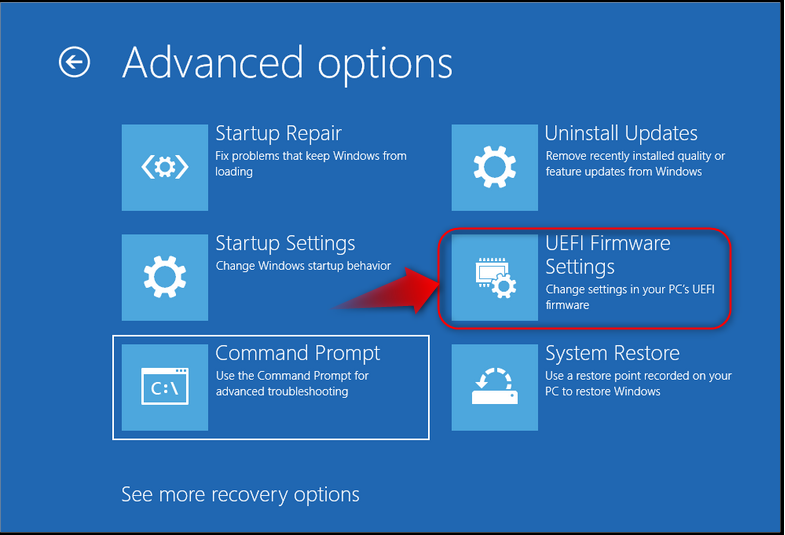
In the Advanced options, navigate to Troubleshoot > Advanced options and select UEFI Firmware Settings to reboot the system into the Startup menu:
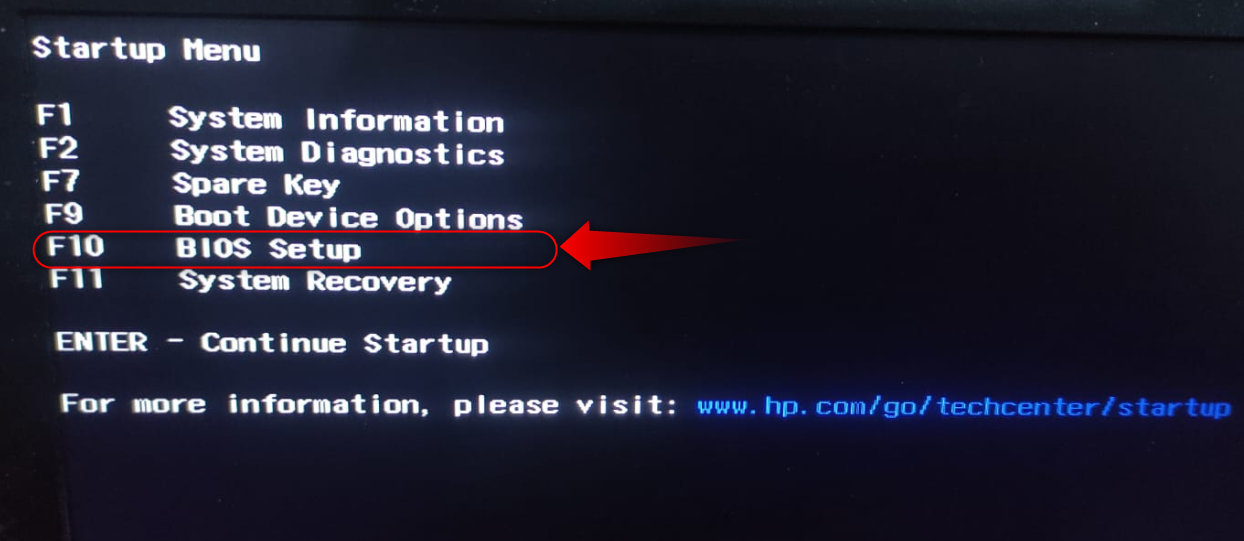
After the system reboots, press the key according to what you see on your screen (F10 in this case) to enter the BIOS Setup:
Step 3: Enable/Turn on the Secure Boot
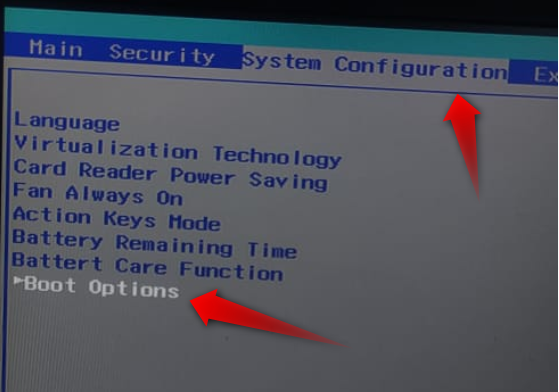
After entering the BIOS Menu, select the System Configuration tab, and then the Boot Options:
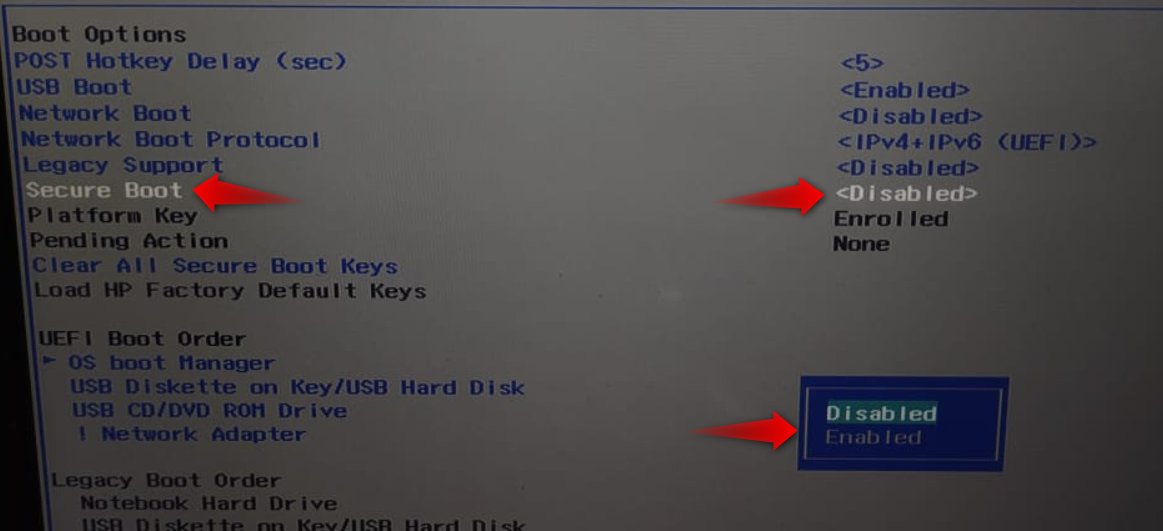
In the Boot Options, find and enable/turn on the Secure Boot:
After that, save the changes and system reboots with the Secure Boot enabled:
Note: The method to enable/turn on the Secure Boot in Windows 10 & 11 is almost identical.
That’s all for enabling Secure Boot for Windows 11.
Final Words
To enable/turn on Secure Boot, navigate to the BIOS Menu by navigating to Advanced Startup> Troubleshoot > Advanced options and select UEFI Firmware Settings to reboot. From here, press the specific key according to your system manufacturer and enter the BIOS Menu. In the BIOS Menu, navigate to the System Configuration, and then the Boot Options and enable/turn on the Secure Boot.
We recommend keeping the Secure Boot enabled to protect your system from Boot kits or boot-time malware attacks. This guide has illustrated the process to enable/turn on the Secure Boot for Windows 11.