Did you know you can recover your data after deleting it (even from the Recycle Bin)? This is a bit concerning, especially if you want to change your device. By default, the Windows OS creates whitespace on the locations where the data is stored on the disk, and until that space is filled, the deleted data is recoverable. To fill this whitespace and prevent Data Recovery, Microsoft has added the “Cipher” command.
The “Cipher Command on Windows” is mainly in use to encrypt and decrypt the data; however, it also lets you securely delete the data without any possibility of recovering it. You cannot use the “Cipher” command on Windows Home versions.
Quick Outline
Today’s guide explains the “Cipher Command in Windows” in detail using the following content:
- How to Encrypt and Decrypt the Files Command in Windows
- How to Make the Files Unrecoverable in Windows
Let’s begin!
How to Encrypt and Decrypt the Files in Windows
In Windows, the encrypted data can only be accessed by the current user account or other users who have imported the valid certificate and key used during the encryption. You must export and import certificates and keys for accessing the encrypted files. You can encrypt the files in Windows using the below methods:
- Using the Windows Explorer
- Using the Cipher Command
Let’s explain the above methods in detail as follows.
Method 1: Encrypt and Decrypt the Files in Windows | Windows Explorer
To encrypt and decrypt the files in Windows via Windows Explorer, follow these steps:
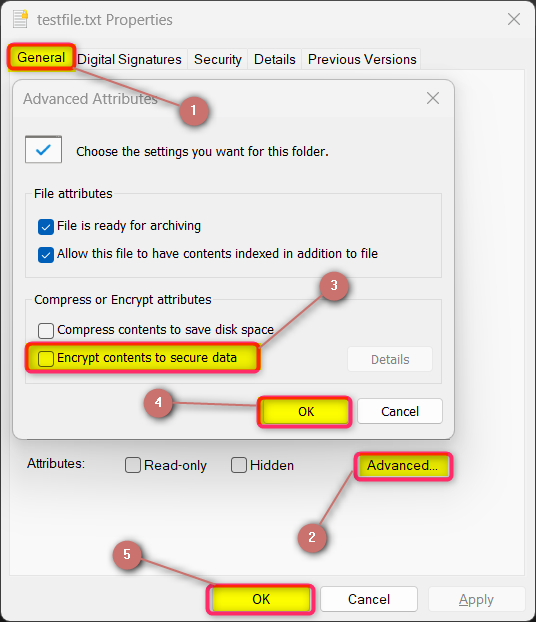
Step 1: Navigate to the file or directory you want to encrypt and open its Properties.
Step 2: Select the “General” tab and then click on the Advanced button.
Step 3: Tick the checkbox “Encrypt contents to secure data” and hit the “OK” button:
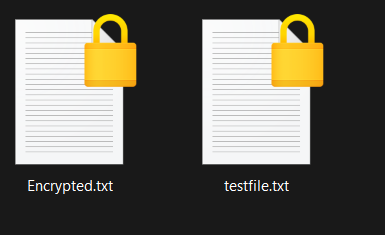
The file is now encrypted and cannot be used by other users or in other systems without a valid certificate and key. The encrypted files/folders are visible within the Windows Explorer with a Lock Sign, as seen below:
Method 2: Encrypt and Decrypt the Files in Windows | Cipher Command
The “Cipher” is a multi-functional command with powerful attributes such as encrypting and decrypting the data. Another interesting feature of the “Cipher” command is filling the white spaces on the disk to prevent data recovery. Let’s understand the use of the “Cipher” command via the following examples:
Example 1: Encrypt Data | Cipher Command Windows
To encrypt the data using the “Cipher” command, use the “/e” flag. It also encrypts the file added later:
Cipher /e
In the above command, some directories are not encrypted because they are protected and there is no way to encrypt them (restrictions from Microsoft). The list of files that you cannot encrypt includes the following:
- System Files & Directories.
- Root Directories.
- Compressed System & Non-System Files.
Example 2: Decrypt Data | Cipher Command Windows
For decrypting the data, use the “/d” flag of the “Cipher” command:
Cipher /d
Example 3: View the Encryption Status | Cipher Command Windows
The “Cipher” command when used without any flag, outputs the encryption status of the current directory. In its output, the “E” stands for encrypted while the “U” represents the unencrypted files and directories:
Cipher
Example 4: Abort the Encryption Process if There’s an Error | Cipher Command Windows
The “Cipher” command keeps on encrypting even if there is an error. These errors can leave some files unencrypted and to stop the encryption process when an error comes up, use the “/b” flag as follows:
Cipher /e /b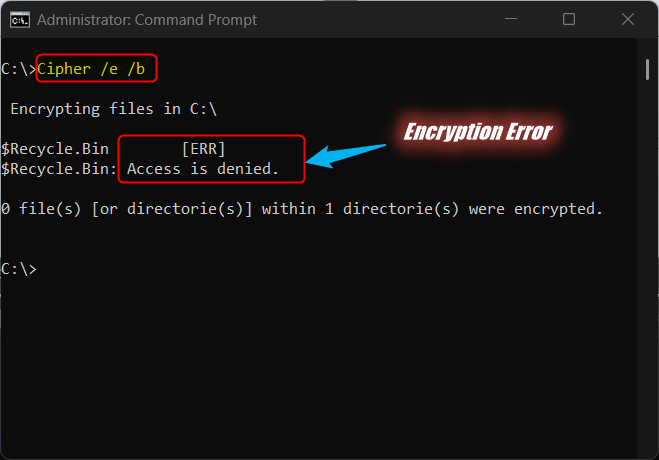
Example 5: View Information of the Encrypted Files | Cipher Command Windows
To view the file/directory encryption information such as “Users who can encrypt”, “Users who can decrypt”, and “Encryption Key & its Algorithms”, use the “/c” flag as seen below:
Cipher /c
Example 7: View and Encrypt the Hidden Files | Cipher Command Windows
By default, the “Cipher Command on Windows” does not encrypt the hidden files. To view and encrypt the hidden files using the “Cipher” command, use the “/h” flag with the “/e” flag like below:
Cipher /e /h
Example 7: Create a New EFS Certificate | Cipher Command Windows
The “EFS” or “Encrypting File System” protects your files using various encryption algorithms and the Cipher command also uses it to encrypt your files on Windows. The “EFS Certificate” contains the public key to encrypt or decrypt the data. To create a new “EFS Certificate”, use the “/k” flag of the Cipher command on Windows:
Cipher /k
You can view the current “EFS Certificate” using the “/y” flag of the Cipher Command:
Cipher /y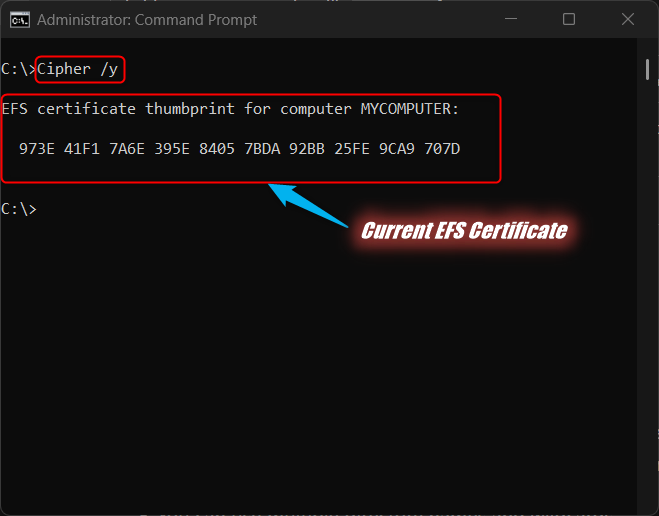
How to Make the Files Unrecoverable in Windows
The traditionally deleted files can be recovered using the Data Recovery Software and to avoid this, Microsoft has added the “Cipher” command that can encrypt/decrypt the files or folders and securely delete the data as well. To make the Windows files unrecoverable, use the “Cipher” command as follows:
Cipher /w:Drive:\path-to-folder\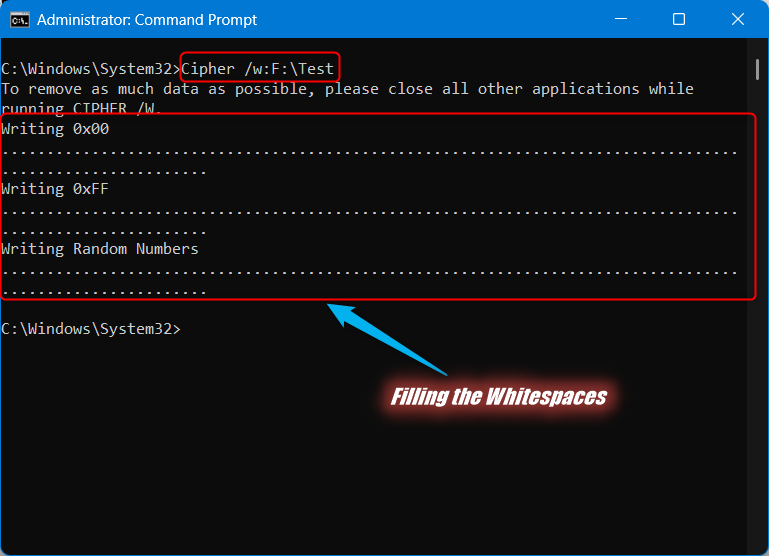
Additionally, you can do the same with the entire drive, as seen below:
Cipher /w:DRIVE:\
Note: The “Cipher” command fills the white spaces with the string of 0’s, 255’s, and Random Numbers.
Final Words
The “Cipher” command in Windows lets you encrypt and decrypt the files or folders. Additionally, you can use it to fill the white spaces and prevent the data recovery. It allows you to securely delete the data since the Windows OS creates the white spaces when you delete a file/folder and it can be recovered until that space is filled. Today’s guide explained the “Cipher Command on Windows” in detail.