On Windows, you are often required to use administrative privileges especially while installing new software or running an elevated instance of PowerShell. In short, you need to have administrative privileges to unlock the full potential of your PC. The main administrator account is locked by default on Windows and the account that is first created is automatically granted administrative privileges. But what if you want to grant the administrator access to a new account or change the administrator?
This comprehensive guide teaches you to change the Administrator on Windows using the Windows Settings App, Control Panel, and the Command Prompt.
Content Overview
- How to Change Administrator on Windows Via the Settings App
- How to Change Administrator on Windows Via the Control Panel
- How to Change Administrator on Windows Using the Command Prompt.
- Bonus Tip: How to Change/Modify Administrator Username on Windows
Let’s begin!
How to Change Administrator on Windows Via the Settings App
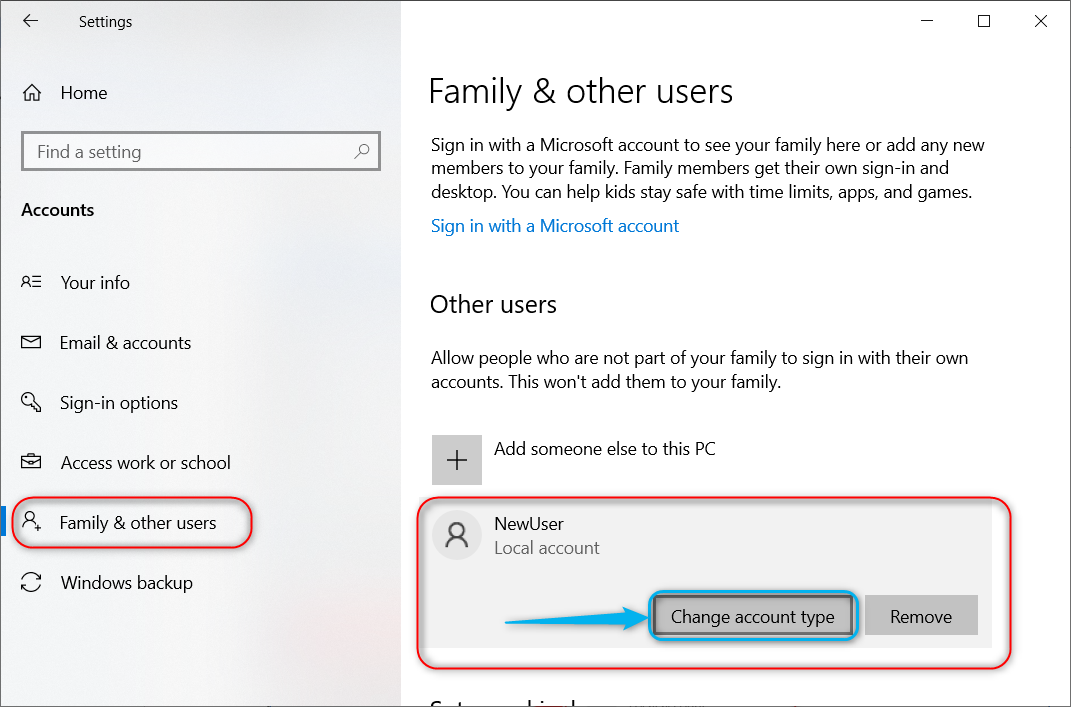
The Windows Settings app hosts various system settings that also include user account management. You can change the administrator. To change the administrator using the Settings app, open the Settings app, navigate to Accounts, and then go to Family & Other Users. From here, click/tap on the user account you want to make administrator and hit the Change account type button, as seen in the below snippet:
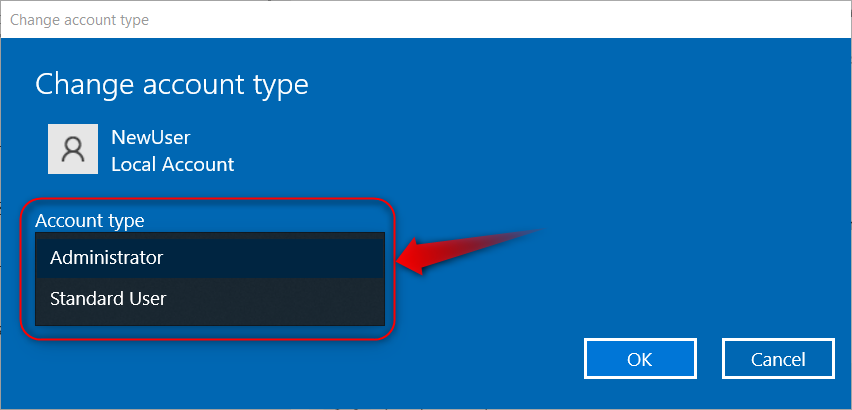
Next, set the Account type to Administrator and use the OK button to trigger the changes:
How to Change Administrator on Windows Via the Control Panel
You can change administrator on Windows via the Control Panel by navigating to User Accounts and selecting the Change account type option:
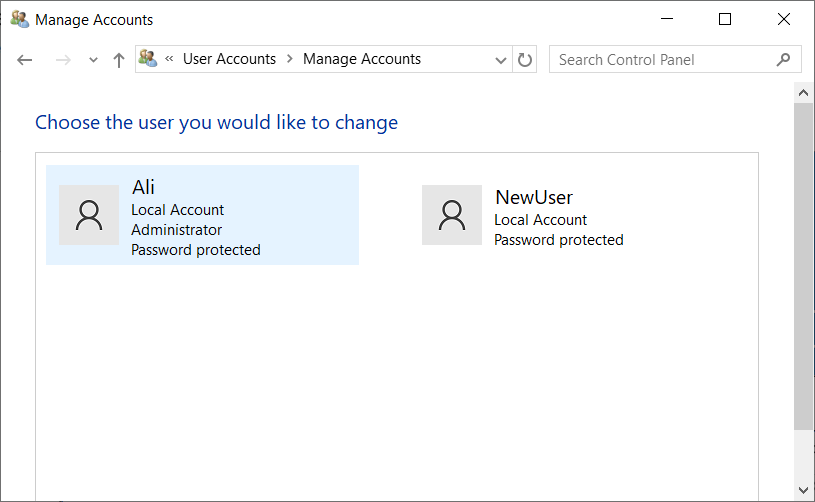
It opens the Manage Accounts window and from here, click/tap on the account you want to make administrator:
Now, click/tap on the Change the account type option while ensuring the correct username is selected:
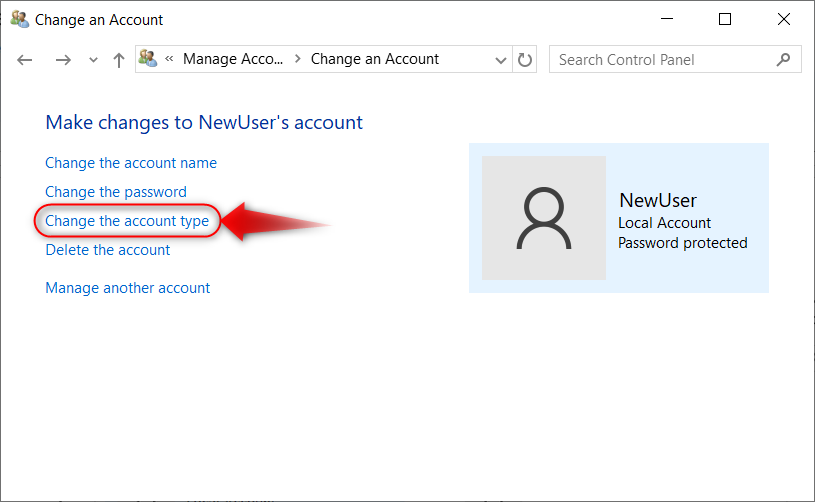
Following that, select the Administrator option and hit the Change Account Type to make the currently selected user account the administrator account:

How to Change Administrator on Windows Using the Command Prompt
The Command Prompt is a powerful command-line system management tool for Windows that also lets you change the administrator. To change the administrator, open the Command Prompt as administrator, execute the following command, and change the NewUser with the username whom you want to make administrator:
net localgroup Administrators NewUser /add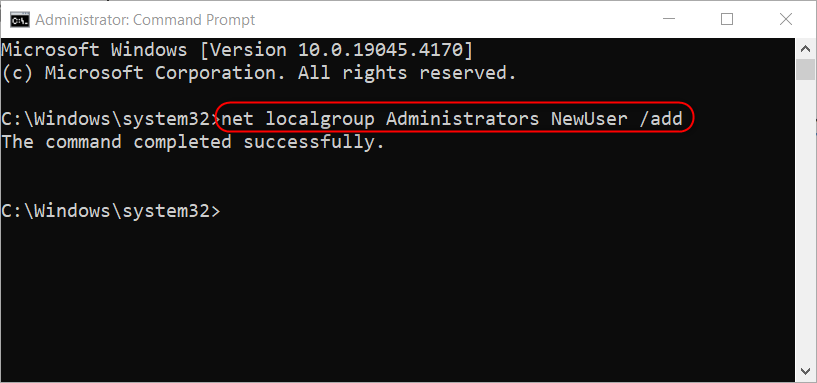
Bonus Tip: How to Change/Modify Administrator Username on Windows
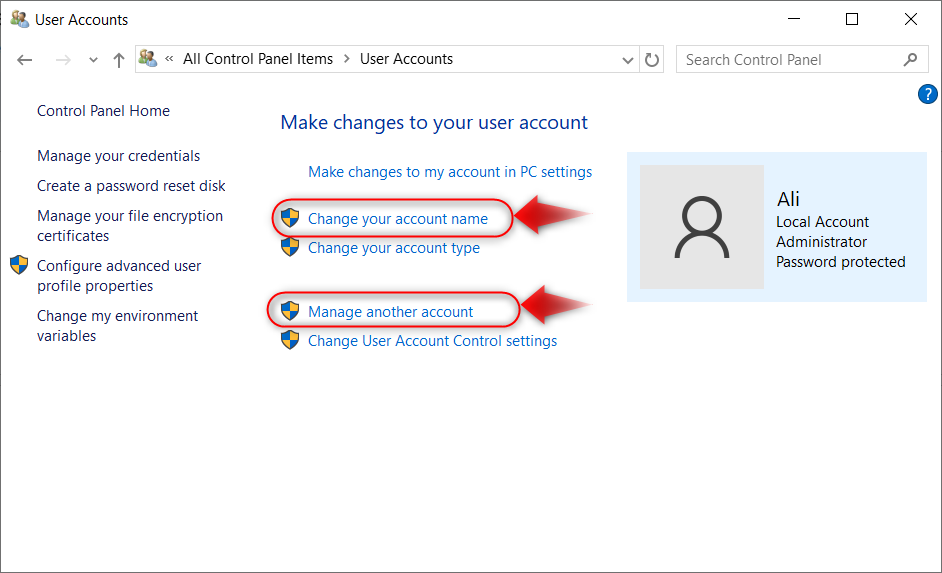
To change/modify the name of the administrator account on Microsoft Windows, open the Control Panel, click/tap on User Accounts, and then on the Change your account name option. You can also change the usernames of other administrators as well using the Manage other account option:
Note: The built-in administrator account on Windows is disabled by default and it should remain disabled because this account has the highest risk associated with it. The built-in administrator account has the highest level of permissions and if malware accesses it, you can lose all your data.
Final Words
To change administrator on Windows, launch the Settings application, navigate to Accounts, and then to Family & Other Users. From here, click/tap on the user account you want to make administrator, use the Change account type button, and change the Account type to Administrator. Additionally, you can change the username from the CMD and the Control Panel.