If you are curious about shifting to a new OS but want to test it without dual-booting? Well, you can do it using the widely used application called “VirtualBox”.
The “VirtualBox” is a powerful and free-of-cost virtualization software that lets you create a virtual machine within your operating system. It is also available (unofficially) on Debian 12 as well.
The virtual machine or “VM” on “VirtualBox” runs independently and is safe to use. A virtual machine uses the system’s hardware resources, including the RAM, the CPU, and the disk space. These VMs are safe and are easily deletable.
Today’s guide is about the process of “Install the VirtualBox on Debian 12”.
How to Install VirtualBox on Debian 12
The process to install the “VirtualBox on Debian 12” includes the following steps.
Step 1: Install the “curl” Utility
The “curl” command allows the users to download the data from a server using the Linux terminal. Use the below command to install it and retrieve the “gnupg2” to ensure secure communication between two systems:
sudo apt install curl wget gnupg2 lsb-release -y
Step 2: Download VirtualBox GPG Key on Debian 12
Here, download the “VirtualBox GPG Key” and store it in the list of trusted keys. Doing this lets you download and update the software packages from the official VirtualBox repository:
curl -fsSL https://www.virtualbox.org/download/oracle_vbox_2016.asc|sudo gpg --dearmor -o /etc/apt/trusted.gpg.d/vbox.gpg
Step 3: Add VirtualBox Repository
Now, add the “VirtualBox Repository” in the “/etc/apt/sources.list.d” to allow the package manager to download the “VirtualBox” from its repositories:
echo "deb [arch=amd64] http://download.virtualbox.org/virtualbox/debian $(lsb_release -cs) contrib" | sudo tee /etc/apt/sources.list.d/virtualbox.list
Here, update the system’s repositories using:
sudo apt update
Step 5: Install the Required Kernel Headers
Next, execute the below command to get the necessary headers for compiling kernel modules and set up automatic rebuilding of those modules when your kernel is updated:
sudo apt install linux-headers-$(uname -r) dkms -y
Step 6: Install VirtualBox
Now, trigger the installation of VirtualBox on Debian 12, using the following command:
sudo apt install virtualbox-7.0 -y
To verify the installation of the “VirtualBox” on Debian 12, use the below command:
vboxmanage -v | cut -dr -f1
Step 7: Add the User to the “vboxusers” Group (Optional)
To use a USB in any of the guest (Linux OS) you install on the VirtualBox, add the specified user (user in this case) to the “vboxusers” group using:
sudo usermod -aG vboxusers user
Now execute the following command to initiate a new shell environment and change to a new group:
newgrp vboxusers
Step 8: Install the Virtual Box Extension Pack (Optional)
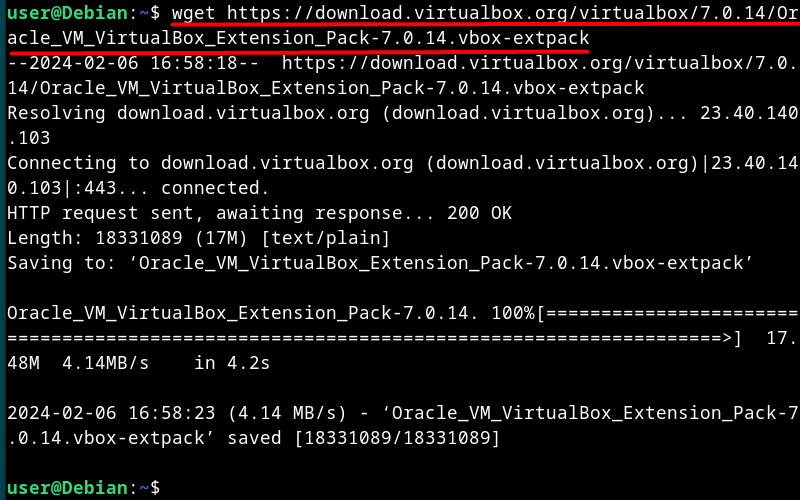
Although the “VirtualBox” comes with several features, some enhancements can be done via the “VirtualBox Extension Pack”. The enhancements include USB 2.0/3.0 support, webcam support, VirtualBox Remote Desktop Protocol, and Disk Image Encryption. To download it, run the below command:
wget https://download.virtualbox.org/virtualbox/7.0.14/Oracle_VM_VirtualBox_Extension_Pack-7.0.14.vbox-extpack
Now install the downloaded “VirtualBox Extension Pack” by executing the following command:
sudo vboxmanage extpack install Oracle_VM_VirtualBox_Extension_Pack-7.0.14.vbox-extpack
It prompts the users to agree to the license terms; enter the “y” to continue with the installation process:

To verify if the “VirtualBox Extension Pack” is correctly installed, execute the below command:
vboxmanage list extpacks
How to Use the VirtualBox on Debian 12
After installing the “VirtualBox on Debian 12”, let’s understand how to use it by creating a virtual machine in it:
Step 1: Create a New Virtual Machine
First, launch the “VirtualBox” from the “Activities” and then click/tap on “Machine” and then on “New” or press “Ctrl + N” keys, as seen below:

Step 2: Specify the Virtual Machine Details
Now, you must add the details of the virtual machine you are creating. Here, add the “Name”, the “Folder” in which the wizard stores the virtual machine’s data, and the “ISO Image” using which the OS is virtually installed:

In the above image, you can see the “Skip Unattended Installation”. UnCheck this option to simplify the installation process as all you need to add is the “User Details” and it installs the OS in a fully automated way.
Step 3: Add User Details
From here, specify the user details and it is meant for Unattended Guest OS Install Setup. Add the “Username” and the “Password”. You can modify the “Hostname” and “Domain Name” as well:

Step 4: Specify the System Resources
Now, assign the system’s resources to the virtual machine you are creating. It includes RAM and CPU:

Next, specify the disk space for the virtual machine:

Now, review the changes and hit the “Finish” button to finalize the changes:

Step 4: Install the Virtual OS
After specifying the requirements to install the OS, select the OS from the left pane of the “Oracle VM VirtualBox Manager” and then hit the “Start” button. Doing this triggers the installation process. Follow the installation process towards the end:

Bonus Tip: Remove VirtualBox From Debian 12
To completely remove the “VirtualBox” from Debian 12, run the below-mentioned command:
sudo apt remove --purge virtualboxFor deleting all the Virtual Machines and their configuration files, execute these commands:
sudo rm ~/"VirtualBox VMs" -Rf
sudo rm ~/.config/VirtualBox/ -Rf
Final Words
To install the “VirtualBox” on Debian 12, import its “GPG Key”, and “Repository” and install it. The “VirtualBox” is a powerful virtualization application software that lets you install the OS within the OS. It is proving quite useful, especially for users who require the use of multiple operating systems for testing and implementation. Using the “VirtualBox”, you can install and test different OS before installing them as the primary OS or Dual-Boot. This guide has explained the entire process of installing and using the “VirtualBox” on Debian 12.
