In the IT industry, we use Infrastructure as Code (IaC) tools for automating the process of provisioning and managing the IT infrastructure components. These tools differ from others as IaC tools automate processes through a code or a script. Terraform by HashiCorp is one of the popular and widely used IaC tools that simplify the process of infrastructure management and provisioning.
When using Terraform, we have to interact with the Terraform commands such as Terraform init, plan, apply, validate, destroy, etc. In this article, we will learn about the plan command and how to run the plan command through some examples.
First of all, let’s see what the terraform plan command is.
Terraform plan command
The Terraform plan command is one of the critical commands in the Terraform workflow. This command creates an execution plan that can be used to preview the changes that Terraform plans to make to our IT infrastructure before actually making them.
First, it examines the desired state defined in our configuration files. Then, it compares it against the infrastructure’s current condition and produces a detailed report of the suggested changes. This command assists us in understanding how the identified changes will affect our infrastructure and see any potential issues or errors before making those changes.
Syntax of the Terraform plan command
Below is the syntax of the terraform plan command.
terraform plan [options] [DIR]
- [options] – Here, we define an optional command-line flag that we can use with the terraform plan command. Some options are -refresh=true|false, -out=path, etc.
- [DIR] – This optional directory path contains all the Terraform configuration files. If we do not specify a path, by default, it considers it to be the current directory.
How to run the Terraform run command
Let’s see the steps to run the Terraform plan command.
- Terraform installation
Firstly, we must ensure the Terraform is installed in our working environment. We can confirm it by checking the Terraform version using the below command.
$ terraform -vWe can see the below output if the Terraform is installed and working correctly.
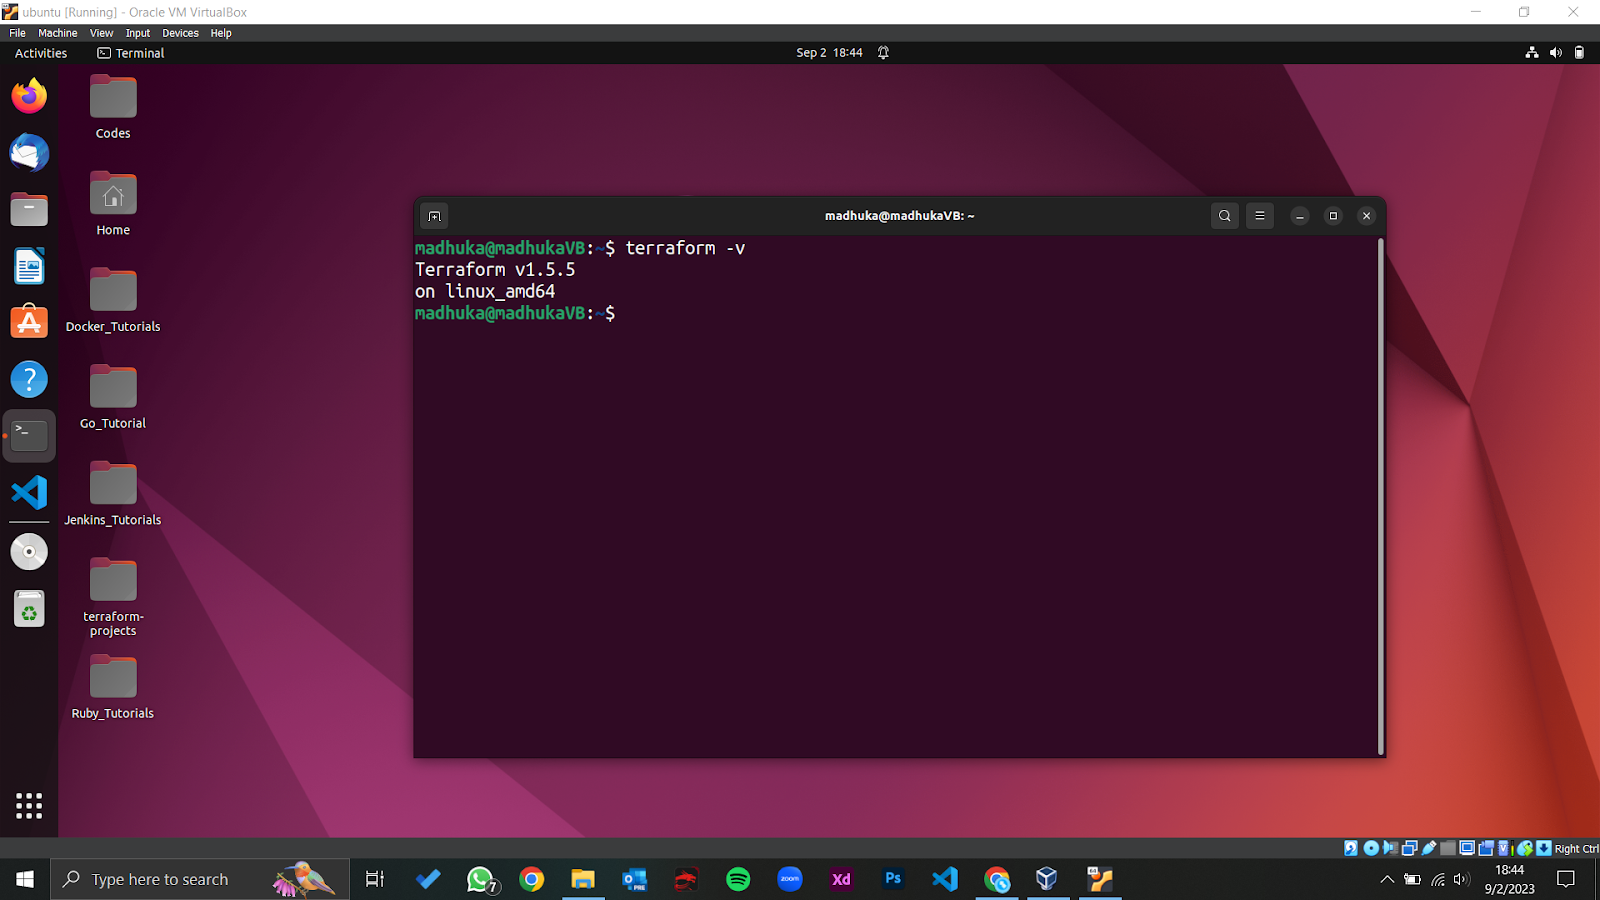
If not, we can download it through their official website and install it according to their installation guide.

- Defining the Terraform configuration file
After having Terraform on our system, we can start writing configuration files. But before that, we need to specify the working folder/directory and create a terraform configuration file (usually a ‘main.tf’ file).
Then, we can write our infrastructure configurations in that file using HCL syntax (HashiCorp Configuration Language).
- Initialize the Terraform configuration.
Next, we can initialize the defined configuration file using the terraform init command, automatically downloading the relevant provider plugins and preparing the working directory accordingly.
We can execute this command in the terminal or command prompt as below.
$ terraform init- Creating an execution plan using the terraform plan command
Now that we have downloaded the necessary provider plugins, we can create an execution plan for our terraform configuration. As we mentioned earlier, we use the terraform plan command to generate an execution plan that can be used to understand the changes to be made and potential errors and issues. We can use the plan command as shown below.
$ terraform planAfter using this command, Terraform will give us a detailed report on what changes will take place and how they will affect the current state of the infrastructure. We must carefully review this plan to check whether the changes are met with our intentions. If not, we should make the necessary changes to the configuration file, reinitialize it and have an updated execution plan.
- Applying the configurations
After carefully reviewing the execution plan, we can execute the defined configurations if they meet our needs. To perform the arrangements, we can use the Terraform apply command.
$ terraform applyThis command gives us a summary of the changes that took place within our infrastructure.
Following the above steps can efficiently run the terraform plan command.
Now, let’s see some examples of using the terraform plan command.
Example 1
Let’s say there is an empty folder called ‘Mytext’ in our system, and we need to create a local file (a text file with some text) inside it. So,
- Current state – An empty folder (‘MyText’).
- Desired state – Add ‘myPet.txt’ file with the content ‘I love pets’ inside of the ‘MyText’ folder.
We can create a Terraform configuration file and write the configuration as below.
resource "local_file" "myPet"{

filename = "path/to/MyText/myPet.txt"

content = "I love pets"

}
So, here we are, creating a text file called ‘myPet’ inside the ‘MyText’ folder. We will write ‘I love pets’ as the file’s content.
Now, we can initialize the file using the terraform init command. It will download the necessary provider plugins; we can see the output below.
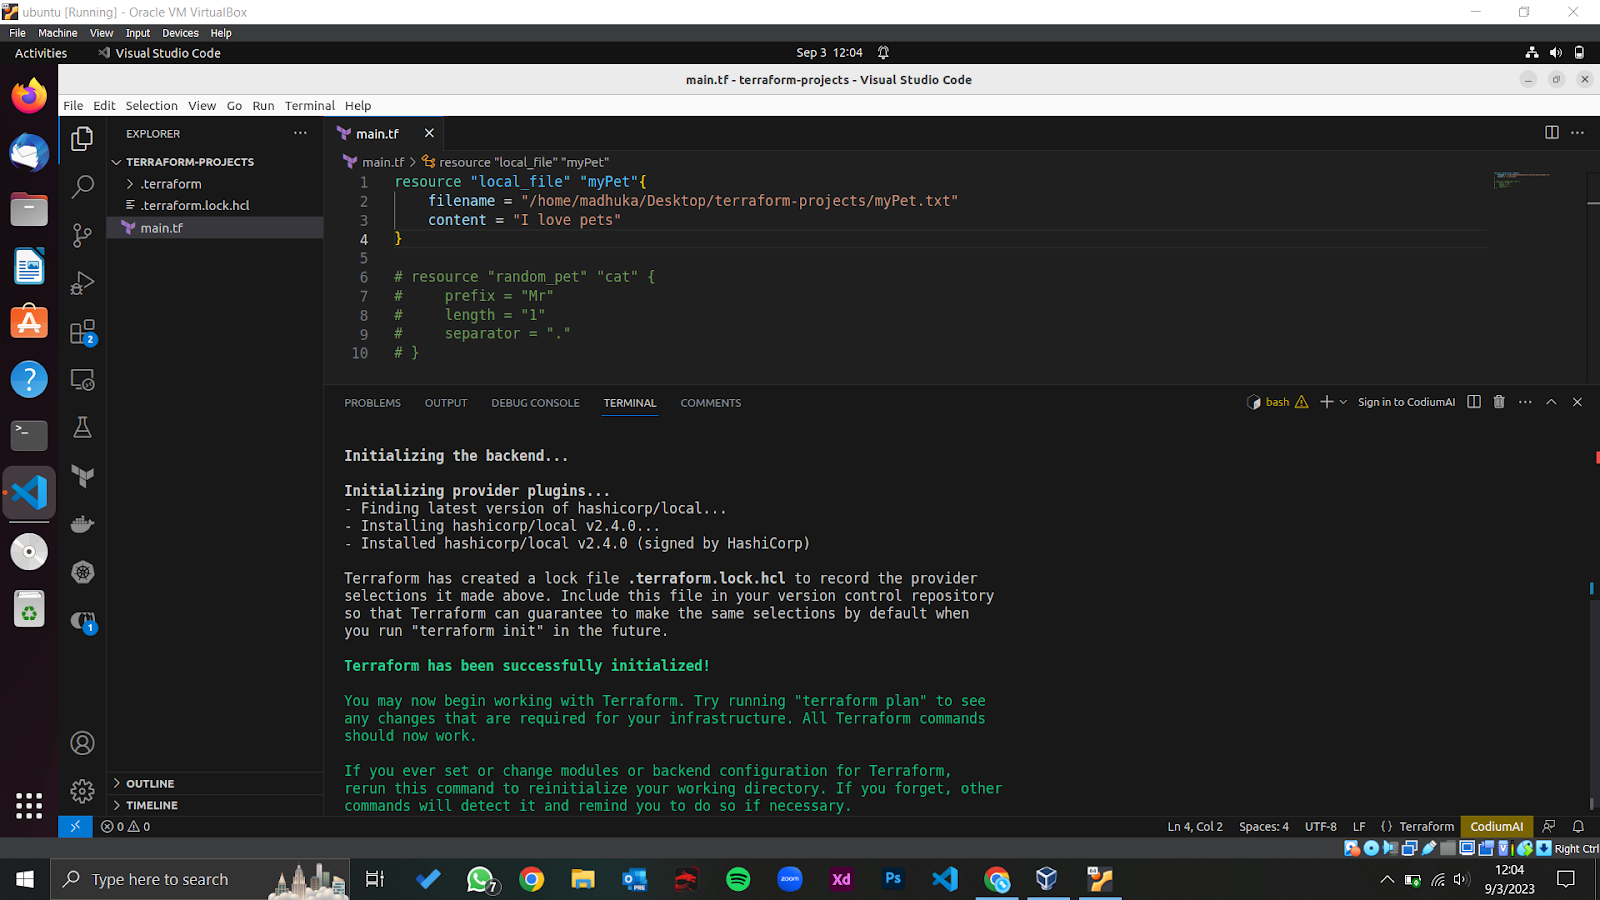
Now, we can use the terraform plan command to create the execution plan. We can see an output like the one below.
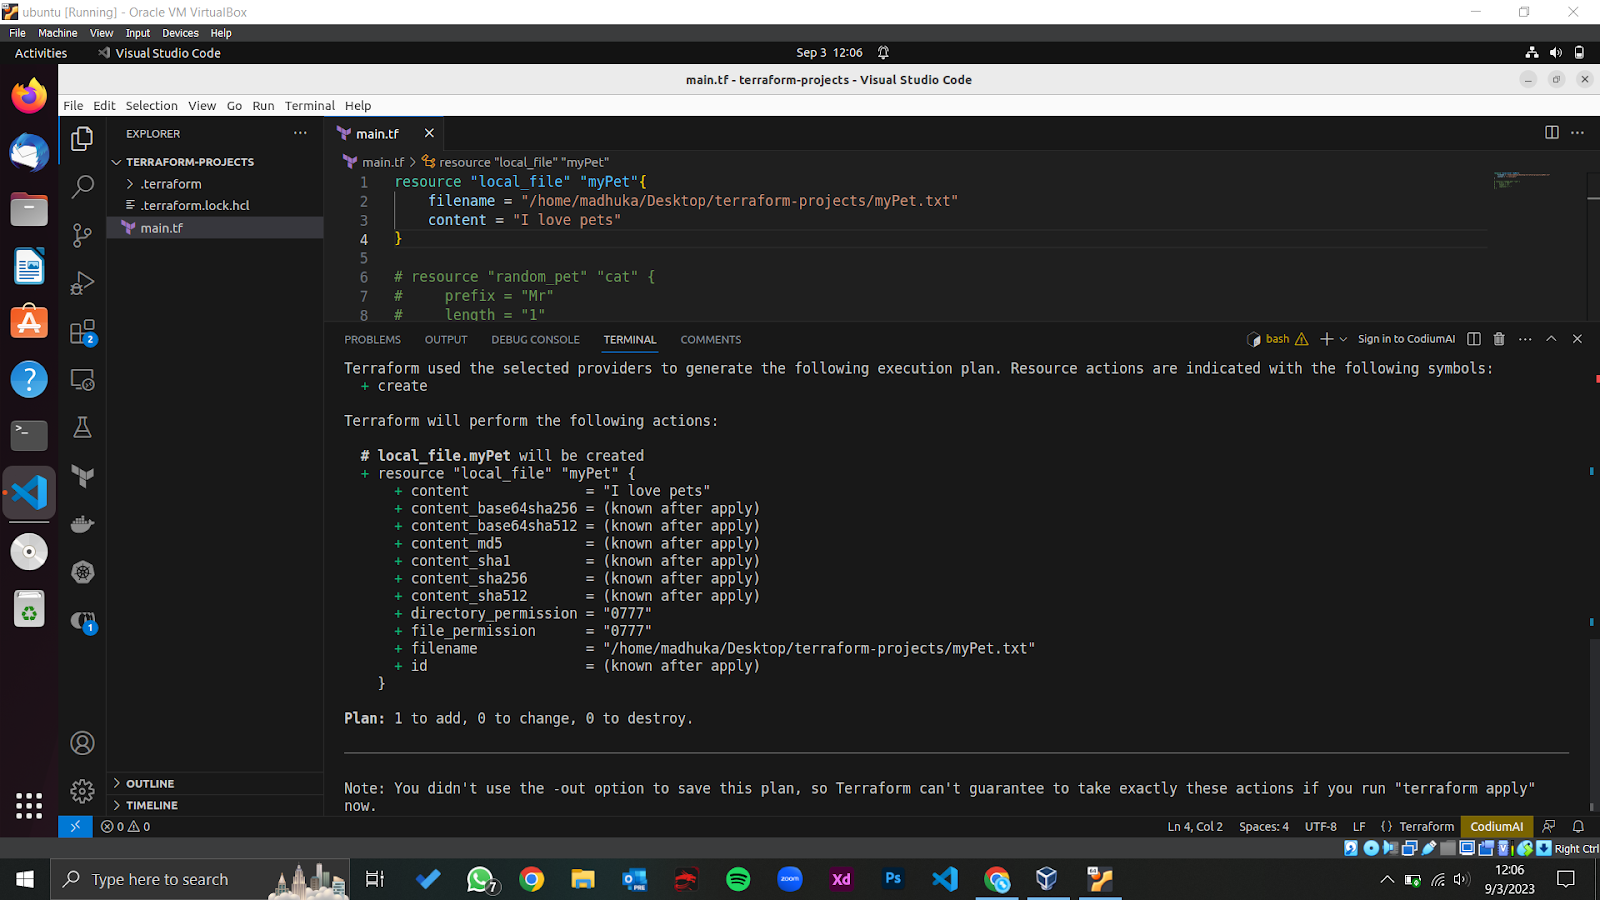
If we carefully review this, we can see a summary of Terraform’s changes (1 resource will be created, and 0 resources will be changed or destroyed).
The changes meet our intentions, so we can now perform the Terraform apply command.
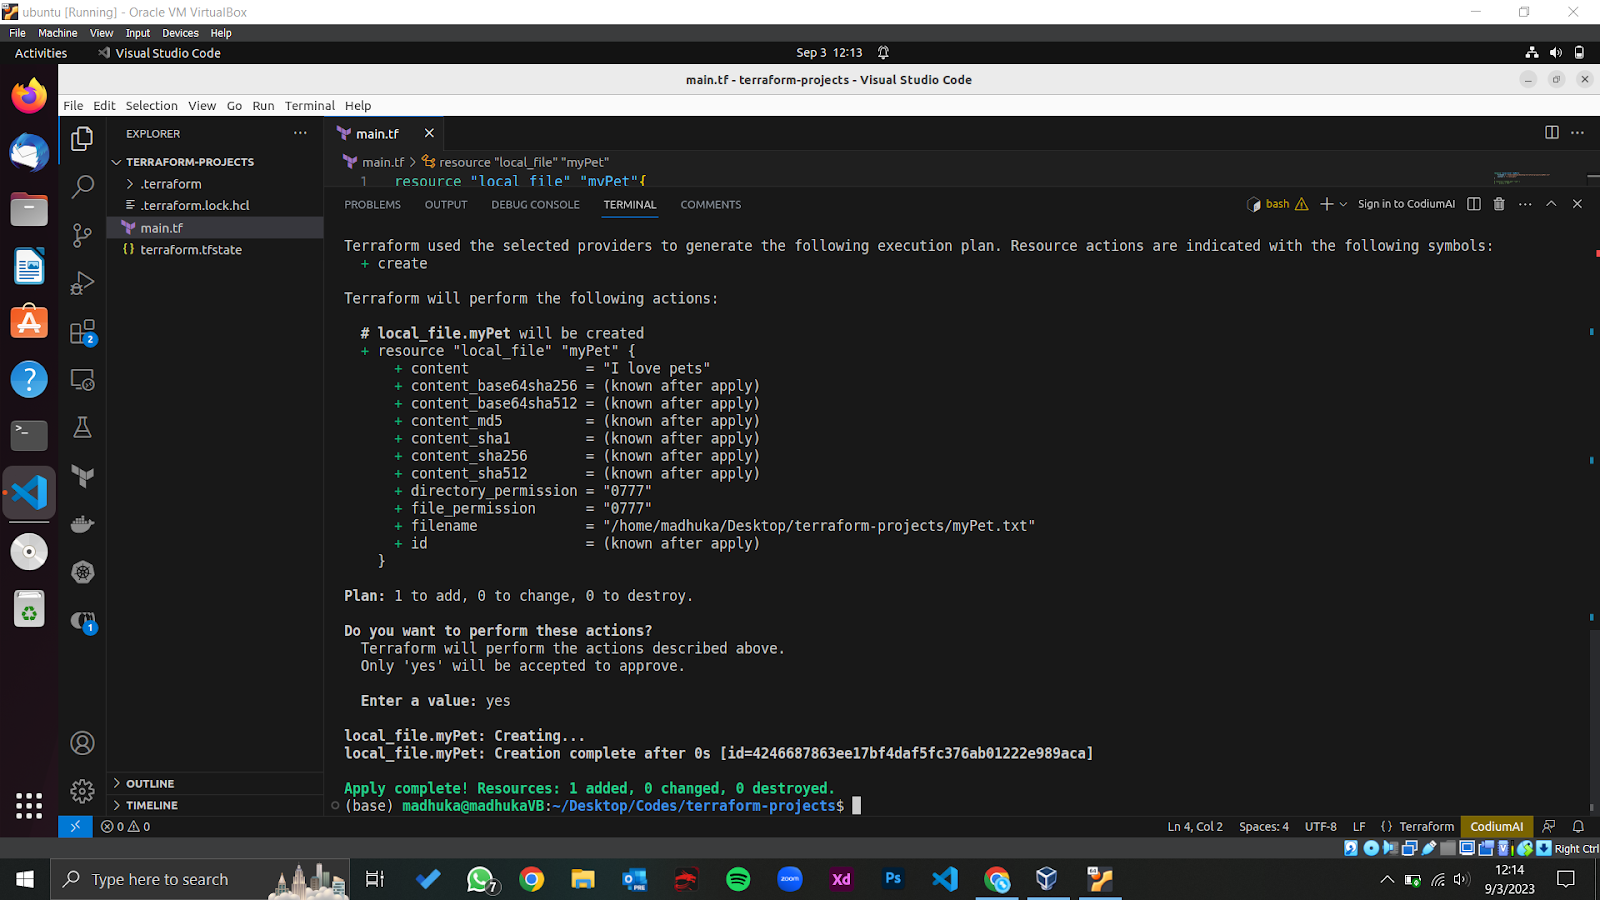
We have successfully created the ‘myPet.txt’ file, and inside it, we can see the content we wrote (‘I love pets’).
Example 2
Let’s say that we do not need the ‘myPet.txt’ file. Instead, we want to create a new file called ‘johnInfo.txt’, which contains our friend John Doe’s information. The information includes the name, age and country. So,
- Current state – ‘myPet.txt’ file with the content of ‘I love pets’ inside the ‘MyText’ folder.
- Desired state – Remove the ‘myPet.txt’ file and add ‘johnInfo.txt’, which includes John’s Name, Age and Country.
Let’s modify the previous configuration file as below.
resource "local_file" "johnInfo"{

filename = "/home/madhuka/Desktop/terraform-projects/johnInfo.txt"

content = "Name: John Doe, Age: 35, Country: USA"

}
As you can see, there is no resource block for the ‘myPet’ resource because we do not need it. Instead, we have added the ‘johnInfo’ resource block with the necessary attributes and values.
Let’s run the Terraform init command to initialize the Terraform Configuration. We can see the output below.
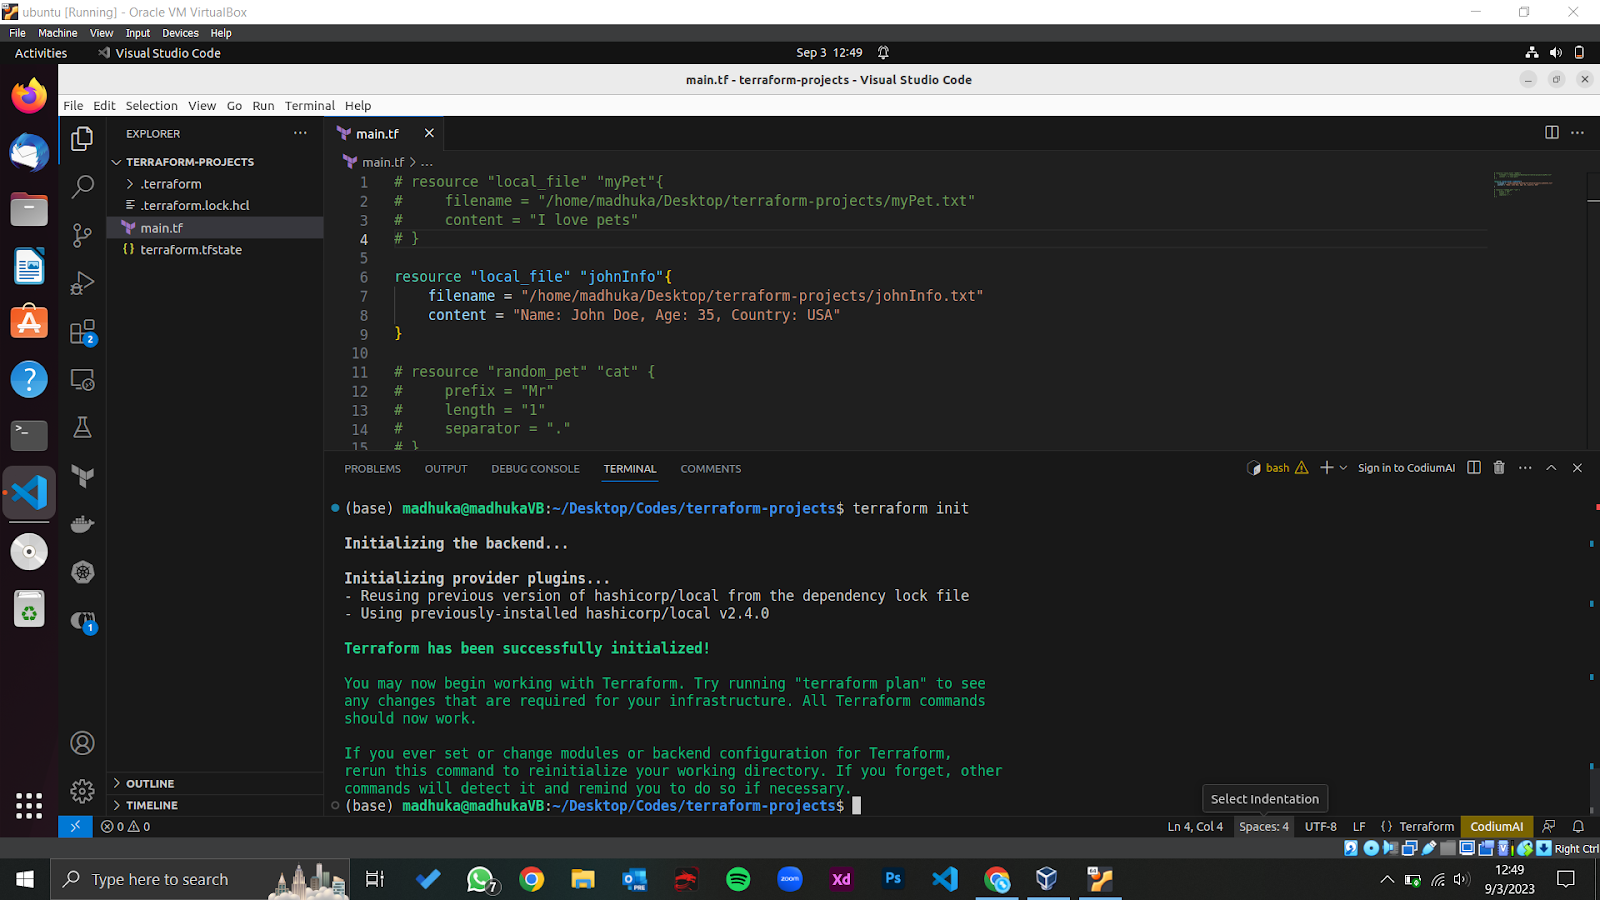
As you can see, it’s slightly different from the previous one. It is because we are using the same provider (local_file) that we used in the last example. So, it will not download anything new because it already contains all the necessary provider plugins.
Next, we can generate the execution plan using the Terraform plan command.
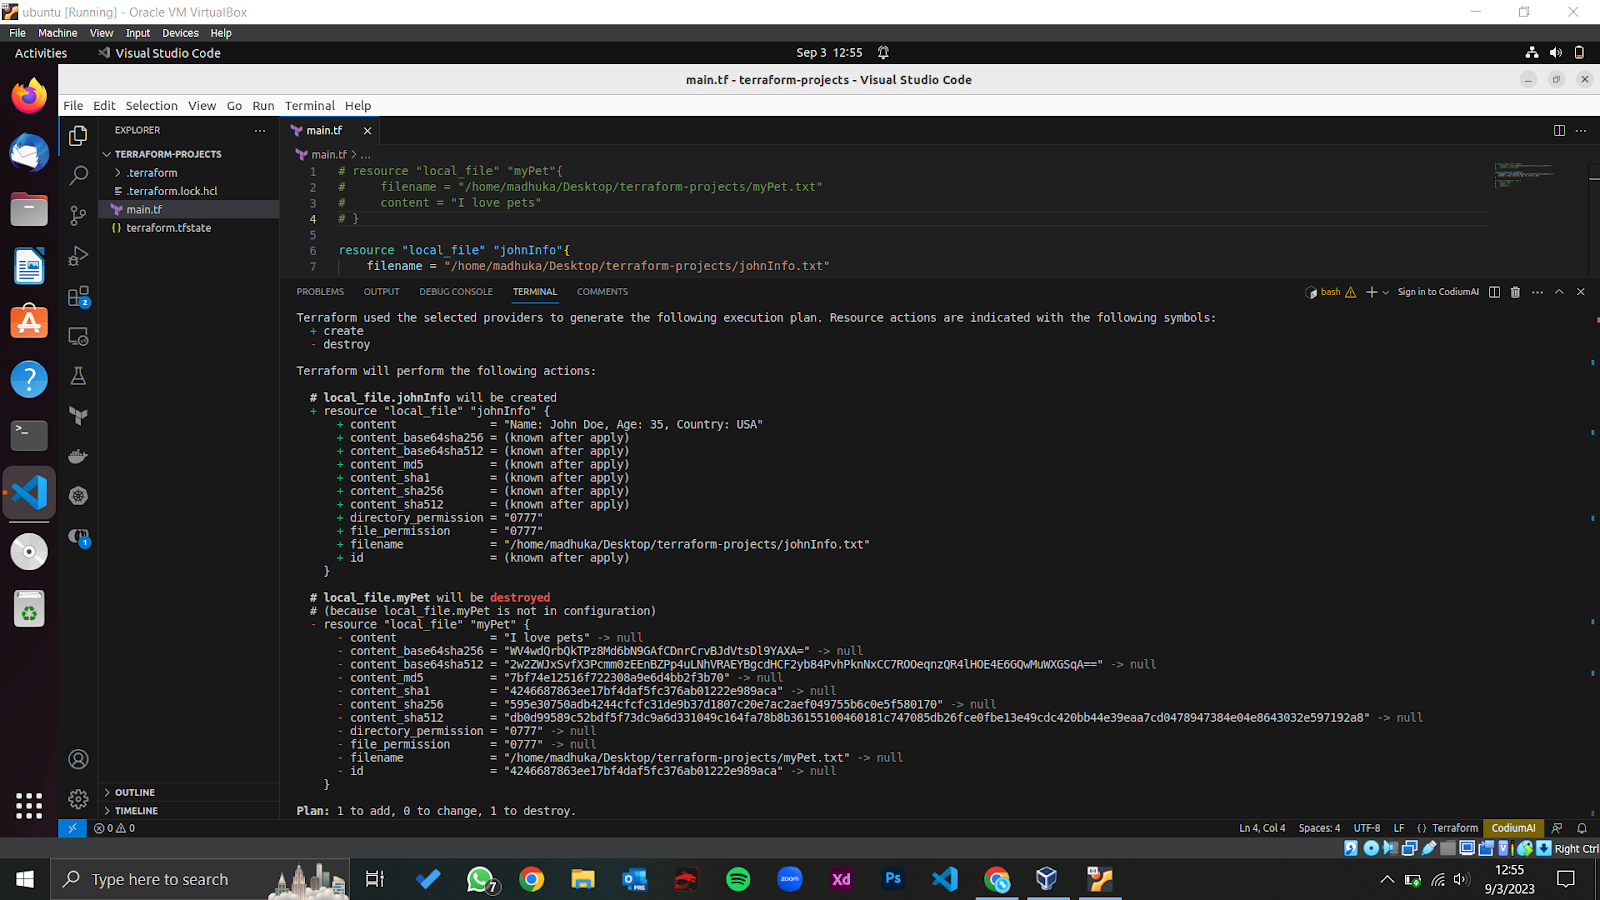
As in the above output, we can see the changes that will be made. It will destroy the ‘myPet’ resource and create the ‘johnInfo’ resource inside the directory.
Now, we can apply the changes with the Terraform apply command.
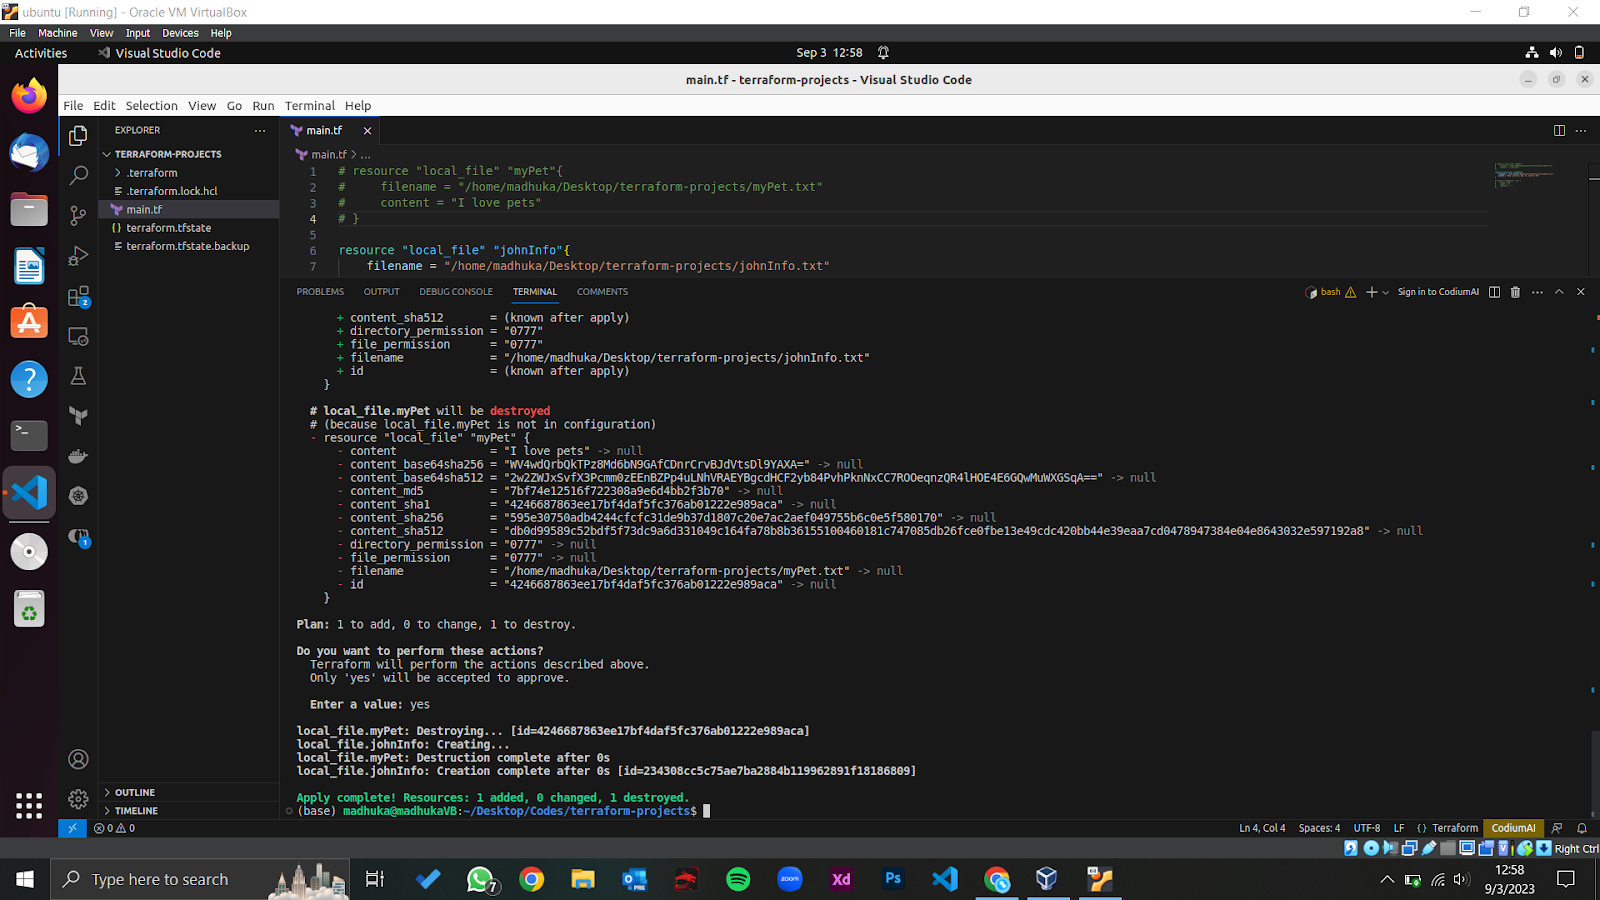
Now, if we navigate to the ‘MyText’ folder, we can see the ‘johnInfo.txt’ file and no file named ‘myPet.txt’.
Conclusion
When using Terraform, the plan command creates an execution plan that we can review and understand the changes defined in configuration files that will be made to our infrastructure. By doing so, we can identify and fix potential errors or issues when applying the changes. In this article, we learned about the terraform plan command with a step-by-step guide on how to run a terraform plan command successfully, along with some examples. By following these steps, we can ensure that our infrastructure changes will be made in a more controlled and expected way.