Cortana is the PDA (Personal Digital Assistant) or VA (Virtual Assistant) application developed by Microsoft. It was designed for the Windows phones and all the devices that contain Windows OS. Till now, it comes pre-installed on every Windows 8.1, Windows 10, and Windows 11 edition.
Removing Cortana from Windows is not easy. Because uninstalling Cortana from Windows can affect other services such as Windows Search and Start menu. However, after the Windows 10 update of May 2020, Microsoft made it a stand-alone application. Meaning that it no longer ties in with the Microsoft Search and Start menu. So uninstalling Cortana will not affect other Windows Services.
Tip: Upgrading your Windows to Windows 11 will also get you rid of Cortana because Microsoft has almost pulled out Cortana from it.
This article will present the procedure to remove the Cortana application using PowerShell.
How to Uninstall Cortana Using PowerShell?
In Windows, Cortana can be uninstalled using Local Group Policy Editor, Registry Editor (Regedit), Command Prompt, Windows Settings, and Powershell. But, in this very guide, we will demonstrate the removal of Cortana using PowerShell. For standard users, it is a lot easier and there is less risk in removing Cortana using PowerShell rather than removing it with the Registry Editor application.
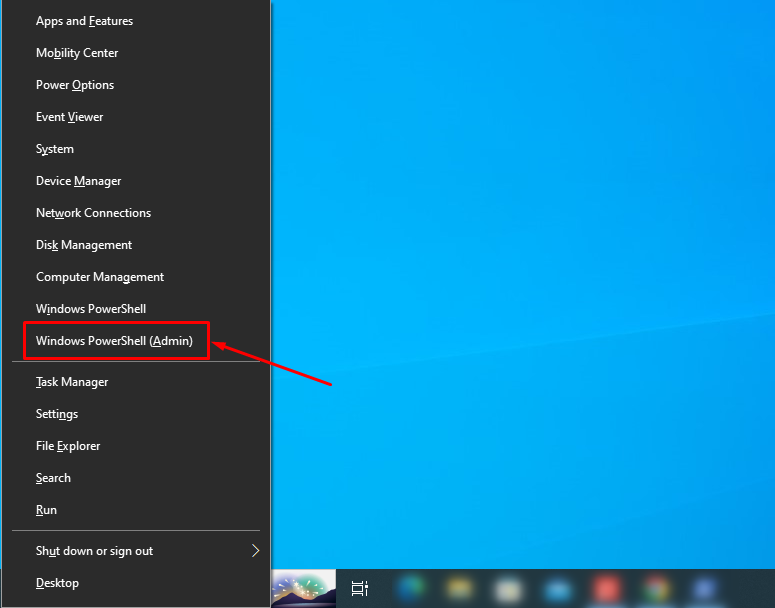
Step 1: Press Windows + X and select Windows PowerShell (Admin):

Step 2: Type the mentioned code in the console and hit Enter:
Get-AppxPackage -allusers Microsoft.549981C3F5F10 | Remove-AppxPackage
Note: There is no need to reboot the PC after removing Cortana.
Bonus Tip: How to Install Cortana App Using PowerShell?
If there is no Cortana installed on your Windows, or you want to re-install it after removing it. Then, Cortana can be installed on Windows 10/11 manually using PowerShell. Check the mentioned steps to install Cortana using PowerShell.
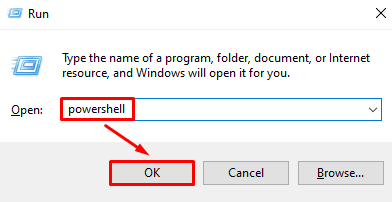
Step 1: Press the Windows key + R to launch the Run app:
Step 2: Type PowerShell and press Ctrl + Shift + Enter shortcut to run PowerShell as an Administrator:

Step 3: Type the mentioned code in the PowerShell console and press Enter button:
Get-AppxPackage Microsoft.Windows.Cortana | Foreach {Add-AppxPackage -DisableDevelopmentMode -Register "$($_.InstallLocation)\AppXManifest.xml"}
Bonus Tip: How to Disable Cortana on Windows 10/11
Instead of removing the Cortana application from Windows, it can be disabled. To disable the Cortana on Windows, check the mentioned steps.
Step 1: First, press the Ctrl +Shift + Esc shortcut keys to launch the Task Manager application:
Step 2: Move to the Startup Apps tab:
Step 3: Select Cortana and click Disable:

Note: The Microsoft OneDrive is supposed to be Cortana here. Because I have uninstalled Cortana in the previous methods.
Conclusion
Press Windows + X and select Windows PowerShell (Admin). Type Get-AppxPackage -allusers Microsoft.549981C3F5F10 | Remove-AppxPackage code and hit the Enter button. To install Cortana, simply, execute the Get-AppxPackage -AllUsers Microsoft.549981C3F5F10 | Add-AppPackage code in the PowerShell console. Read the above guide to check the practical way of removing the Cortana application from Windows using PowerShell.