Creating partitions on Windows 10 is a great way to organize your data and keep your system running smoothly. With the help of built-in tools, you can easily create partitions in just a few simple steps. This guide will lead you through the steps of partition creation on Windows 10.
How To Create Partitions on Windows 10?
You can utilize built-in tools such as Disk Management or Command Prompt to create partitions. Here’s a step-by-step guide to creating partitions in Windows 10:
Step 1: Identify Your Disk
Prior to commencing the process, you must determine which disk you intend to partition.
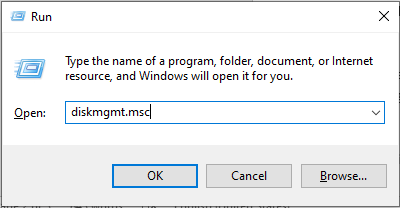
To achieve this, open the Disk Management window by searching for it in the Start Menu or by pressing Windows + R and entering diskmgmt.msc.

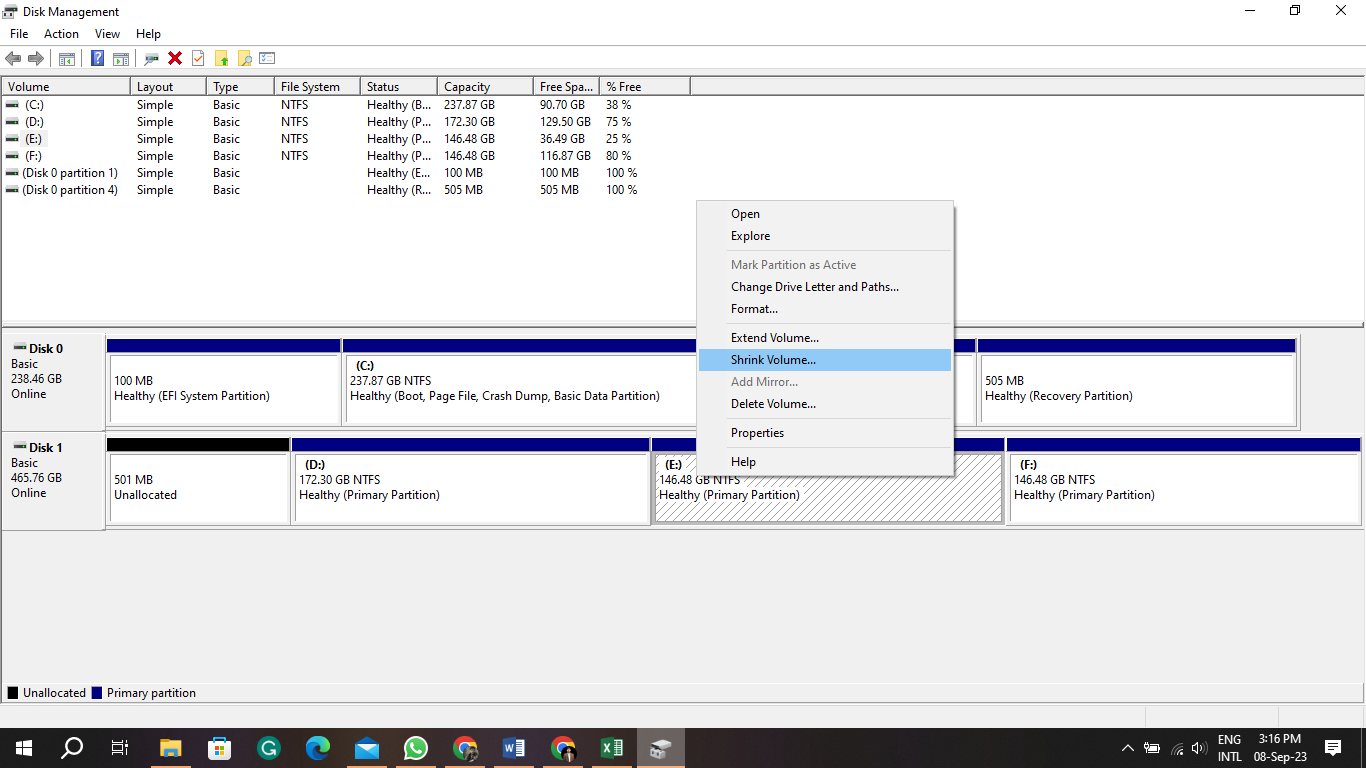
This action will display a list of the accessible disks on your computer. After identifying the desired disk for partitioning, right-click on it and opt for “Shrink Volume” from the menu.

Step 2: Shrink the Volume
The next step is to shrink your disk volume. This will create a new, unallocated space that can be used for your partitions. Upon receiving the prompt, input the desired amount of space you wish to reduce your volume by.
This should be at least 1 GB in order to ensure that the partitions will function properly. After inputting the specified amount, click on “Shrink” and await the completion of the process.
Step 3: Create Your Partitions
Once your disk has undergone the shrinking process, right-click on the freshly generated unallocated space, and choose “New Simple Volume.”

This action will initiate the New Simple Volume Wizard, which will provide step-by-step guidance for partition creation.
Adhere to the on-screen instructions to craft your partitions and subsequently click “Finish” to conclude the procedure.
Step 4: Format Your Partitions
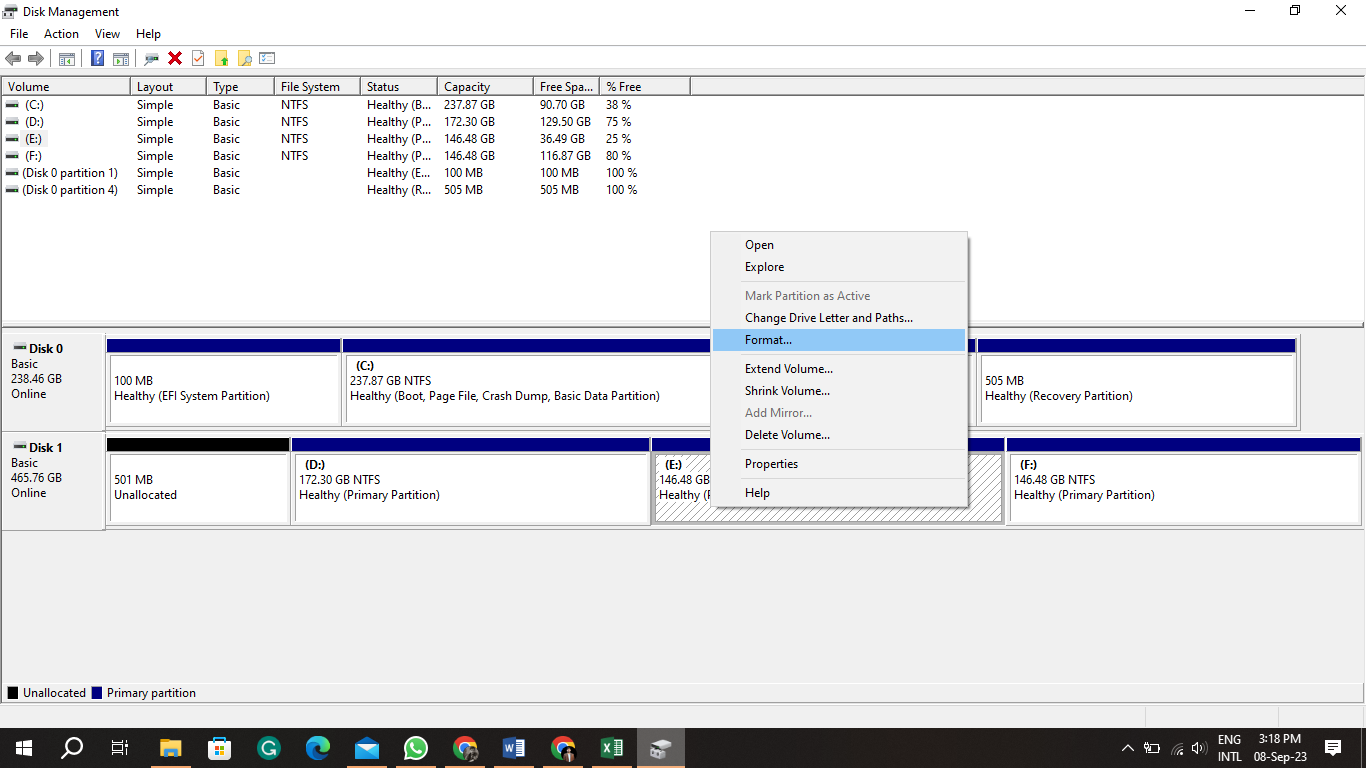
The last step is to format your partitions. To accomplish this task, right-click on each partition and then choose “Format” from the menu.

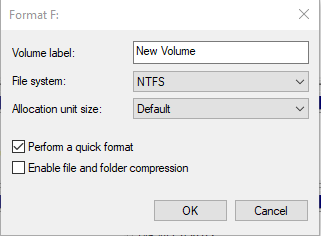
When prompted, enter a name for your partition and then click “OK”. Lastly, pick the preferred file system, whether NTFS or FAT32 and subsequently click “Start” to commence the formatting operation.

Once complete, your partitions will be ready to use.
Partitioning your disk can enhance data management and organization efficiency while also offering an added layer of security through the creation of password-protected partitions separate from the primary system drive. By adhering to these instructions, you should now possess a clearer comprehension of how to establish partitions on Windows 10.
What Are the Benefits of Partitioning?
Partitioning your disk can have a number of benefits, including improved performance, better organization, and increased security. The improved performance comes from having multiple drives that can be used for different tasks, such as running programs or storing data. This helps ensure that your system is running as efficiently as possible.
Additionally, partitioning can help you keep track of your files and folders more easily. By creating separate partitions for different types of data (e.g., photos, music, documents), it’s easier to find what you need without having to search through a giant mess of files. Finally, since partitions are separate from the main system drive, you can create password-protected partitions for added security.
Conclusion
Creating partitions on Windows 10 is a great way to manage and organize your data more efficiently. This instructional manual ought to have imparted a more enhanced comprehension of the process of partition creation within the Windows 10 operating system. From there, you can enjoy the benefits of improved performance, better organization, and increased security.