Screensavers have been a staple of personal computing for decades, serving as both a way to prevent image burn-in on monitors and as an entertaining diversion while the computer is idle. However, on occasion, Windows 10 users may encounter an issue where their screensaver fails to activate properly, causing frustration and potentially putting their monitor at risk of developing burn-in.
Within this blog post, we shall delve into typical reasons behind this concern and present remedies to assist in resolving screensaver problems on your Windows 10 system.
How to Fix Windows 10 Screensaver Not Working?
The below-listed methods can help you troubleshoot and fix the “screensaver not working” problem:
- Check Your Settings
- Scan for Malware
- Use the Command Prompt
- Disable Background Programs
1. Check Your Settings
The most obvious fix to the screensaver not working issue is to simply double-check your settings.
To do so, navigate to your personalization options by right-clicking on your desktop and selecting ‘Personalize.’

From there, select ‘Lock screen’ in the left-hand menu.

Scroll down to the ‘Screen timeout settings’ section.

Make sure the box labeled ‘On battery power, turn off after:’ is set to the desired time. If this is set to ‘Never’ already, try setting it to a specific amount of time and see if the screensaver begins working again.

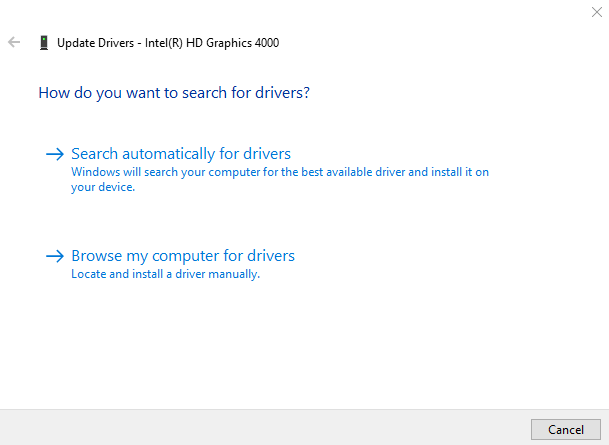
Occasionally, problems with your screensaver can be attributed to outdated or improperly installed display drivers.
To update your drivers, press the Windows key + X, and then choose ‘Device Manager’ from the menu that appears.

Locate your display adapters, right-click on them, and opt for ‘Update Driver.’

You may be given the option to automatically search for updates online, or you may have to manually download and install them from the manufacturer’s website.

2. Scan for Malware
Sometimes the issue with your Windows 10 screensaver not working could be caused by a virus or malware infecting your system. Execute a comprehensive system scan utilizing your favored antivirus software to identify and eliminate any potentially harmful software that could be responsible for the issue.
3. Use the Command Prompt
Using the command prompt can be a more technical solution, but often it can solve issues that other methods can’t.
To fix the screensaver not working issue using the command prompt, type cmd in the Windows search bar and select ‘Command Prompt (Run as administrator).’

Type in the following command and hit enter:
sfc /scannow
This action will trigger a system file checker, which will perform a scan of your system to identify any damaged or absent files and make an effort to replace them.

4. Disable Background Programs
Sometimes, other programs running in the background can cause your screensaver to fail to activate properly.
To fix this issue, try disabling any unnecessary programs running in the background by pressing Ctrl + Shift + Esc to open the Task Manager.

Select any programs that you don’t need and click ‘End Task’ to close them.

If all attempts prove unsuccessful, do not hesitate to seek the expertise of professional IT or computer repair services for further assistance.
Conclusion
Windows 10 Screensaver Not Working can be fixed using different methods, such as using System Settings, Scanning for Malware, using Command Prompt, or Disabling Background Programs. Encountering difficulties with your Windows 10 screensaver not functioning is a prevalent problem, yet it can be effectively addressed through diligent troubleshooting. Within this blog post, we have examined some of the frequently encountered causes of this problem and provided solutions to assist in resolving it.