Few days ago, VMware Workstation 10 was released. VMware Workstation is a virtualization software that lets you run multiple operating systems using a single host machine. With this software, you can run guest machines such as Windows XP, Vista 7 and 8 though 8.1. You can also run Linux operating systems, including Ubuntu.
Because we use VMware Workstation to run some guest machines, we had to upgrade VMware tools on all of them. It is very important that you install VMware Tools in the guest operating system. That’s because the tool provides required support for shared folders, drag and drop operations, better graphic and improved performance.
This brief tutorial is going to show you what we did to install and upgrade all our guest machines that run under VMware Workstation. Other benefits that the tool provides is synchronization of time between the guest machine and the host, grabbing and releasing of the mouse, coping and pasting between the guest and hose machines and more.
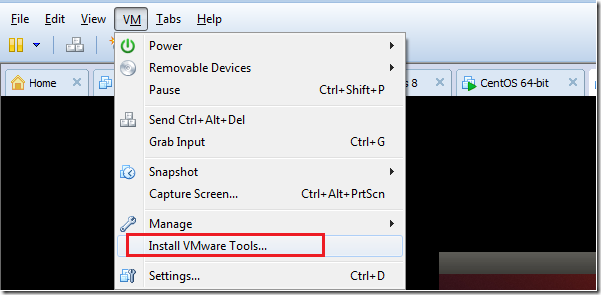
To get started, open VMware Workstation and select the Ubuntu guest machine and start it or turn it on. Next, click VM –> Install VMware Tools… from the host menu.
For you information, I am running Ubuntu 13.10 (Saucy Salamander) but this method may work with previous versions.
A virtual CD/DVD Rom should be mounted with VMware Tools archive. Next, run the commands below to extract the package to the temp directory.
tar -xvf /media/$USER/"VMware Tools"/VMwareTools*.gz -C /tmp

Next, run the below commands to begin the installation.
sudo /tmp/vmware-tools-distrib/vmware-install.pl

During the installation, just press the Enter key to accept the defaults when prompted. The tool will install itself along with any required packages.
When it’s done, restart your computer and begin enjoying your machine.
