If you’re a webmaster or blogger managing a website or blog and you’re not using FileZilla, then you’re probably doing it wrong. That’s because FileZilla FTP Client has become the most popular FTP application to manage websites for webmasters and blogger alike. This brief tutorial is going to show you one simple trick – and that is to choose the default file editor for FileZilla.
By default, FileZilla will try to use the system file editor which may not be your favorite. Like in Windows, FileZilla will try to use notepad which is an awful editor for managing your blog or website scripts.
So, if you’ve just installed FileZilla, let me show you how to configure the default editor to use when opening PHP, CSS, HTML, and other files automatically.
Before we continue, let’s first install FileZilla if you’re haven’t already done so. To install it in Ubuntu, run the commands below.
sudo apt-get install filezilla

Windows users can get it @ https://filezilla-project.org/download.php
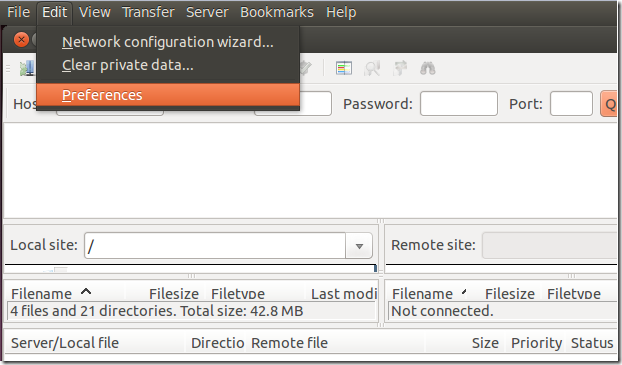
After installing it in Windows or Ubuntu, go and open it, then select Edit –> Preferences or Settings for Windows systems.


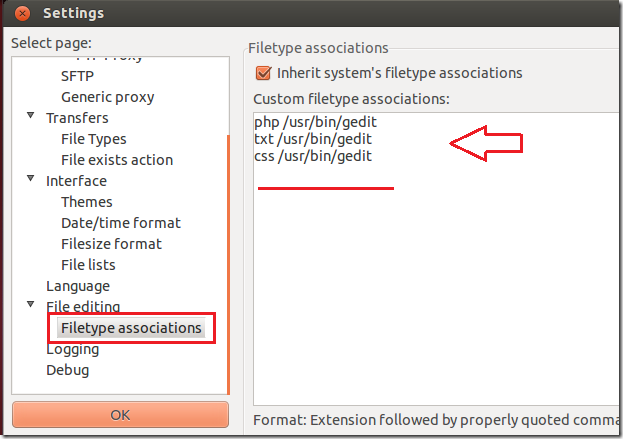
Next, scroll down to Filetype association and manually type the filetype extension and the path to the editor as shown below. For example, if you want gedit or another editor to be the default, type the filetype extension followed by /usr/bin/gedit.
html /usr/bin/gedit


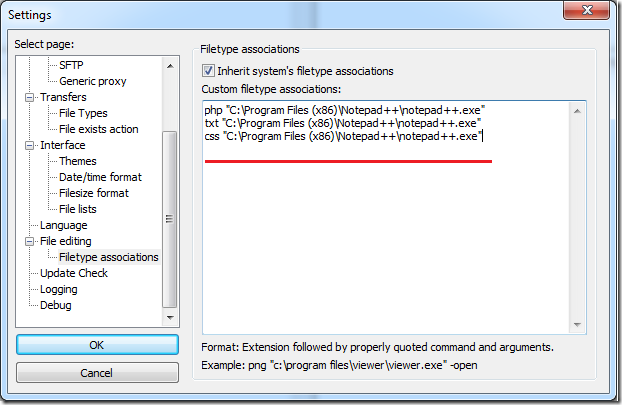
For Windows users, it will look like this below. The example below makes notepad++ the default editor for FileZilla.


When you’re done, click OK and that’s it!

Enjoy!


