Before making any drastic changes to your Windows 8 machine that made render it inoperable, you should create a restore point first. For example, if you want to dual-boot Windows 8 with another operating system, or install some complicated software that made change your computer settings, you should create a restore point.
Restore points are snapshots of your computer’s system files. You use restore points to restore your computer’s system files to an earlier point in time. So if you messed up your computer while installing a piece of software or driver, you will easily be able to go back to when your computer was still in good health.
And although Windows 8 automatically creates restore points or snapshots by default, it always good to create one just before making changes to your computer’s settings. This allows you to go back to the most recent system image in the event that you want rollback changes you made.
This brief tutorial is going to show you how to easily create restore points in Windows 8 machines.
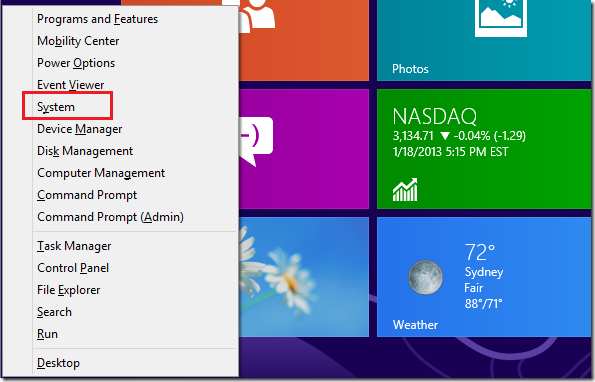
To get started, press Windows Key + X keys on your keyboard to open Windows 8 Tool menu. When it opens, select ‘System’
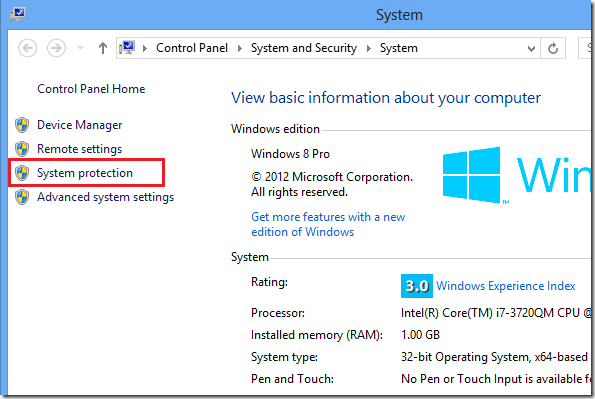
Next, select ‘System protection’ as shown below
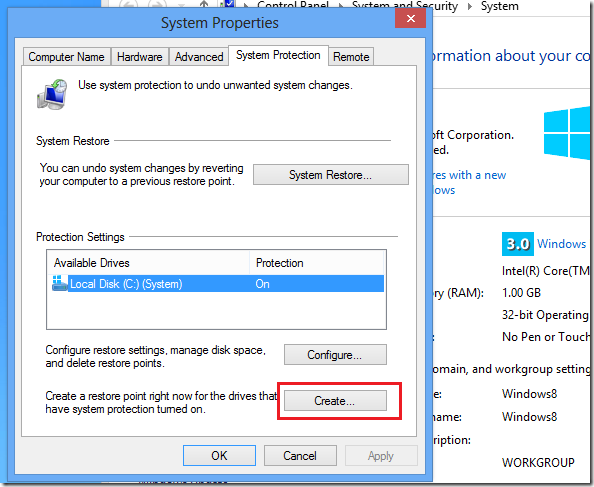
Finally, select the Local Disk (C:) (System) and click ‘Create’ as shown below.
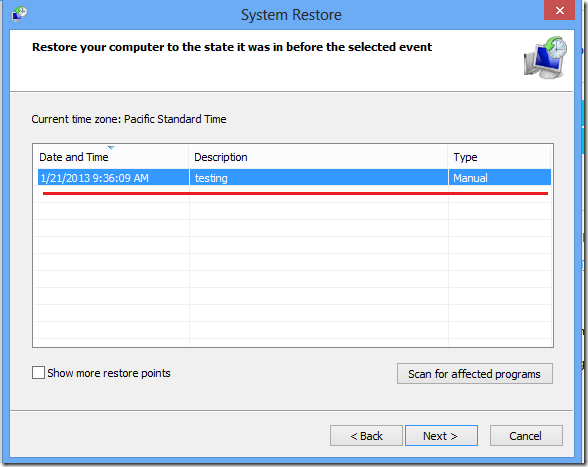
You will be prompted to provide a name for the snapshot. Type one continue to create the restore point. In the event something bad happens to your machine, you can go back and restore it to before you started machine changes to it.
Enjoy!


