Windows 8 comes with several tools that help you protect your files and folders by backing them up automatically, but one feature that’s most useful is File History. The new File History can automatically backup all your documents, browser favorites, music and videos, desktop icons and more to either an external USB drive or a network location. It can also be started manually if you wish to do so.
If you want to protect yourself from accidental deletion and the lost of important documents, you may want to configure this feature to automatically backup your critically important folders to external devices like USB Flash drives or a network locations.
In this brief tutorial, I’m going to show you how setup File History in Windows 8 so that your documents are protected. This is important in that when your computer crashes, you can go back and restore the most recent files and documents from File History.
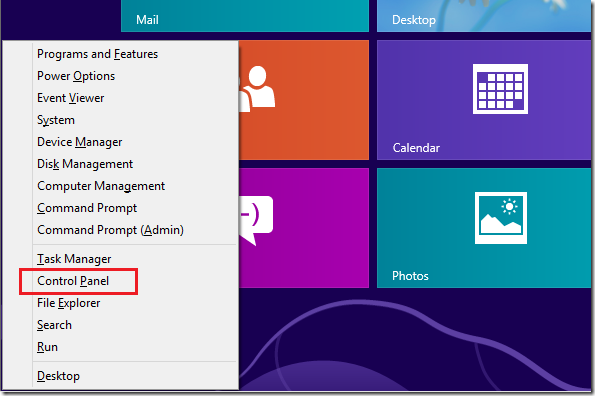
To get started with File History, insert an external USB drive into your computer then press the Windows Key + X to open Windows 8 Tools Menu. When that opens, select ‘Control Panel’ from the list.
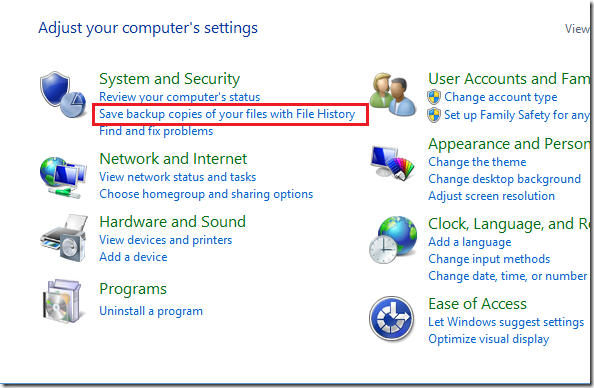
Then, choose ‘Save backup copies of your files with File History’ from the System and Security group.
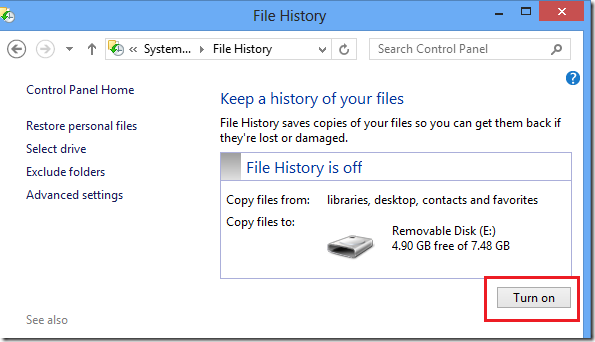
When File History opens, make sure the external device is visible, then click ‘Turn on’ to turn on File History.
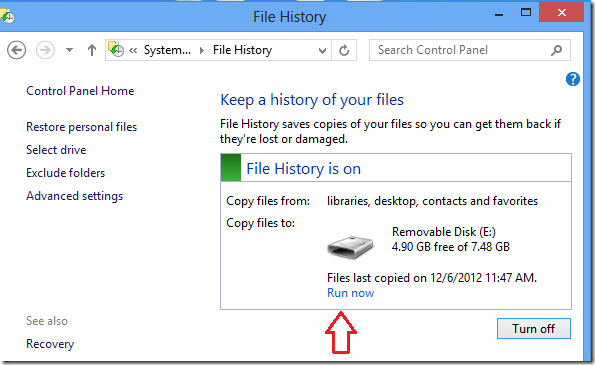
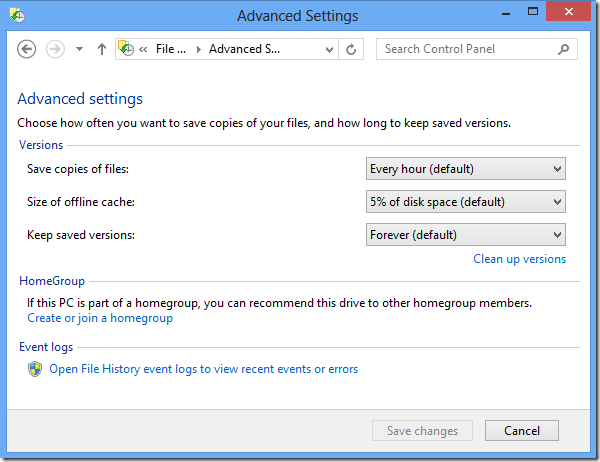
After turning on, you can choose to immediately run it to begin backing up your files. It is also configured to automatically backup your file at a chosen time and date. To change the backup time and date, click ‘Advanced settings’ from the left.
On the advanced settings screen, choose how frequently you want to backup your data and how long to keep it. When you’re done, click Save.
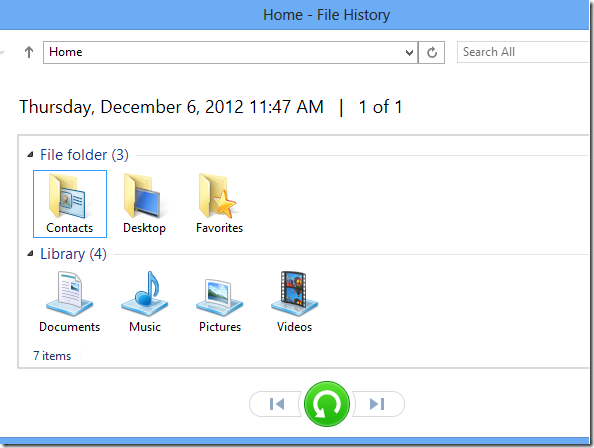
That’s it. To restore your data in the event that it is missing or deleted, go back to File History and select Restore personal files on the left. Then click the restore button to restore the recent backup copies of all the files. You can choose which file to restore by selecting.
Enjoy!
