Once in a while you may have to setup static IP addresses on your systems if you’re not in a DHCP network environment. This brief tutorial is going to show you how to do that in Windows 8.
For example, you may want to test network connectivity between two systems that are not DHCP enabled, one being Windows 8, in that case you’ll have to setup a static IP address, netmask, and/or gateway for each system to communicate with the other. DHCP makes this easy in environment where it’s enabled. In environment where it’s not enabled, you must setup a static IP address in order to connect with other network devices.
In Windows 7 and prior, one could easily access the network adapter properties by going to the control panel and choosing network and internet group. You can do the same in Windows 8 but the process is a bit different since Windows 8 comes with a new start screen called Metro.
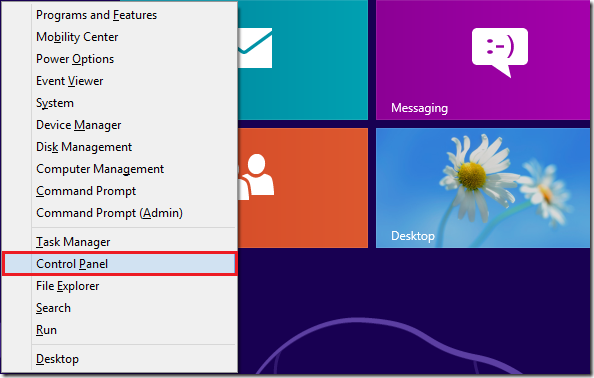
To get started, press the Windows Key + X on your keyboard to open Windows 8 Tools Menu. When it opens, select ‘Control Panel’
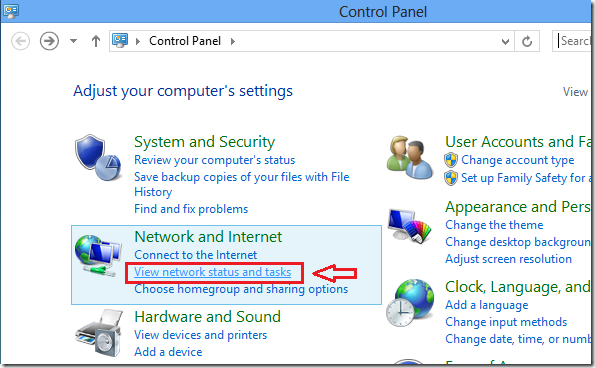
Next, select ‘View Network status and tasks’
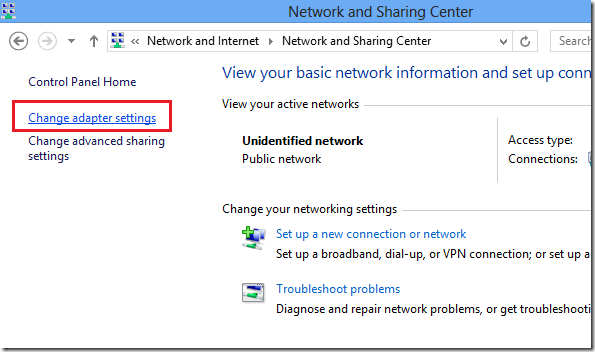
Then select ‘Change adapter settings’
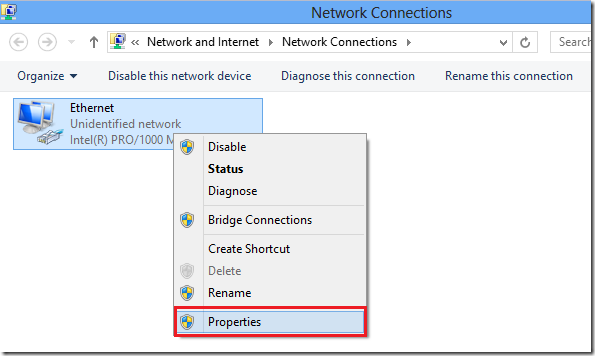
Next, right-click on the adapter you wish to change and select ‘Properties’
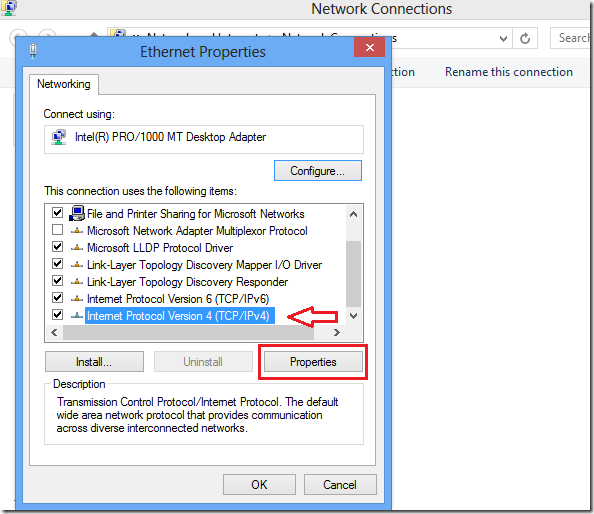
Then select the ‘Internet Protocol Version 4’ since that is still the most popular choice and click ‘Properties’
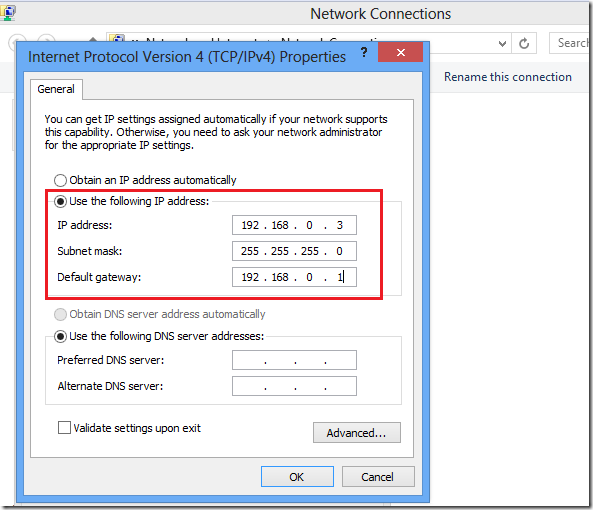
Finally, enter the IP address, Subnet Mask, and Default gateway for your network and click OK to save.
That’s it!
