This brief tutorial is going to show you how to mount or map network shares in both Windows 7 and Ubuntu 12.04 (Precise Pangolin). Ubuntu 12.04 and Windows 7 may be different in many ways, but are almost similar in many functions. Whatever tasks you perform in Windows 7 can also be done in Ubuntu, maybe in a different manner. So, today’s task is how to map network shares or drives in both Ubuntu 12.04 and Windows 7. If you’re coming from Windows 7 to Ubuntu 12.04, this guide will come in handy and help you understand Ubuntu better.
Objectives:
- Map / Mount Network Shares in both Windows 7 and Ubuntu 12.04
- Enjoy!
How to Map Network Shares in Windows 7
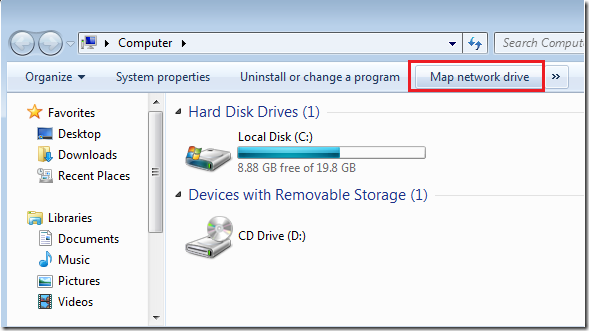
To map network shares in Windows 7, go to ‘Start – > Computer –> and select ‘Map network drive’ from the top menu shown below.
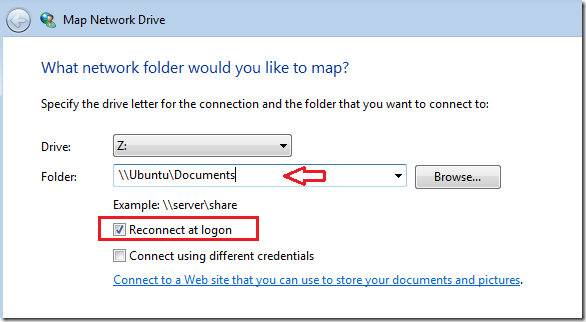
Next, choose a Drive letter and type in the folder path to the shared resource. The format to connect to network resources in Windows is shown below:
\\IP_Address or Hostname\share_name


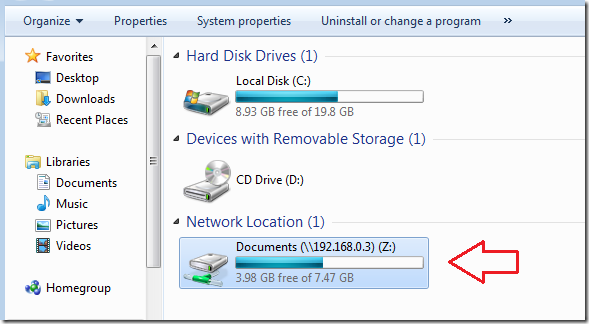
Finally, click Finish and you should see the resource mapped.


How to Map Network Shares in Ubuntu 12.04 (Precise Pangolin)
To map network shares in Ubuntu 12.04, press Ctrl –Alt – T on your keyboard to open Terminal. When it opens, run the commands below to edit fstab file.
sudo gedit /etc/fstab


Next, add the line shown below at the end of the file and save it. Replace <username> with your username, and <password> with your password.
//IP_Address or Hotname/Share_Name /home/<username>/Windows cifs username=<windows_username>,password=<windows_password>,uid=<Ubuntu_username>,defaults 0 0


After that, run the commands below to create a Windows mount point in your home directory.
mkdir ~/Windows

Next, run the commands below to install smbfs packages.
sudo apt-get install smbfs


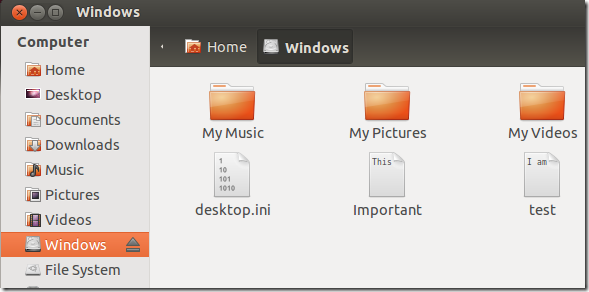
Restart your computer and you should see the shares.


