This brief tutorial is going to show you how to enable advanced file sharing in both Windows 7 and Ubuntu 12.04 (Precise Pangolin). Windows 7 and Ubuntu 12.04 may be different in many ways, but are almost similar in many functions. Almost everything you do in Windows 7 can be done in Ubuntu 12.04, and file sharing is one of them. File sharing enables you to provide full or limited access to resources based on user accounts. With this type of file sharing, especially on different systems, the user(s) must already have accounts on the local computer the resource is being shared. Without a local account, the user won’t be able to access local resources.
Objectives:
- Enabling Advanced Sharing in both Windows 7 and Ubuntu 12.04
- Enjoy!
How to Enable Advanced Sharing in Windows 7
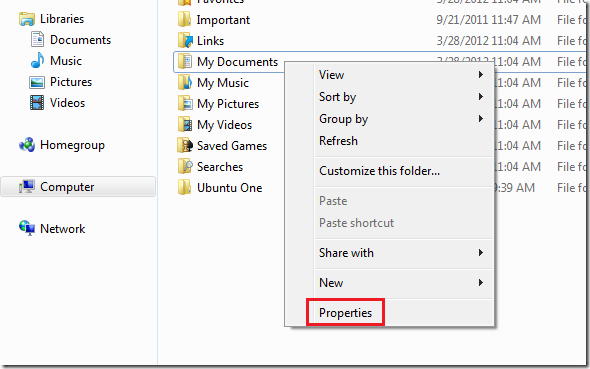
To enable advanced sharing in Windows 7, right-click on the folder you wish to share and select ‘Properties’
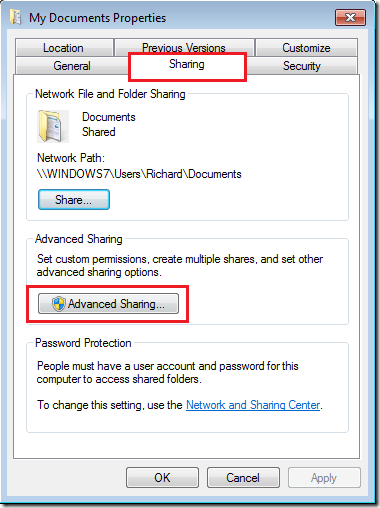
Next, select ‘Sharing’ tab and click ‘Advanced Sharing’
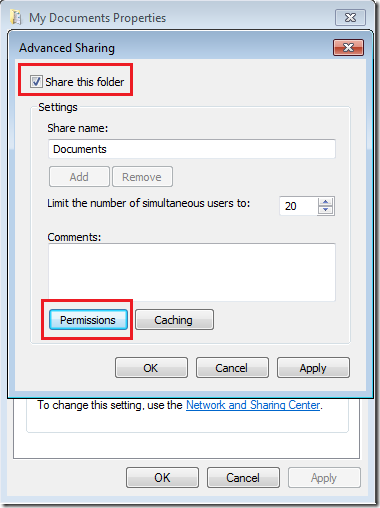
Then check the box to ‘Share this folder’
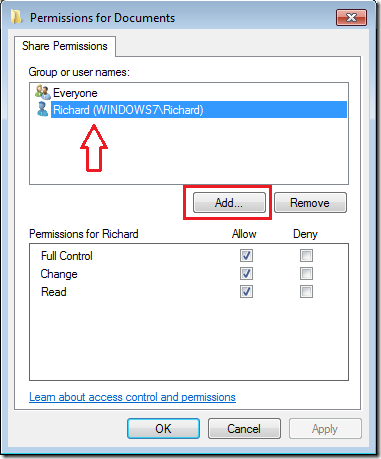
Next, click ‘Permissions’ button and choose the users you want to have access to the shared folder and click OK.
That’s it!
How to Enable Advanced Sharing in Ubuntu 12.04 (Precise Pangolin)
To enable advanced sharing, press Ctrl – Alt – T on your keyboard to open Terminal. When it opens, run the commands below to install system-config-samba package.
sudo apt-get install system-config-samba


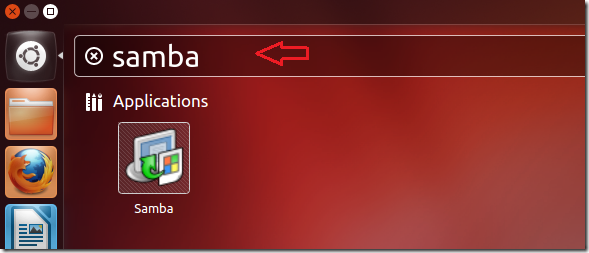
After that, go to Dash and open Samba.


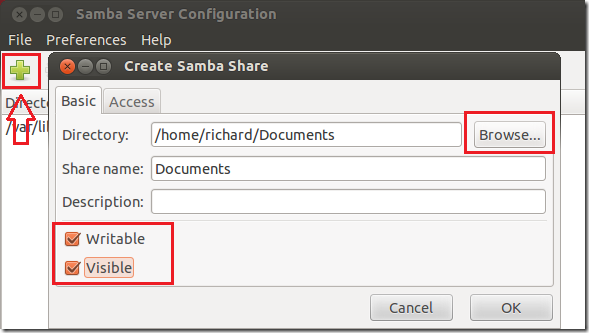
Next,  click the Add button (plus) , then browse to the folder to wish to share and open it. Then enable Write and Read permission on the folder.


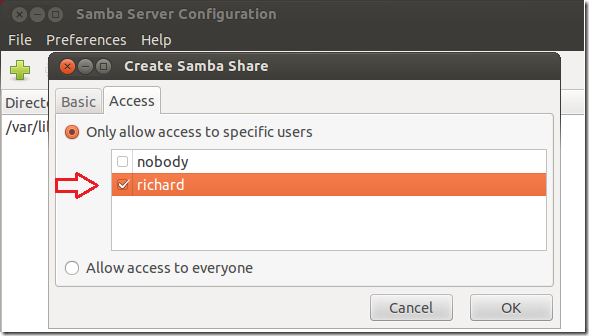
Next, select the ‘Access’ tab and enable the users you wish to have access to the shares and click OK.


After that, run the commands below for each user account to add it to Samba database. This will allow you to create new password for Samba. It’s always good to use the same password as your Ubuntu account.

sudo smbpasswd -a <username>


That’s it!

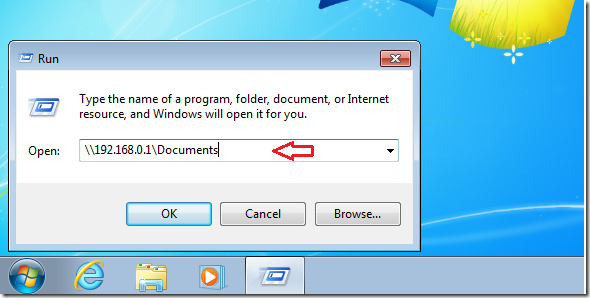
To access the shares from Windows 7, go to Start –> All Programs –> Accessories –> Run and type the share path as shown below.
\\IP Address or Hostname\shared_name


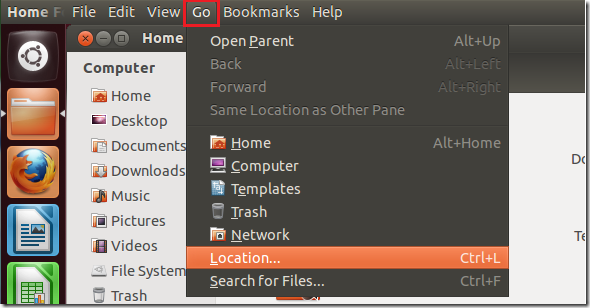
To access the shares from Ubuntu, press Ctrl – N to open Nautilus. When it opens, go to ‘Go –> Location..’


Then type the address as shown below:
smb://IP Address or Hostname/shared_name


Enjoy!
