Want to create and automatically mount Windows 7 shares in Ubuntu? Well, this brief tutorial is going to show you how to do just that. If you have both Windows and Ubuntu machines and you want to easily access files and folders on your Windows machine then file sharing is something you’ll want to enable. This tutorial assumes that both machines are on the same LAN (switch) and that both machines are able to ping (communicate with) each other. Without that, this is not going to work. This first step will be to create a share in Windows. Then we’ll install samba packages in Ubuntu and finally enable file shares.
Objectives:
- Create and automatically mount Windows shares in Ubuntu 12.04
- Enjoy!
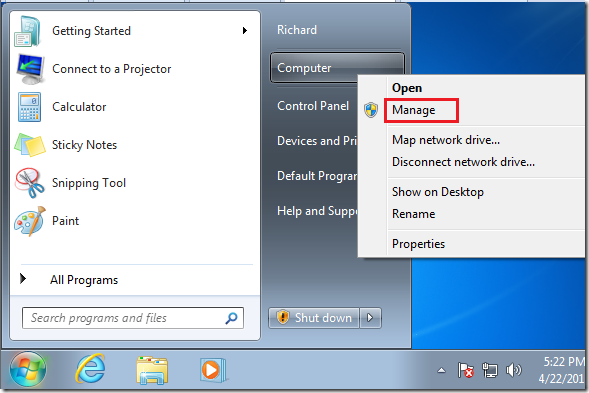
To get started, start Windows 7 and click Start –> right-click ‘Computer’ and select ‘Manage’
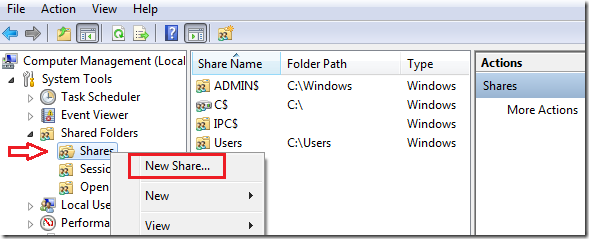
Then expand ‘Share Folders’ and right-click on Shares and select ‘New Share..’
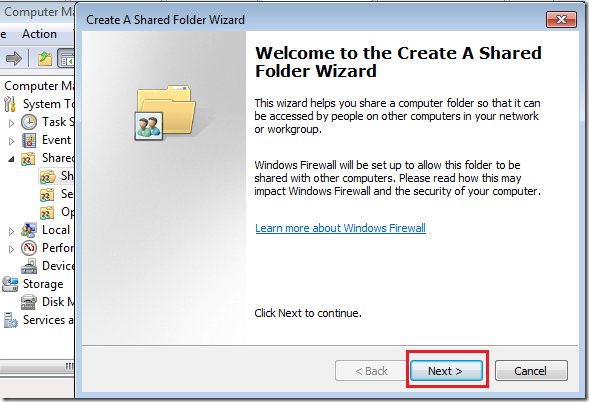
Click ‘Next’
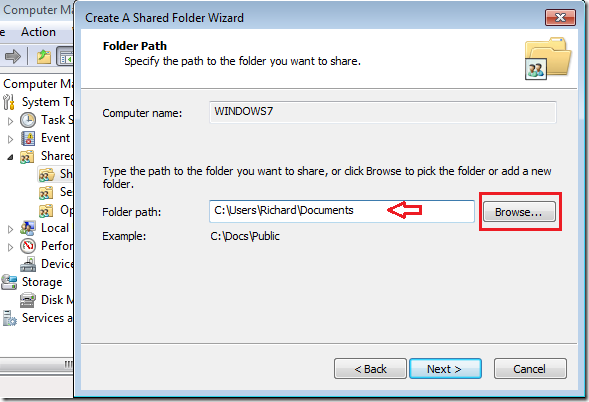
Then select the folder you wish to share by browsing to it. When done, click ‘Next’
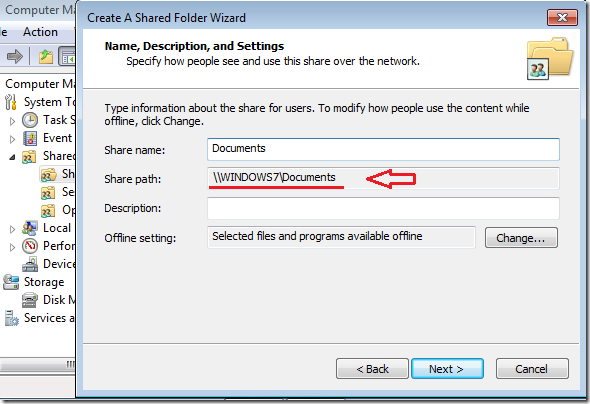
Next, take notes of the share path. This is how you can get to this share from a remote location.
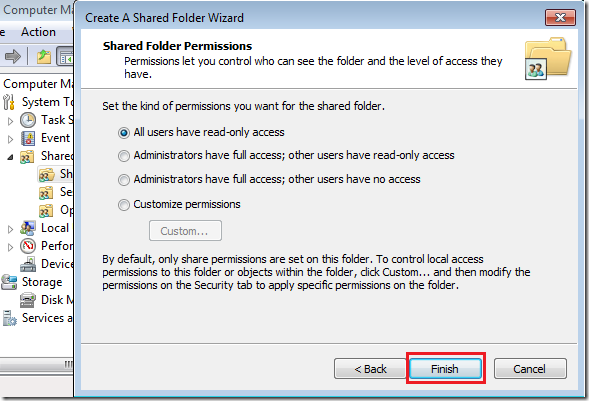
Next, set the permissions on the folder you’re sharing. Finally click ‘Finish’.
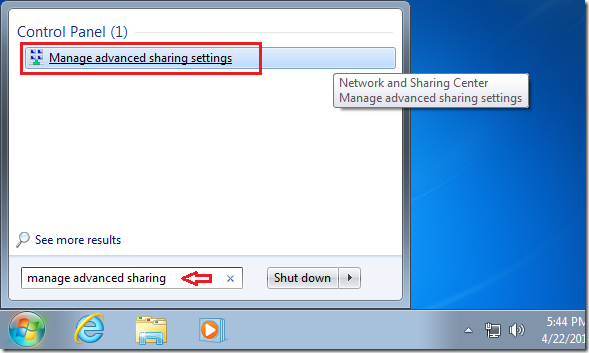
After that, search for ‘Manage advanced sharing settings’
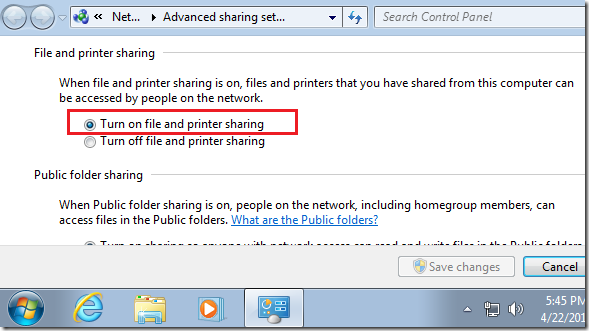
And make sure sure to ‘Turn on file and printer sharing’
Save and you’re done.
On your Ubuntu machine, press Ctrl – Alt – T to open terminal. When terminal opens, run the commands below to install samba smbfs package.
sudo apt-get install smbfs


Next, create a Windows folder in your home directory by running the commands below.
mkdir ~/Windows


After that, run the commands below to open fstab config file.
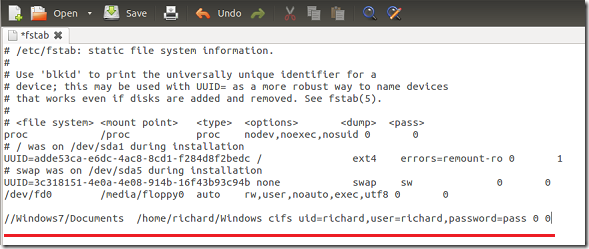
sudo gedit /etc/fstab


Then add the line below at the bottom of the file and save.
//Windows_Computer/Share /home/<username>/Windows cifs uid=<ubuntu_username>,user=<Windows_username>,pasword=<Widnows_Password> 0 0


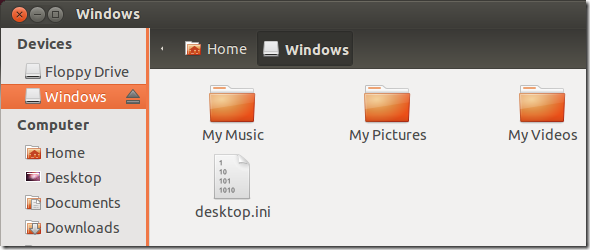
Restart both computer, Windows machine first, then Ubuntu and go to your home directory to view your Windows content.

Enjoy!

