Yesterday we showed you how to manually mount Box Cloud Storage in Ubuntu 12.04 (Precise Pangolin) and 11.10 (Oneiric Ocelot). Today we’re going to show you how to automatically mount Box Cloud Storage every time you login to Ubuntu. When your storage is mounted automatically, you won’t have to manually mount it every time you wish to access your content from Box.com. It will be there when you login.
To read our previous tutorial on this, click here.
Objectives:
- Automatically mount Box Cloud Storage in Ubuntu 12.04 / 11.10
- Enjoy!
To get started, press Ctrl – Alt – T on your keyboard to open Terminal. When it opens, run the commands below to install davfs2 package.
sudo apt-get install davfs2


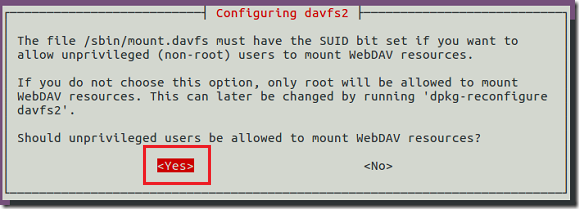
Next, run the commands below to reconfigure davfs2 so that regular users can mount storages.


When prompted with the screen below, select Yes.


Next, run the commands below to copy davfs2 folder to your home directory.
sudo cp -r /etc/davfs2/ /home/<username>/.davfs2


Then run the commands below to change the permissions so that you’re the owner.
sudo chown -R <username> /home/richard/.davfs2/


Next, run the commands below to edit davfs2 secrets file. This is where your username and password are kept.
gedit ~/.davfs2/secrets


When the file opens, add the line shown below at the end and save.
https://www.box.com/dav <box_username>  <box_password>


After that, run the commands below to open the fstab configuration file.
sudo gedit /etc/fstab


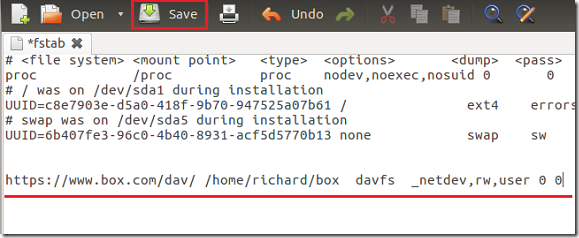
Then add the line shown below at the end and save the file.
https://www.box.com/dav/ /home/<username>/box  davfs  _netdev,rw,user 0 0


After that, run the commands below to add your account to davfs2 group.
sudo adduser <username> davfs2


Finally, create the mount point in your home directory where box cloud storage will be mounted.
mkdir ~/box


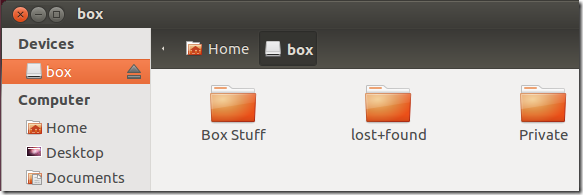
Restart your computer to test.


Enjoy!

Remember to replace all <username> with your box account username, and <password> with your box account password.


