I started testing the latest CentOS 7 yesterday as a guest machine on VirtualBox software to see how much it has changed from previous releases. As you may record, CentOS version 7 was just recently released.
What I did was to download the NetInstall ISO version of CentOS 7 and installed it. It’s pretty straightforward and if you want to test CentOS 7, you may want to follow the same course.
Instead of downloading the entire full version of CentOS ISO file, some users, including me choose to download the NetInstall version which is lot smaller and allows you to install a customized version of CentOS.
NetInstall will allow you to install only the packages and services you want and nothing more.
If you want to learn how to install CentOS via NetInstall ISO, follow the steps below to learn it. It’s easily and anyone should be able to do it without much of a problem.
Before you continue, make sure that you have a reliable Internet connection, since you’ll need to download all packages you select in the customization section of the setup.
Without a reliable and good Internet connection, you may run into trouble and may not finish what you started. For me, I did all from a guest VirtualBox guest machine created for CentOS 7.
- Downloading CentOS NetInstall ISO file.
First, download the NetInstall version of CentOS. Then burn it to a CD/DVD and boot the computer from it. If you’re using a virtualization software like VirtualBox or VMware Workstation, then just create a guest machine and boot from the downloaded ISO file.
Here’s the download link: http://isoredirect.centos.org/centos/7/isos/x86_64/
- Booting from the NetInstall ISO
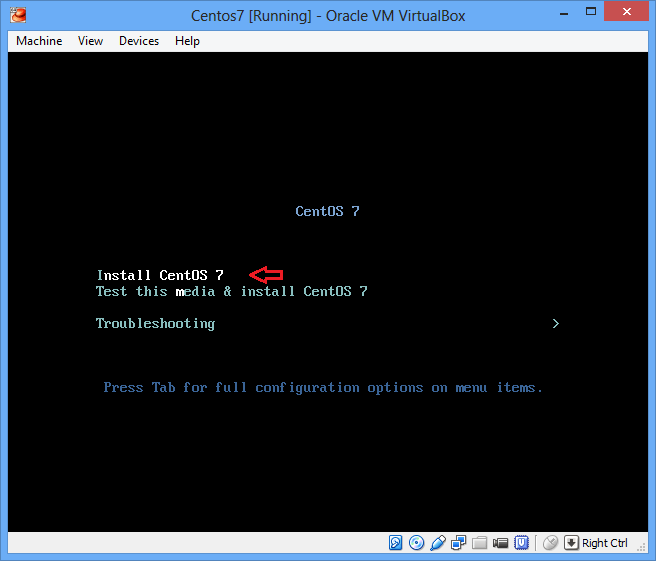
When the file is downloaded, boot from the ISO CD/DVD or ISO file if you’re using virtual machine. When prompted select to install CentOS 7
- Configuring the basic setup
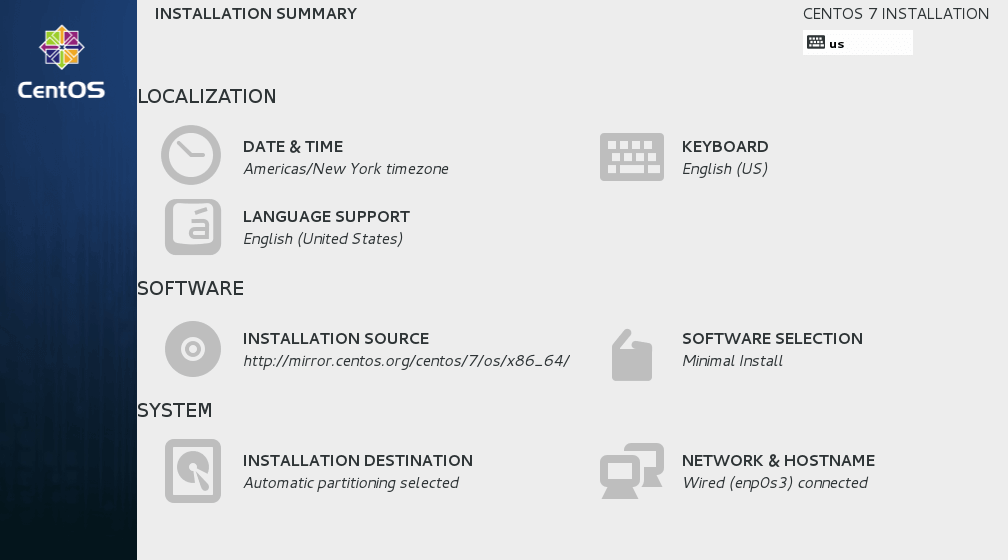
On the installation summary page, you may see different selections with yellow exclamation or warning marks. These are areas that required some setup.
The Installation Source, Software Selection and Installation Destination are areas that you’ll have to specify before you will be able to continue with the installation.
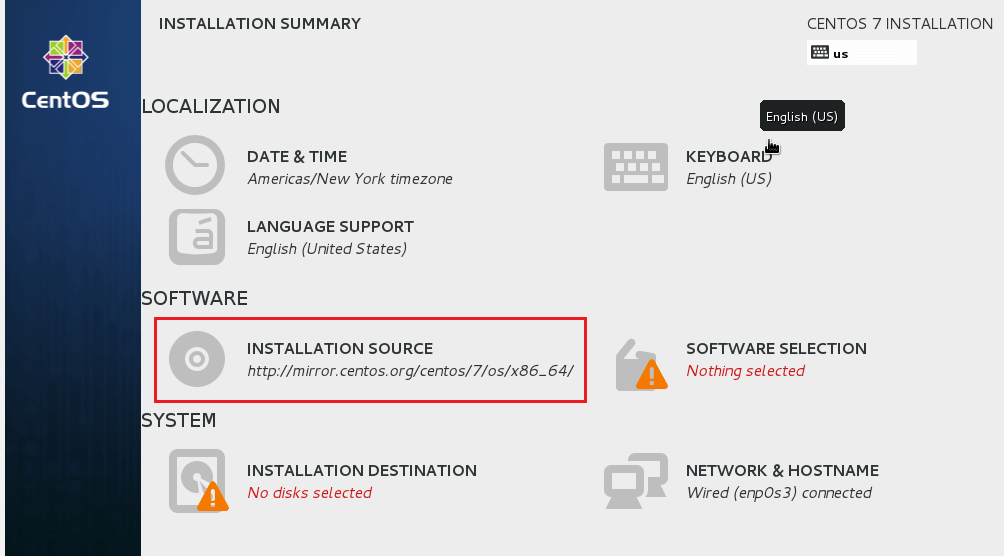
The first area you select is the Installation Source. This is where you’ll have to enter the mirror URL of CentOS. To configure it, select it and continue.
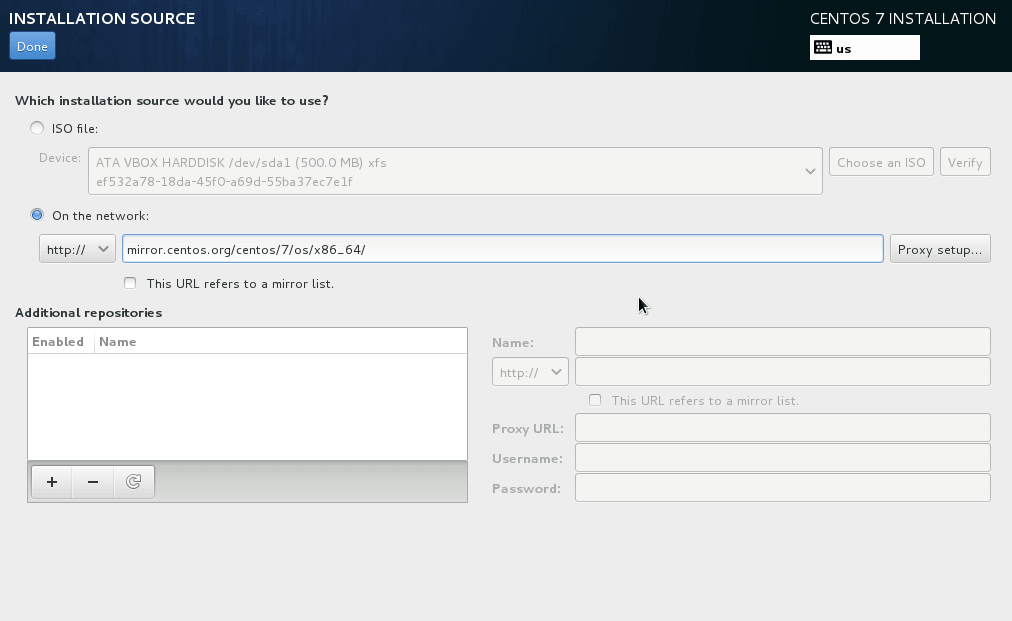
Then enter the software repository mirror to use to install the CentOS. There are many mirrors to choose from, but there two are popular.
- The 32-bit CentOS 7 mirror
http://mirror.centos.org/centos/7/os/i386/
- The 64-bit CentOS 7 mirror
http://mirror.centos.org/centos/7/os/x86_64/
Type either the 32-bit or 64-bit mirror to install the correct version. Most folks prefer CentOS 7 64-bit. When you’re finished, click Done to go back to the next screen.
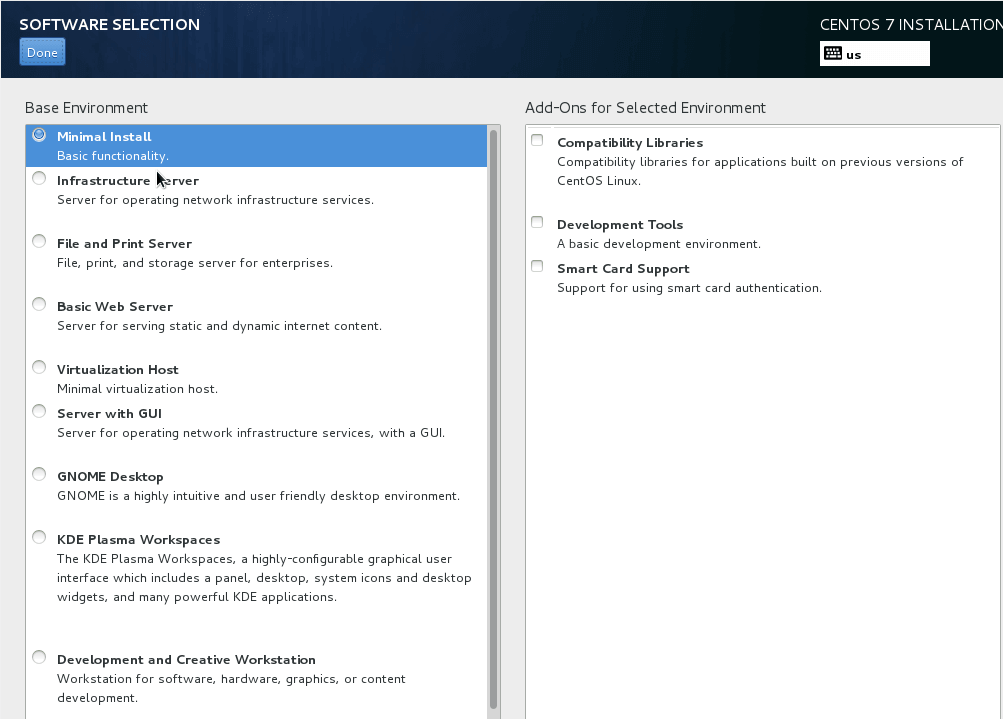
Next, select Software Selection to choose the packages and services to install. For my setup, I chose Minimal Install. This will only install the bare minimum of packages to get your system up and running. When you’re finished, click Done to go back to the previous screen.
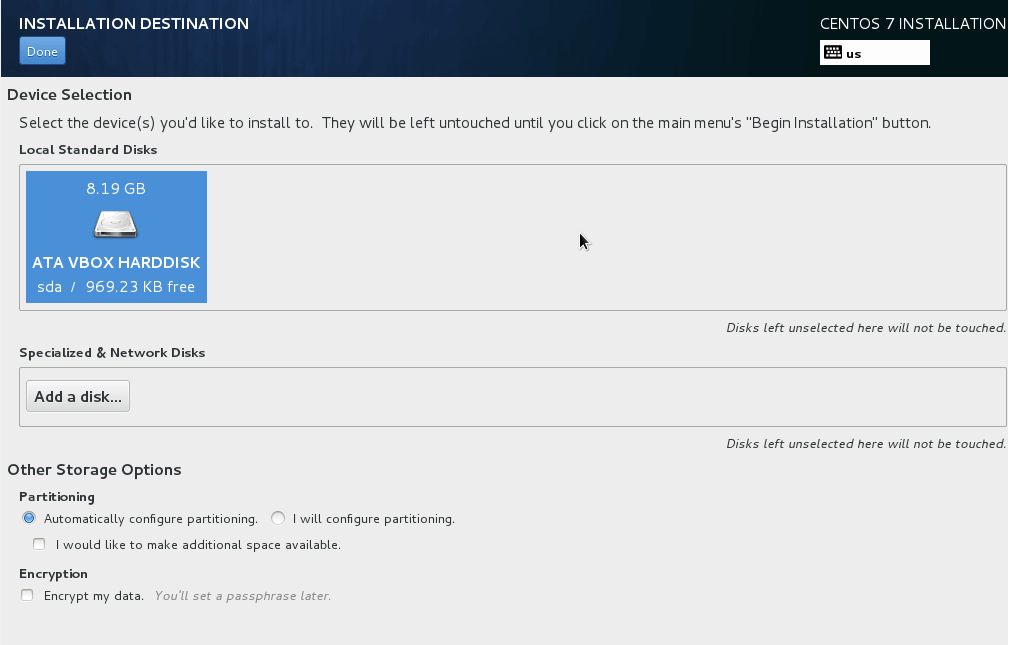
Then next area to is to select the Installation destination (Hard Drive). Select the hard drive partition and click Done with finished to go back to the previous screen.
After satisfying all the areas that required setup, your screen should look complete. Click Begin Installation to start the installation.
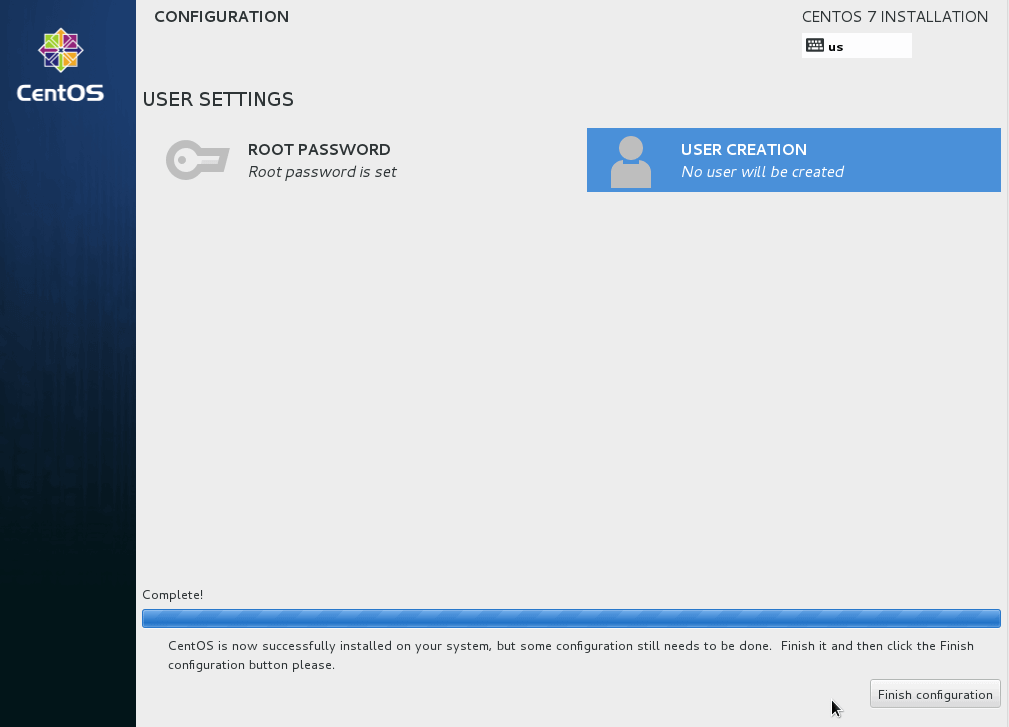
Finally, you’ll be prompted to create a new password for the root user on the next screen. Set the password and click Finish configuration
That’s it! Reboot the machine and you’re done.
Enjoy!