VirtualBox, the popular virtualization software that lets you run multiple virtual guest machines (Windows, Mac OS X and Linux) on a single host machine (Windows, Mac OS X and Linux) has been updated to version 4.2.16 and this brief guide is going to show you how mine is setup and configured on my Windows 7 and Windows 8 machines.
Installing and configuring VirtualBox software isn’t difficult when using Windows. In fact, the default settings will work just fine. However, using optimized configurations is highly recommended and there are many ways to optimize VirtualBox. The current settings I am using with my Windows machine is one that works great and you should use it if you’re new to VirtualBox.
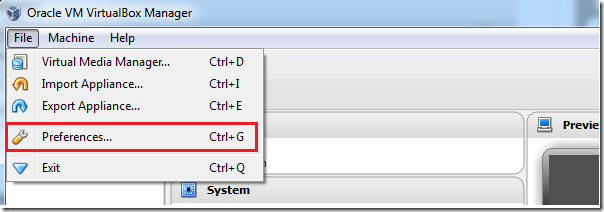
To get started, the first download the latest version of VirtualBox from the download page. For the installation, choose the default settings and well as the default installation folder path. After installing it and before creating guest operating systems, open VirtualBox and select Files –> Preferences.
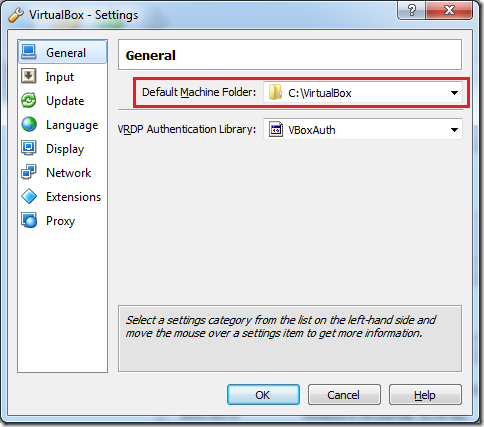
On the General settings page, create a default machine folder at Windows’ root directory called VirtualBox and choose it for Default Machine Folder. Again, you don’t have to, but separating VirtualBox guest machines folder from other configuration files is better.
Next, go and download VirtualBox’s extension pack from it’s download page. The extension pack provides support for USB 2.0 devices, VirtualBox RDP and PXE boot support for Intel cards and experimental support for PCI pass-through on Linux hosts.
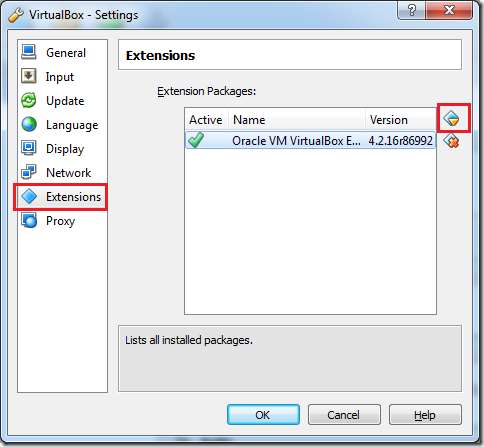
After downloading it, select Extensions from the list of settings and click the ‘Add’ button to the right. It will open Windows Explorer to find the extension pack. Select it to install it.
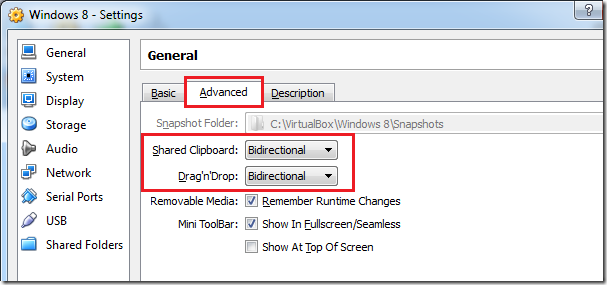
After installing it, click OK to close out. You’re now ready to install guest machines. (Windows XP, 7, 8, Ubuntu, Mac OS X and others). After creating a virtual machine, select the virtual machine and click Settings. Then on the general settings page, select ‘Advanced’ tab and enable bidirectional support for Shared Clipboard and Drag’n’Drop’
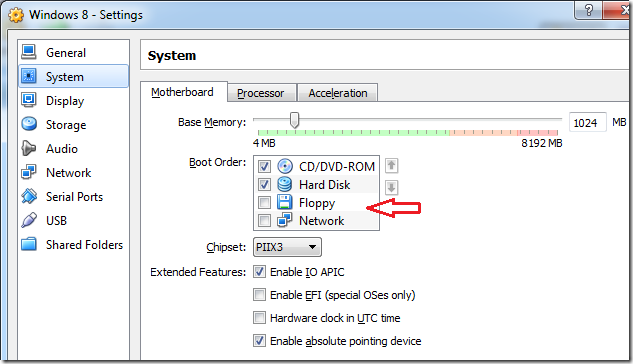
Next, on the System settings page under Motherboard, remove support for Floppy Disk if you’re not going to be using it. Also adjust the base memory for the virtual machine accordingly.
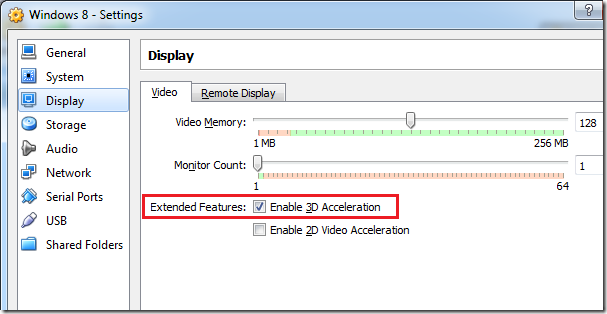
Next, select the Display settings page and make sure to enable 3D if your host machine supports it. Also adjust the Video Memory accordingly.
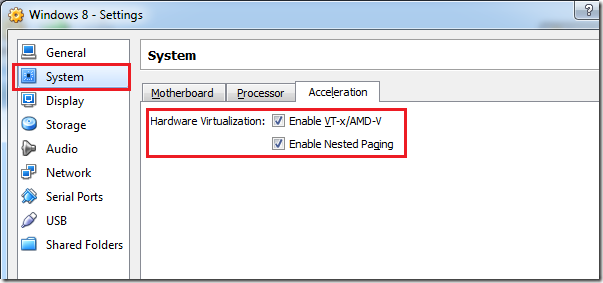
Save your settings and you’re done. One last thing before closing is to enable Hardware Virtualization VT-x/AMD-V if your machine supports it. It can be turned on from the host machine’s BIOS. Enable it in the BIOS and for the guest machines as well.
Again, there are many ways to optimize VirtualBox and this is just one of many. These settings have worked great for me. If you have other settings suggestions, please comment below.
Enjoy!

