By default, Microsoft disables the administrator account in Windows 8. This brief tutorial is going to show you how to enable it so that you can login as the administrator. For security reasons, it’s not recommended to sign in with this account and that’s why it was disabled in the first place. Signing in as administrator makes it easy for malicious programs to take over your system and put your system at risk because security is wide open. The administrator account has elevated privileges and is not subject to any restrictions.
That’s why the first local user that gets created on the system is added to the administrators group. And although this local account is a member of the administrators group, it’s also subject to other security restrictions like UAC dialog box when trying to make changes. This user must also run the command prompt as administrator to make some changes to the system. The built-in administrator doesn’t have to.
If you still want to activate the administrator account despite the risks come with it, continue below.
There are multiple ways to activate the administrator account in Windows. For this tutorial, I am just go to show you a one method that always works.
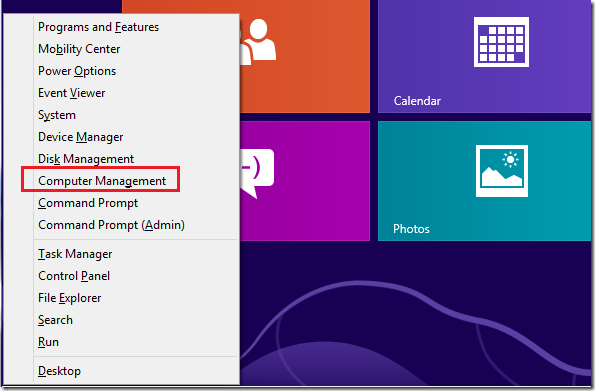
To do that press the Windows Key + X on your keyboard to open Windows 8 Tools Menu. When it opens, select ‘Computer Management’
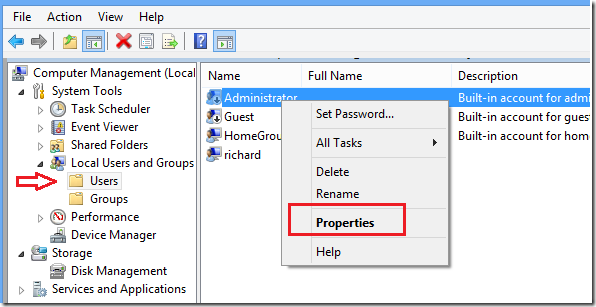
Next, expand Local Users and Groups, then select the Users folder and right-click ‘Administrator’ then select ‘Properties’
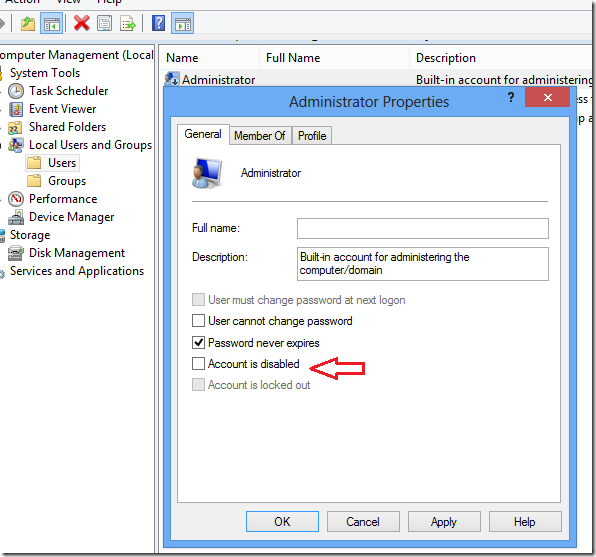
When the Properties window opens, uncheck the box to enable the Administrator account. Click OK to apply.
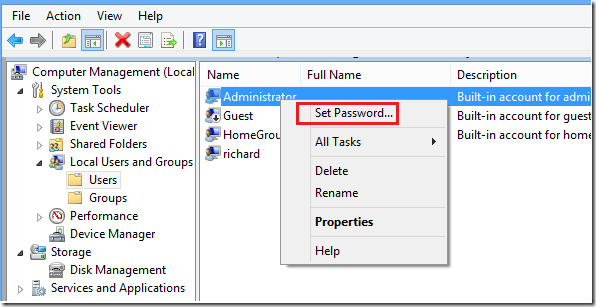
Back to the User folder, right-click on the Administrator account again and this time select ‘Set Password’
Create a new password for the the account and save.
Restart and enjoy!

