LibreCAD is a GNU computer-aided design (CAD) app for 2-D design. Intended for MAC OS, Linux, macOS, and Windows operating systems, the GUI of is based off from Qt4 (cute) libraries, a graphical interface toolkit, and intended to run across many operating systems in a similar fashion.
LibreCAD has been around since 2011 and it is translated into over 30 different languages. In space where CAD software is not always easy to find, and, further, does not come cheap, TurboCAD and AutoCAD are great programs, but they can cost hundreds of dollars for multiple licenses. Even the once free Google Sketch-up now demands a hefty buy-in.
However, there is one 2-D modeling solution that is free and has remain so now for almost 10 years. LibreCAD is available for all main operating systems and is adept at creating 2-D shapes and dimensions. According to one blog, it is even considered to be a high-quality, free alternative to many pricey high-end modeling options.
Why LibreCAD?
As stated, there are not a ton of CAD options out there to begin with, and Linux isn't famous for its plethora of modeling software options, either. Dassault Systems offer DraftSight for about $150, which is available in Fedora and Ubuntu LINUX flavors, but, other than that, the LINUX CAD landscape is pretty barren.
LibreCAD, the other LINUX option, though, can do everything that DraftSight can do, and it is free. It may lack the sophistication and polish of other commercial editions, and you may find yourself having to manually create many automated features, but, rest assured, this versatile software is more than capable of getting the job done.
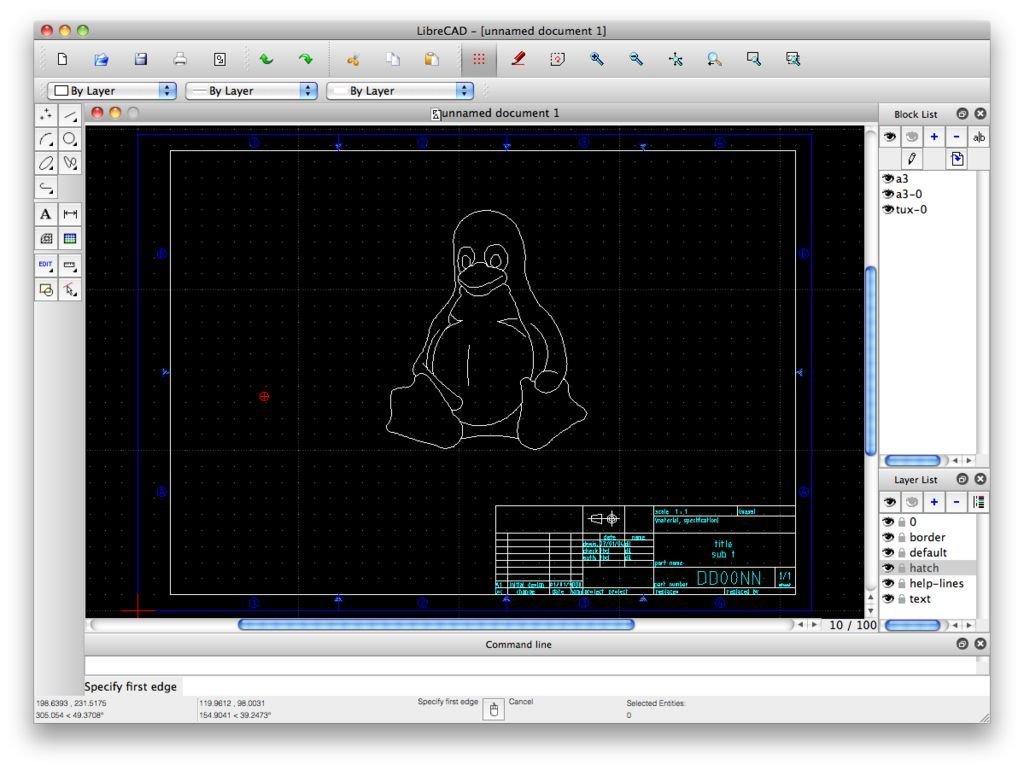
As we explore this free CAD powerhouse, we’ll point out some things we think you will appreciate in the software, and you’ll, more than likely, come to appreciate the more you use it. As one blog points out, before you begin working, you will want to set up your project preferences by navigating to the Current Drawing Preferences, under the Edit menu before embarking on any project.
Note as well that you will find all of the drawing tools condensed down to a few buttons on the left side of the screen. In Photoshop-like fashion, each tool represents a compiled sub-set of tools. Also, it shows that a lot of thought went into the UI when you hover your mouse over something and a tooltip pops up to help to explain it.
LibreCAD offers many tooltips, and there are many tools and symbols to hover over that offer descriptions of what they do and how to use them. In addition, LibreCAD helps to align objects and makes straight lines easy, which may not be a broad feature across all CAD software, and, in fact, it is far less common than you would think.
Nevertheless, with Snap-To-Grid, you can place anything along the dot-grid line, making it easy to align elements.
The grid spacing value is quite important in “snap to grid” mode as whatever you draw will snap to these predefined increments, and it is important to consider this value before setting up your project. You can set the grid spacing and then choose a different value for X and Y in the same menu, which is super convenient.
Drawing with LibreCAD
LibreCAD also supports the drawing of all kinds of shapes, from lines to squares and circles, and center-point drawing is quick an easy. Just click on any point as the center of the circle, and then click again to establish the radius. Alternatively, you can insert the reference points in a field below the canvas.
Next, let’s say you wanted to define eight smaller holes inside the original circle you drew so you could cut it out with a CNC machine and attach it to a wall.
Draw the first small screw hole with the same process as described above, and, when you are done, go the top panel and select the Rotate option under the Modify menu. Select the small hole and press enter. You will be prompted for the coordinates or you can eyeball a spot on the canvas.
Next, select the point of rotation by clicking on the screen or typing x/y coordinates. Do this four times down the left side of the larger circle.
When you are done, return to the Modify menu and select the Mirror option. Select the four screw holes on the left, and, again, go to the top panel and select Mirror from the Modify menu, select the four holes, and press enter. Again, you will be prompted for coordinates.
Finally, you may export this or any other drawing by selecting File and then Save As or Export. In the first case, you can easily save as a .DXF file, or as AutoCAD 2000 through the current version. But, if you would like the export a final project, you can choose from .png, .tiff, .jpg, .bmp, and even vector files like .svg in the Export menu.
LibreCad Layers and Measurements
According to at least LibreCad Tutorial, though, one of the coolest things about LibreCAD is the ability to create “layers.” In the same fashion as Photoshop, where you can create images on top of images, LibreCad allows you to place drawings “on top” of other drawings.
Imagine piling tracing paper a couple of sheets high; you can clearly see the bottom sheet through the top one, right, but the top one is more prominent.
In LibreCAD, you can rearrange layer order, too, flatten images, and turn layers on and off. You can even label your layers and define them using different colors.
Text, too, is easy to add and represent its own layer. Just choose the button in the menu on the left, pick a size, alignment, and font type. When you are finished formatting, you can move your text around the page and put is anywhere you like.
LibreCad tutorials also like to point out the taking measurement right inside of the drawing is particularly easy with this free CAD software. Just grab the measurement tool in the left menu, and click two points in the drawing. The distance between those two points is returned in whatever units you set up in preferences to begin with. You can see the measurement values displayed at the bottom of the display.
LibreCAD tutorials usually follow drawing, layers, measurements, and more. On any standard LibreCad tutorial, you can expect to find subjects that contain but are not limited to the following:
LibreCAD Tutorial Final Thoughts

This highly functional, easy-use-software offers many LibreCAD tutorials and instructions on how to use it, so it is not overwhelming at all, as some sites suggest. Plus, it is free and just as functional as so-called high-end software, it comes with tons of community support, and it offers a great primer software that illustrates what a 2-D modeling software can be.
But, as with much software, it is not perfect, and LibreCAD has been known to have issues with running and rendering large files. This issue is not new to the developers, and, while it was rumored that this issue would be handled by a new kernel rewrite, support from developers at LibreCAD has wavered as usage has dropped off in recent years.
Nevertheless, if you need to execute small projects using a core set of features, LibreCAD is a great choice. The price is certainly right, and there is the GNU/GPL factor to consider philosophically before deciding to adopt any software.
But, if you go that route, just remember, you may be sacrificing new, glitzy features or a lot of 3rd party plug-in scalability, and options beyond the most basic manipulations may be limited.
However, with the sectors of building, construction, and fabrication getting a shot in the arm recently due to increased housing demands, it is possible that CAD software will be reenergized across the board to the benefit of LibreCAD others that have been so good for so long.
Currently, though, with the lack of developers, there is always the possibility that the looming reaper-like fork God will come for LibreCAD, and that would be a sad end to a free CAD dynasty.