For new users who want to monetize their content and make some money, the most popular way is to add Google AdSense code to your blogs or websites. We use AdSense on this blog to help pay the bills.
AdSense is a free, simple way to earn money by displaying targeted ads next to your online content. With AdSense, you can show relevant and engaging ads to your site visitors and even customize the look and feel of ads to match your website.
Some people are making real money from AdSense, others (us), not so much. We used to make decent amount of money from AdSense until our blog got hit with Google Panda algorithm few years back. Now, we’re making peanut.
Registering and being accepted in Google’s AdSense program might be the easy part for new users, but implement AdSense code on your website can be tricky. If you don’t know a bit of HTML or how to implement JavaScript code on your blogs, then you may want to try other WordPress plugins to help.
The good thing about using plugins to implement AdSense is that Google has already created a plugin that helps you implement AdSense to your WordPress blog easily. It enables you to easily add AdSense as well as use Google Webmaster tools with your WordPress blogs.
This brief tutorial is going to show you how to install Google AdSense plugin for WordPress and start making money with your content.
When you search WordPress’ plugin page, there maybe hundreds of plugins that may claim to help you implement Google AdSense. I personally stay away from those third-party plugins, and instead use the Google official AdSense plugin for WordPress.
Using third-party plugins may get you into trouble that you didn’t ask for. So to be on the safe side use the official AdSense plugin from Google. Using Google AdSense plugin is great for new users. It doesn’t require any kind of coding or learning something new. Just install the plugin, active it, sign into your account and stay adding AdSense codes. The downside of this plugin is it may not allow you to properly implement AdSense anywhere on your pages..
Advanced users can generate AdSense code and paste it anywhere on the page. When using AdSense, you may not have that flexibility, but the plugin allows for optimal implementation.
When you’re ready, sign into your WordPress blog as administrator and go to the Plugin page.. There search for Google AdSense, then select and install the official plugin from Google. Ignore the rest.
After installing and activating the plugin, you’ll be prompted to sign into your AdSense account from WordPress dashboard. Do it so the plugin can be linked with your account. You may do the same for Google Webmaster tool account.
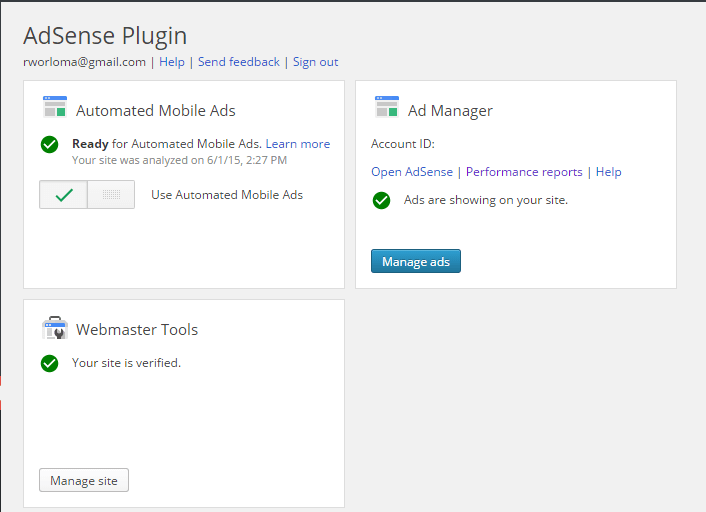
After, verifying your accounts, click the Mange ads button to begin inserting ads on your pages. On the ads management page, select the pages to add ads to and where.. Clicking the red plus button allows you to put ad unit at that location.
You’re only allows to add three ad units per page or post. Using the plugin, you’ll not be able to add ad units to areas where the plugins hasn’t already selected or marked with the red plus button. After that, save your changes and you’re done.
This is how new users can implement AdSense on their blogs. As of last week, we have been using AdSense plugin to implement AdSense on this blog.
Enjoy!