WordPress is best content management system (CMS) online today, but that’s my opinion. If you don’t believe me, try looking for statistics online on WordPress and other CMS applications.
The most popular CMS applications today are, WordPress, Drupal, Joomla and many others. Of all WordPress is the king. Some may disagree here, but again it’s only my opinion.
This brief tutorial is going to show you how to install WordPress 4.0.1 on CentOS 7 if you haven’t ready done so. If you’re just started out with WordPress, then this post should come in handy in that it will show you how to install and configure WordPress on the latest version of CentOS.
Now, WordPress is a PHP application which depends on the LAMP stack if you didn’t already know that. The LAMP stack is just a short reference to Linux, Apache2, MySQL and PHP. All these different components make up the LAMP stack.
So, in order for WordPress to function, these packages and must be installed on a Linux operating system. WordPress will work on Windows systems, but that’s not recommended and done for testing purposes only.
To install the LAMP stack when using CentOS 7, read this post or click the link below. This link shows you how to easily install the LAMP stack on CentOS 7.
https://www.liberiangeek.net/2014/12/install-lamp-stack-centos-7/
After installing LAMP, continue below to download and configure WordPress content.
- Downloading WordPress content
At this point, you should already have LAMP installed. If not, refer to the link above. When you’re ready, use the commands below to download WordPress content. You should already have wget package installed , if not go and install it.
cd /tmp/ && wget http://wordpress.org/latest.tar.gz
Next, type the commands below to extract the downloaded WordPress archived file.
tar -xvzf latest.tar.gz
The next step is to copy the extracted content to Apache2 default root directory. When you install Apache2 on CentOS 2, it creates a default root directory at /var/www/html.
Copy WordPress content there. To do that, run the commands below.
sudo mv /tmp/wordpress/* /var/www/html/
- Configuring WordPress database
Now that WordPress content is in the correct root directory, let’s go and configure WordPress database and user. WordPress needs a database to store its content as well as a database user it uses to connect to the database.
Run the commands below to sign on to the database as the root user. You should already know the password.
mysql -u root -p
Next, run the commands below to create a WordPress database named wpdb.
CREATE DATABASE wpdb;
Then create database user named wpuser and assign a new password
CREATE USER wpuser@localhost IDENTIFIED BY 'new_password_here';
The next thing it so grant the database user full access to the database. To do that run the commands below
GRANT ALL ON wpdb.* to wpuser@localhost;
Finally, reset the database permission table by running the commands below.
FLUSH PRIVILEGES;
Then exit..
- Configuring WordPress Database connection
Finally, you need to configure WordPress to connect to the database. To make that work, copy WordPress sample configuration file to create wp-config.php file.
This file is where you’ll enter the database settings for WordPress to connect. To do that, run the commands below.
sudo cp /var/www/html/wp-config-sample.php /var/www/html/wp-config.php
Next, open the file by running the commands below
sudo vi /var/www/html/wp-config.php
Then make the following changes to match your settings.
// ** MySQL settings – You can get this info from your web host ** //
/** The name of the database for WordPress */
define(‘DB_NAME’, ‘wpdb‘);
/** MySQL database username */
define(‘DB_USER’, ‘wpuser‘);
/** MySQL database password */
define(‘DB_PASSWORD’, ‘password‘);
When you’re done, save the file and exit.
Next, change Apache2 root directory permission so that WordPress functions correctly. To do that run the commands below.
 sudo chown -R apache:apache /var/www/html/

sudo chmod -R 755 /var/www/html/
Finally, restart Apache2 and test
sudo systemctl reload httpd
Open your browser and browse the the server using its IP address or hostname. You should see WordPress setup page.
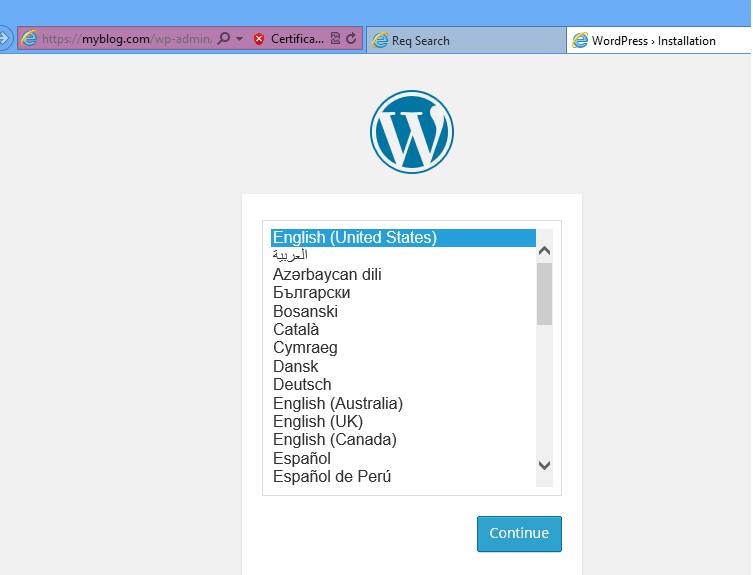
Enjoy!