Few days ago we showed you how to install Drupal in Ubuntu 14.04 on top of Apache web server. This brief tutorial is going to show you how to install the same Drupal on top of Nginx web server on CentOS 7.
In our previous post, we said WordPress wasn’t the only CMS platform for bloggers or webmasters. Other Content Management Systems are also available to those who preferred not to use WordPress to manage their online content.
Since Drupal is the second in line with it comes to CMS systems, it should be a great choice to install in place of WordPress.
To install Drupal, you must also install a web server, database server and PHP modules and scripts.
This this post, we’re going to be installing Nginx web server to process our web pages, MariaDB database server to store our content and PHP5 which is available in CentOS 7 repository by default.
When you’re ready, lets get started by installing Nginx web server in CentOS 7
- Installing Nginx Web Server in CentOS 7
To install Nginx in CentOS 7, run the commands below to download and install Nginxs’ repository for CentOS 7.
sudo rpm -ivh http://nginx.org/packages/centos/7/noarch/RPMS/nginx-release-centos-7-0.el7.ngx.noarch.rpm
Next, run the commands below to install Nginx
sudo yum -y install nginx
Next, run the commands below to manually start Nginx.
sudo systemctl start nginx.service
To automatically start Nginx server everytime you server reboots, run the commands below
sudo systemctl enable nginx.service
Now that Nginx is installed, lets go and install MariaDB database server in CentOS 7.
- Installing MariaDB Database Server in CentOS 7
To install MariaDB database server in CentOS 7, run the commands below. MariaDB is now the default database server in CentOS 7 replacing MySQL. It’s a drop-in replacement for MySQL database and compatible with all server and services that previously worked with MySQL.
Next, run the commands below to install MariaDB database server.
sudo yum -y install mariadb-server mariadb
When you’re done, run the commands below to start the database server.
sudo systemctl start mariadb.service
If you wish to automatically start MariaDB when you reboot the server, run the commands below.
sudo systemctl enable mariadb.service
Next, run the commands below to setup MariaDB server. After you run the commands, you’ll be prompted to choose Y for Yes and N for No.
The default answer is Y. Choose Y for all the prompts.
sudo mysql_secure_installation
Next, choose Yes for the rest of the prompts until you’re done.
- Enter current password for root (enter for none): press Enter
- Set root password? Y
- New password: Type new root password
- Re-enter new password: Confirm the password
- Remove anonymous users? Y
- Disallow root login remotely? Y
- Remove test database and access to it? Y
- Reload privilege tables now? Y
- Creating Drupal Database and User
To run most PHP CMS systems, there must be a database as well as a user account to connect to that database. Drupal is no different.
For Drupal to function, you need to create a database. To do that logon to the database server using the commands below.
mysql -u root -p
Then run the commands below to create a new database called drupaldb
CREATE DATABASE drupaldb;
Then run the commands below to create a database user..
CREATE USER drupaluser@localhost IDENTIFIED BY 'password_here';
Finally, give the database user complete control of the drupaldb database you just created.
GRANT ALL PRIVILEGES ON drupaldb.* TO drupaluser@localhost;
Then save and exit.
FLUSH PRIVILEGES;
exit
- Installing PHP5 and its modules
The final steps is installing PHP5 and its modules and scripts. To do that, copy and paste the commands below.
sudo yum -y install php php-gd php-ldap php-odbc php-pear php-fpm php-xml php-xmlrpc php-mbstring php-snmp php-soap curl curl-devel php-mysql
- Downloading Drupal Archive
Finally, download Drupal archive from online. The latest version as of this date is version 7.31. To download the latest version, run the commands below.
cd /tmp/ && wget http://ftp.drupal.org/files/projects/drupal-7.31.zip
Then run the commands below to extract the downloaded archive.
unzip drupal*.zip
Next, run the commands below to copy the extracted content to the default root directory of Nginx.
sudo cp -rf drupal*/* /var/www/html/
Change the ownership of Drupal content by running the commands below.
sudo chown -R nginx:nginx /var/www/html/
The change the permissions on these files and folders to give the nginx web server full access.
sudo chmod -R 755 /var/www/html/
Restart Nginx web server and continue to set Drupal up.
sudo systemctl restart nginx.service

sudo systemctl restart php-fpm.service
- Enabling Access through the Firewall
To access Drupal remotely you must enable port 80 through the firewall. If possible enable port 443 as well. Do to that, run the commands below
sudo firewall-cmd --permanent --zone=public --add-service=http

sudo firewall-cmd --permanent --zone=public --add-service=https

sudo firewall-cmd --reload
Next, open the default Nginx site configuration page and enable the PHP location block.
sudo vi /etc/nginx/conf.d/default.conf
Then configure the file as shown below.
server {

listen 80;

server_name 192.168.107.127;

root /var/www/html;

try_files $uri $uri/ /index.php?$args;

index index.php index.html;

#charset koi8-r;

#access_log /var/log/nginx/log/host.access.log main;

# proxy the PHP scripts to Apache listening on 127.0.0.1:80

#

#location ~ \.php$ {

# proxy_pass http://127.0.0.1;

#}

# pass the PHP scripts to FastCGI server listening on 127.0.0.1:9000

#

location ~ \.php$ {

try_files $uri =404;

fastcgi_split_path_info ^(.+\.php)(/.+)$;

fastcgi_pass 127.0.0.1:9000;

fastcgi_index index.php;

fastcgi_param SCRIPT_FILENAME $document_root$fastcgi_script_name;

include fastcgi_params;

}

# deny access to .htaccess files, if Apache's document root

# concurs with nginx's one

#

#location ~ /\.ht {

# deny all;

#}

}
Save the file and restart Nginx.
Go and open your browser and browse to the host by IP or Hostname
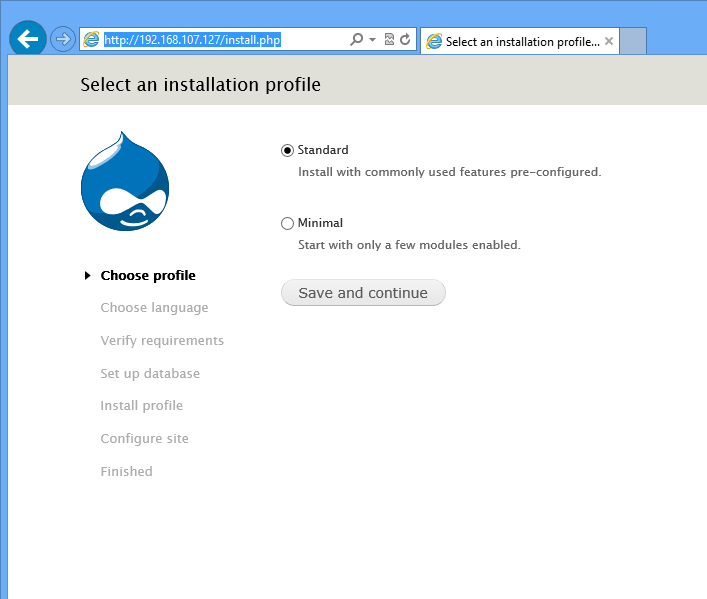
Continue below with the setup until you’re done. If you get an error that certain default sites file can be created, run the commands below to create it.
chcon -R -u system_u -t httpd_sys_content_t /var/www/html/

chcon -R -t httpd_sys_rw_content_t /var/www/html/
Restart both Nginx and PHP-FPM services, then try again.
If the above tricks done get it working, open SELinux and disable it.
sudo vi /etc/sysconfig/selinux
Set the valid to disabled
[...]

SELINUX=disabled

[...]
Restart your server and try again. This time hopefully, everything should work.
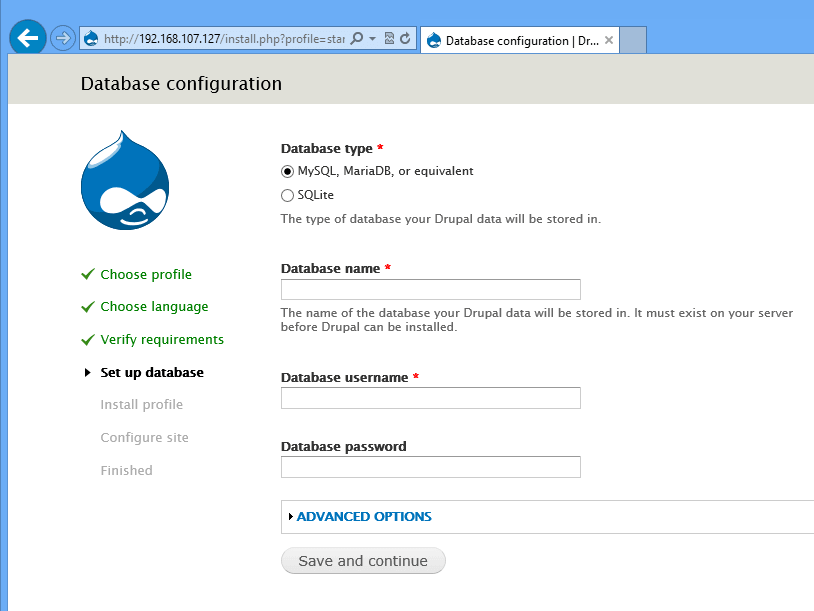
Enter the database info to continue
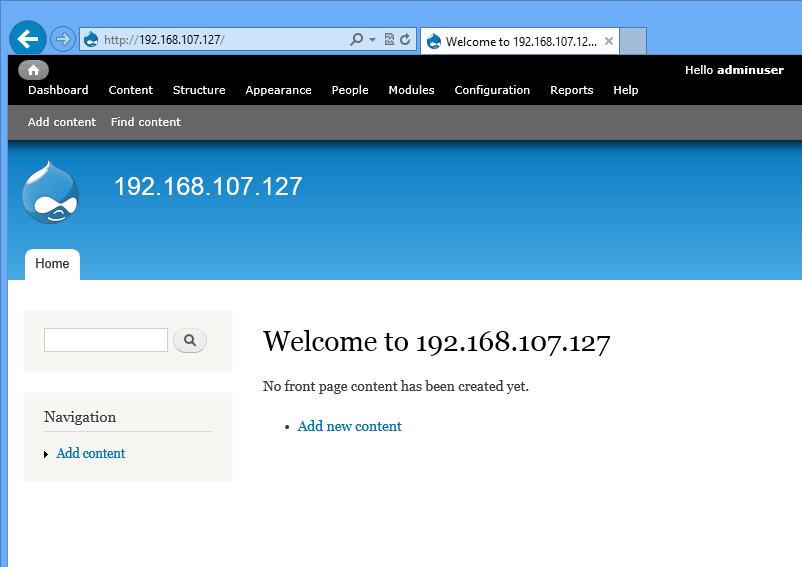
Enjoy!