Again, here’s another post for WordPress beginners. For those starting out with WordPress blogs, there may be many unanswered questions on their minds.
We’ll try to answer these questions in series of posts about managing WordPress blogs or websites here. Last week, we talked about improving WordPress speed by caching its content.
We also describe what caching is and how it works. We then showed you how to install and use W3 Total Cache, a very popular caching plugins for WordPress.
This blog post is going to introduce another caching plugin that you may use on your WordPress blog if W3 Total Cache didn’t work for you.
To summarize our previous post, we said caching plugins generate static WordPress files. WordPress is dynamic, which means there are many moving parts involved when a user tries to access your blog.
The web server must retrieve the web content, database and images. So, one request from a client results in multiple requests from different components behind the scenes.
To help speed this up, caching plugins and technologies were introduced. So, instead of a single request resulting into multiple calls behind the scenes, caching plugins store these behind-the-scenes calls into a single file within a time frame, (ex. an hour).
Within that hour, any new request from your users will display the cached files, if they haven’t been changed since the last cached data.
This speeds up websites, including WordPress dramatically.
Install WP Super Cache
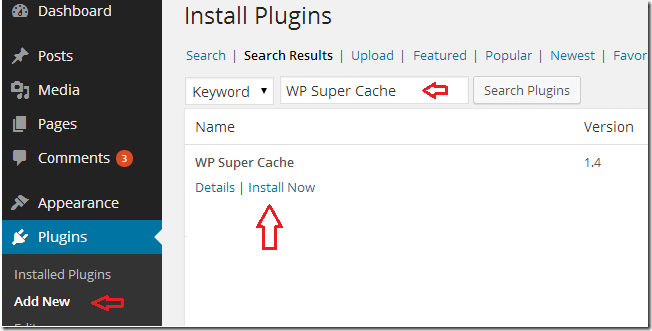
WP Super Cache is a caching plugin for WordPress that helps speed up WordPress blogs. To install it, go to your WordPress admin page and select Plugins – Add New.
Then search for WP Super Cache and press Enter. On the result page, click to install WP Super Cache.
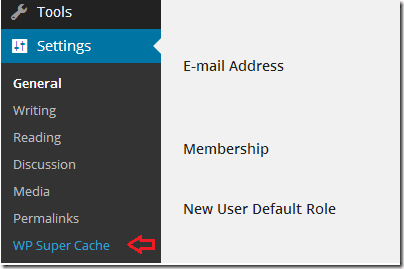
Next, Activate the plugin. After the activation, the plugin file should appear under Settings. There you can configure it to work on your site.
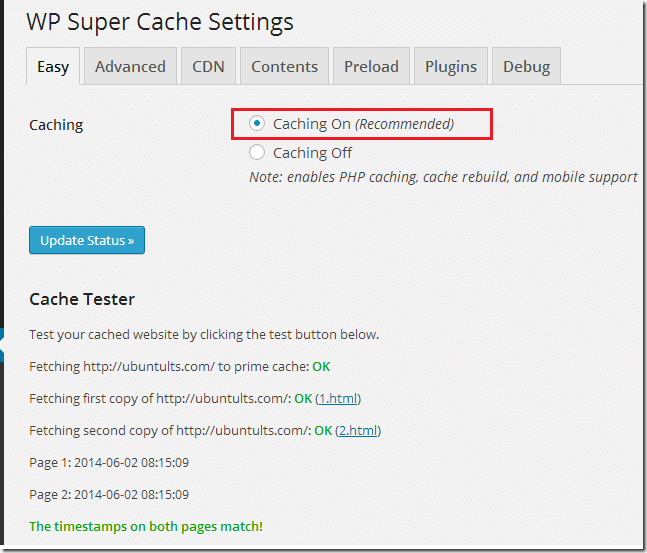
The default settings should work great for most WordPress sites.
Turn caching on and save. That’s it!
Hope this helps.
Enjoy!


