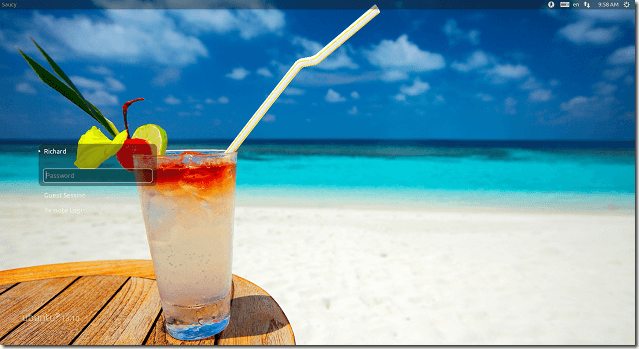
Here’s a simple tip that shows you how to change Ubuntu logon screen background with custom images. Ubuntu logon screen is ok and maybe better than most Linux distributions, but if you want to show custom images like ones that remind you of special places and things, you may be able to change it using the steps below.
There are many ways to do this and this post is just one of many. The method below uses dconf-editor and lightdm user to accomplish to get the same results. To do it, change to the root user and give lightdm user access to the x-server. Next using lightdm user credentials, run dconf-editor and make the change.
After setting the custom logon image and restarting, you should see the picture everytime you start your machine. If image is one you love and brings back a log of memories, you should be delighted everytime you startup Ubuntu to logon.
This tutorial assumes you already have dconf-editor installed on your machine. If not, run the commands below to install dconf-editor.
sudo apt-get install dconf-editor

Next, choose the image you wish to use as your logon image. Then take notes of the location, including the image name. Next, run the commands below to change to the root user.
sudo –i

Next, run the commands below to give lightdm user access to the X-Server. Lightdm is the service that manages the logon background so if you need to make changes to the logon screen, it should be done as lightdm user.
xhost +SI:localuser:lightdm

Next, change to lightdm user by running the commands below.
su lightdm -s /bin/bash

Then run the commands below to start dconf-editor.
dconf-editor

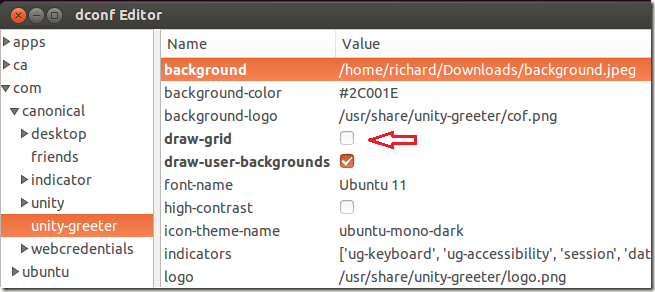
When the tool opens, browse to com –> canonical –> unity-greeter. Then change the background value to the custom image. You may also want to disable draw-grid.


Restart your computer and enjoy your~


