Ever wish you could turn back time and undo changes that crashed your computer or made it worse? Well, you can do just that with Windows’ System Restore feature, which is also included in Windows 8.
System Restore is a Windows’ feature that lets you restore your computer to an earlier date and time when your system may have been functioning properly. Sometimes installing programs or drivers can make Windows’ run slowly or stop responding correctly.
Using System Restore, you can return your computer’s files and programs to when everything was working great, which may save you hours or work to fully recover.
This brief tutorial is going to show you how to perform system restore in Windows 8. This is going to be quick.
To perform system restore, press the Windows Key + X on your keyboard to open Windows 8 tools menu. When it opens, click ‘System’
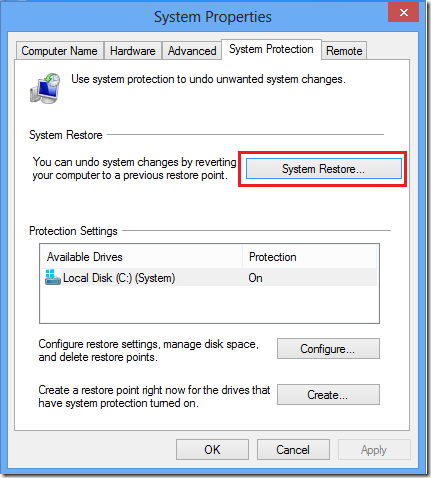
Next, click ‘System Restore’ button as shown in the image below to begin the process.
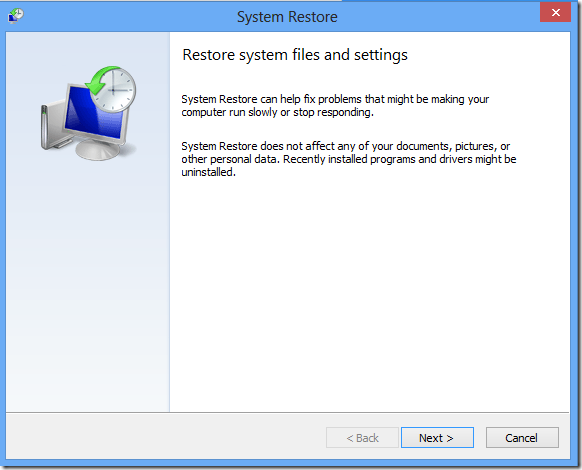
Then read what system restore can do and click ‘Next’. This feature helps you fix problems that might be making your computer run slowly or stop responding. Restoring your system won’t affect your files, including documents, pictures or other personal data. It may uninstall or remove programs that you have installed after the restore date and time you select.
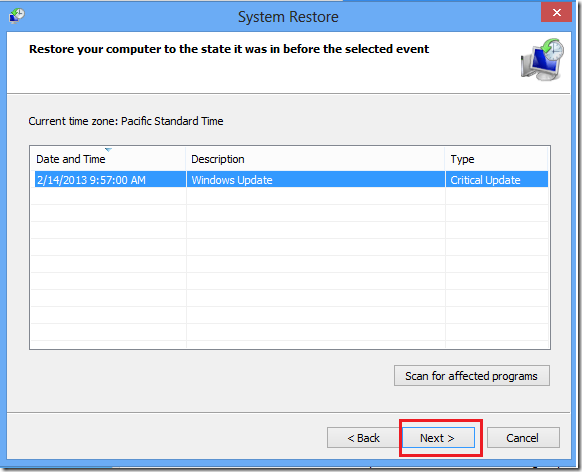
Next, select the restore date and time, then click Next
Finally, click ‘Finish’ to start restore your computer. You system will have to restart to complete the restoration.
After that, your system may hopefully be functioning ok.
Enjoy!


