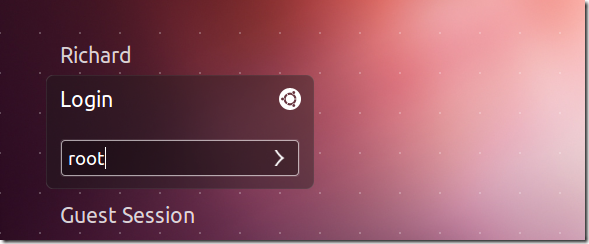
By default, both Windows 7 and Ubuntu 12.04 (Precise Pangolin) are shipped with the administrator or root account disabled. It is disabled because of security reasons. Now, this brief tutorial is going to show you how to turn on that account in both systems. When the root account is enabled, it allows you to login as the admin rather than a regular user who takes on the admin role when needed. Even though it is allowed, it’s not recommended in either systems. The reason it’s not recommended is simple, and this, when you login as the admin and make a simple mistake, it can potentially render your system unusable.
So, if you’re not afraid and still want to go on with it, then continue below to learn how.
Objectives:
- Enable the Administrator Account in Windows 7 and Ubuntu 12.04
- Enjoy!
How to Login as Administrator in Windows 7
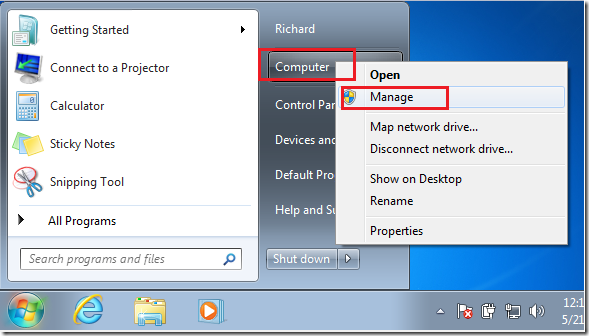
To login as the administrator in Windows 7, go to Start –> and right-click Computer, then select Manage.
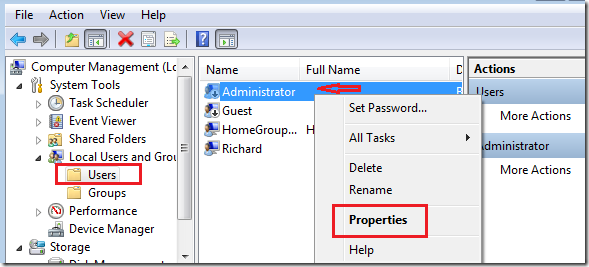
Next, expand Local Users and Groups and select the Users folder. Next right-click on Administrator and select ‘Properties’
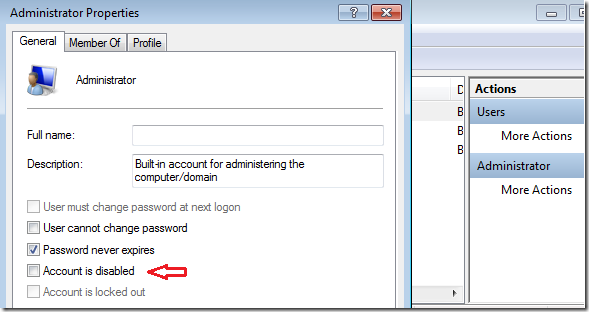
Then uncheck the box to not disable the administrator account.
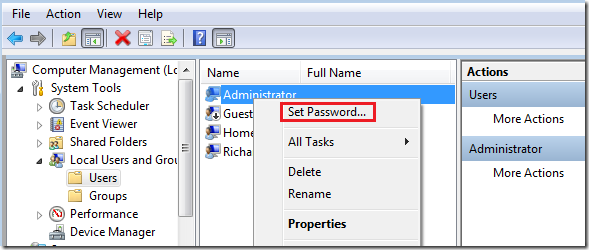
After that, right-click the Administrator account again and set a password for the account.
That’s it! Logout and you should be able to login as administrator.
How to Login As Root in Ubuntu 12.04 (Precise Pangolin)
To login as root in Ubuntu, press Ctrl – Alt – T on your keyboard to open Terminal. When it opens, run the commands below to create a new password for the root account.
sudo passwd root


Next, copy and paste the line below in terminal and press Enter.
sudo sh -c 'echo "greeter-show-manual-login=true" >> /etc/lightdm/lightdm.conf'


Restart your computer and you should be able to login as other users (root).


Enjoy!

