We’ve written a lot about WordPress on this site. We’ve written about how to speed up WordPress, install and secure plugins, and many other valuable posts.
One thing to remember is WordPress isn’t the only content management system (CMS) available. There are many others, but WordPress is the most popular among them all.
If WordPress isn’t working for you, you may want to try other CMS applications to host your blogs or websites. I am not too certain about this, but the second most popular might be Drupal.
Drupal is an opensource CMS application that’s used and supported by millions of websites online. It has an active community base like WordPress.
Drupal allows you to easily build simple blogs to enterprise websites. It has thousands of templates and plugins that are mostly free to download and install.
This blog post is going to show you how to install Drupal in Ubuntu 14.04.
- Installing Drupal in Ubuntu
To get started with installing Drupal in Ubuntu, you should first install the LAMP stack. LAMP stands for Linux, Apache, MySQL and PHP.
These are the tools that most CMS systems rely on. Without them, WordPress, Drupal and other PHP CMS systems won’t be able to run.
To easily install the LAMP stack in Ubuntu, run the commands below.
sudo apt-get install mysql-server mysql-client apache2 php5 php5-mysql php5-curl php5-gd php5-intl php-pear php5-imagick php5-imap php5-mcrypt php5-memcache php5-ming php5-ps php5-pspell php5-recode php5-snmp php5-sqlite php5-tidy php5-xmlrpc php5-xsl
After running the commands above and installing the required packages, continue below to create a database for Drupal.
- Creating Drupal Database
Drupal relies on databases to host its data content. Without a database server, you won’t be able to run Drupal.
During LAMP server installation, you’ll be prompted to create and confirm a root password for MySQL database server. The prompt should look like the image below.
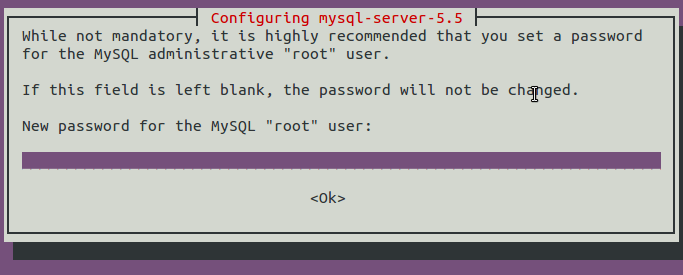
After creating the password, wait until the installation is complete.
Next, run the commands below to start MySQL database server.
sudo service mysql start
After starting the server, run the commands below to logon to MySQL database server.
mysql -u root -p
You’ll be prompted to enter the root password you created earlier. After signing in to the database, run the database statement below to create a new database called drupaldb
CREATE DATABASE drupaldb;
Next, run the statement below to create Drupal database user account.
CREATE USER drupaluser@localhost IDENTIFIED BY 'password_here';
After that, run the statement below to grant all privileges to the user for that newly created Drupal database.
GRANT ALL PRIVILEGES ON drupaldb.* TO drupaluser@localhost;
Save the settings and exit.
FLUSH PRIVILEGES;
exit
- Configuring Drupal Site
The final thing to do is to download Drupal archive data and configure the new site. To do that, run the commands below to download Drupal archive.
cd /tmp/ && wget http://ftp.drupal.org/files/projects/drupal-7.30.zip
Then extract the content and move it to the default root directory for Apache. To extract the downloaded file, run the commands below.
unzip drupal*.zip
Next, using the commands below, move Drupal content into the root directory for Apache.
sudo cp -rf drupal*/* /var/www/html/
Next, run the commands below to set the correct permissions on the directory
sudo chown -R www-data:www-data /var/www/html/
sudo chmod -R 755 /var/www/html/
Next, run the commands below to start Apache.
sudo service apache2 start
Using your browser, open a http connection to the server and you’ll see Drupal default setup page below.

Continue with the setup until you’re done. Remember that you’ll need the database name, username and password you created earlier to connect.
That’s it!
Enjoy!