VirtualBox, the software that lets you run multiple guest operating systems, (Windows, Mac, Linux) on a single computer has been updated to version 4.2.14 and this brief tutorial is going to show you how to install or upgrade to it in Ubuntu.
This update brings many changes, including a work around for Linux hosts for not crashing as the result of automatic NUMA balancing which was introduced in Linux kernel 3.8. In addition to that, it also fixes a bug when compiling against Linux 3.2.0 Ubuntu kernels and problems copying and pasting between two guest machines on an X11 host.
For more information about this release, please check out the release page and view the Changelog.
Some of the changes that were added to this release are as followed:
- Storage: fixed lost writes if iSCSI is used with snapshots and asynchronous I/O (bug #11479)
- VBoxManage: fixed setting the parent UUID on diff images using sethdparentuuid
- Windows Additions: Seamless mode and auto-resize fixes
- Settings: limit depth of snapshot tree to 250 levels, as more will lead to decreased performance and may trigger crashes
Windows and Mac OS X users can download and install or upgrade from the download page.
For Ubuntu users, press Ctrl – Alt – T on your keyboard to open the terminal. When it opens, run the commands below to add its repository’s key in Ubuntu.
wget -q http://download.virtualbox.org/virtualbox/debian/oracle_vbox.asc -O- | sudo apt-key add -
Next, run the commands below to add its software repository in Ubuntu
sudo sh -c 'echo "deb http://download.virtualbox.org/virtualbox/debian $(lsb_release -sc) contrib" >> /etc/apt/sources.list'
Finally, run the commands below to update your system and install / upgrade VirtualBox.
sudo apt-get update && sudo apt-get install virtualbox-4.2
After installing it, go to Ubuntu Dash and launch it. If you wish to completely remove or uninstall it, run the commands below.
sudo apt-get purge virtualbox-4.2 && sudo apt-get autoremove
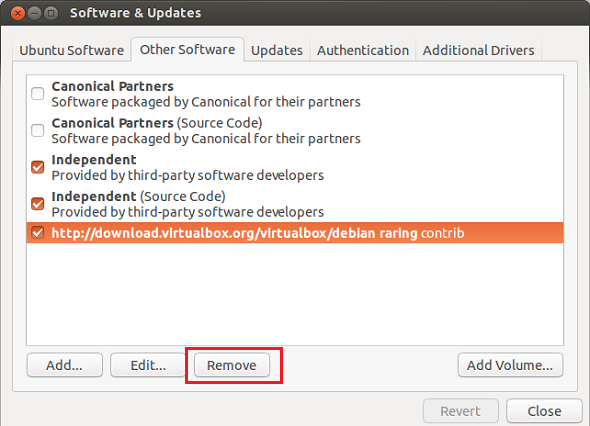
To get rid of it repository’s key, go to System Settings –> Software & Updates –> Other Software tab, then select and remove the key from your system.
Enjoy!