Oracle Java Runtime Environment, also referred to as Java Runtime is a piece of software that lets you interact with rich online content like online chat, games, and other interactive content. If you don’t have JRE installed, you may not be able to play or interact with some of these online applications.
Now, Canonical doesn’t include Java Runtime anymore by default. If you need to inactive with these online Java applications, you will need JRE. Since it’s no longer available in Ubuntu default repository, you will have to manually download and install the software or use third-part repository to help you install it. Most third-party repositories are easy to use and follow but many don’t last long enough and most don’t have the current version of Java installed in their repository.
Manually installing Java Runtime when update becomes available is the right way to get the latest version for your Ubuntu system. This tutorial is going to show you how to manually install it in Ubuntu 12.10 or previous versions.
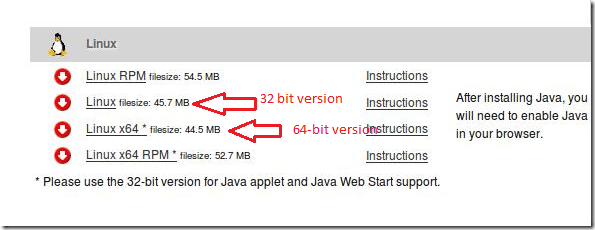
To get started you must go to this download page and download the latest version for your system. Java download page can be found here.
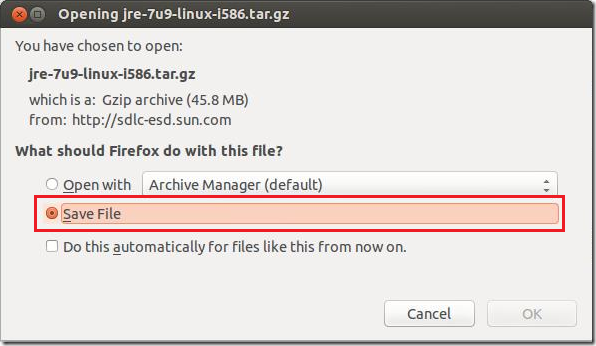
When prompted, choose to save it. By default it will be saved in the Downloads folder of your home directory.
After downloading, press Ctrl – Alt – T on your keyboard to open the terminal. When it opens, run the commands below to create folder where Java (JRE) content will be stored.
sudo mkdir -p /opt/java


Next, change to the Downloads folder in your home directory.
cd ~/Downloads

After that, extract the content into the new directory by running the commands below. Remember that the next version of JRE might be different than the one shown below. So you must change the Jre-xxx-linux to whatever the new version is.
sudo tar -xvzf jre-xxx-linux-i586.tar.gz -C /opt/java


After extracting the content, run the commands below to create a mozilla plugins directory if one isn’t already created for your profile.
mkdir -p ~/.mozilla/plugins

Finally, run the commands below to create a link to your mozilla plugins directory. Change Jrex.x.x.x to whatever the latest version is.
ln -s /opt/java/jre1.7.0_09/lib/i386/libnpjp2.so ~/.mozilla/plugins/


After that, restart Firefox and verify if you have the latest version.


That’s all to it.


