This is part of our beginner’s guide series that shows you how to manage basic settings in both Windows 8 and Ubuntu 12.10.
In this tutorial, we’re going to show you how to easily change your system name or workgroup in Windows 8. In Windows 7, one could easily access the system properties and changing the computer name by clicking ‘Start –> and right-clicking Computer and selecting Properties. Not in Windows 8. To access the System Properties in Windows 8, you must now use the search feature via Metro and this tutorial is going to show you how.
Objectives:
- Change Windows 8 Workgroup / Computer Name
- Enjoy!
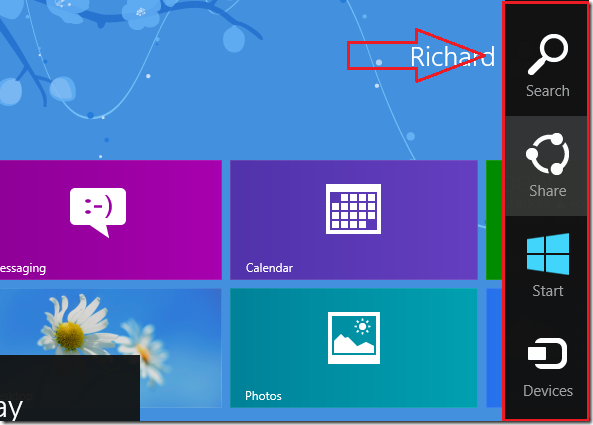
To get started, gradually move and hover your mouse over to the right of your display (top or bottom) to show the Charms bar. On the Charms bar select ‘Search’
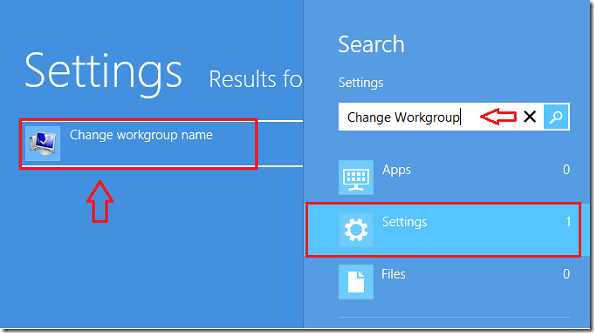
Next, select ‘Settings’ option and search for ‘Change Workgroup’ then select the search result shown.
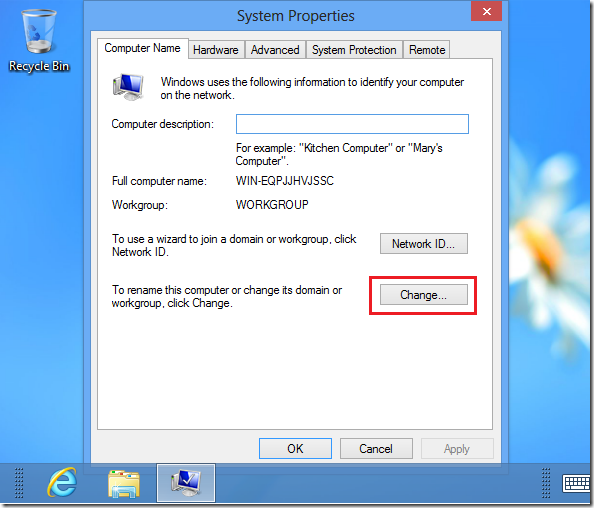
Next, click the ‘Change’ button
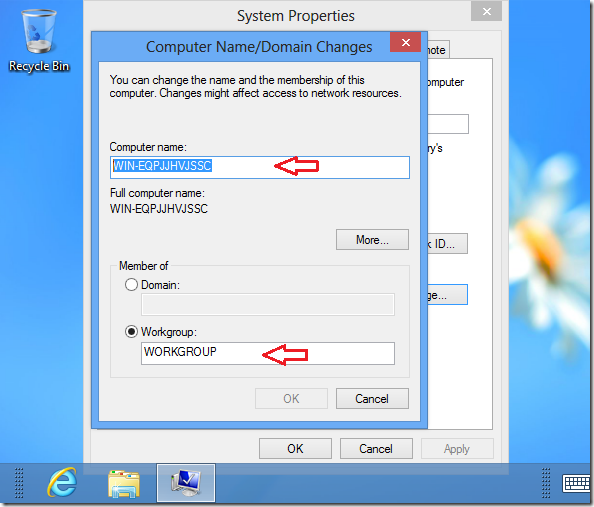
Finally, change the computer name and/or Workgroup name to whatever you want and save. You must restart your computer before the settings will apply.
Enjoy!


