This brief tutorial is going to show you how to easily change your computer workgroup name in both Windows 7 and Ubuntu 12.04 (Precise Pangolin). Remember changing and joining a particular workgroup allows you access to resources that belong to that workgroup. In a file sharing environment, if your system is not a full member of a particular workgroup, resources in that workgroup may be difficult to access from your system. And although Windows 7 and Ubuntu 12.04 are different systems, they are similar in many functions. Almost anything you do in Windows 7 can be done in Ubuntu 12.04. If you already know how to do it in Windows 7, continue below to learn how to do it in Ubuntu 12.04.
Objectives:
- Change system workgroup in both Windows 7 and Ubuntu 12.04
- Enjoy!
How to Change Windows 7 Workgroup
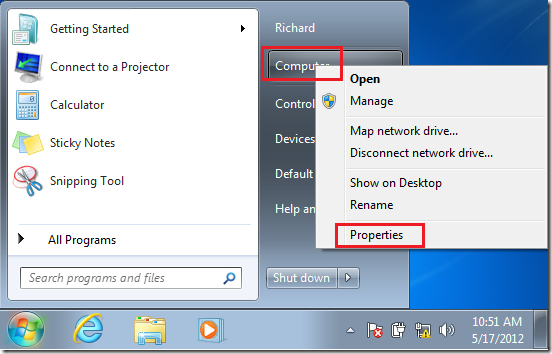
To change Windows 7 workgroup, go to Start –> and right-click on Computer then select ‘Properties’
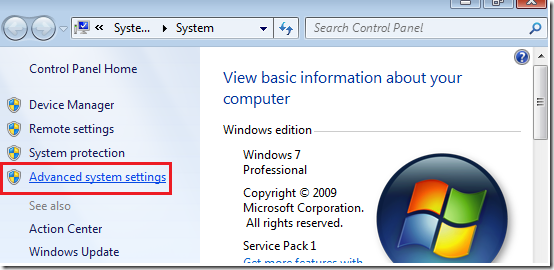
Next, select ‘Advanced system settings’
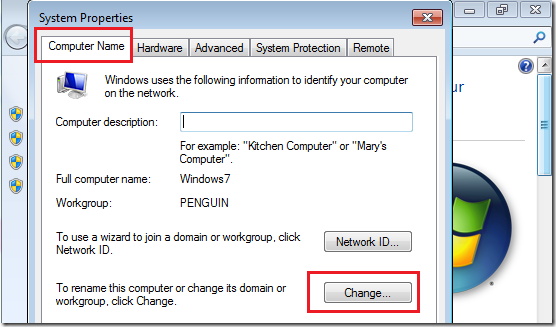
Next, select ‘Computer Name’ tab and click the ‘Change’ button.
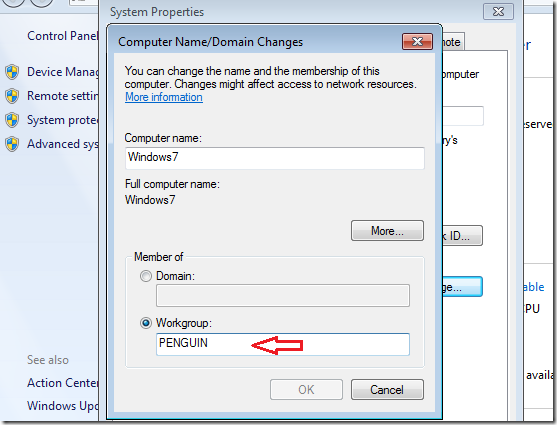
Finally, change the workgroup name and click ‘OK’ .
Restart your computer and you’re done.
How to Change Workgroup Name in Ubuntu 12.04 (Precise Pangolin)
To change your workgroup name in Ubuntu 12.04, press Ctrl – Alt – T on your keyboard to open Terminal. When it opens, run the commands below to install this package.
sudo apt-get install system-config-samba


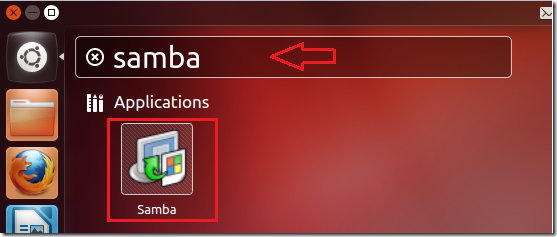
Next, go to Dash and open Samba


Then click ‘Preferences’ and select ‘Server Settings’


Finally, type the system workgroup name and save.


Restart your computer and you’re done.

